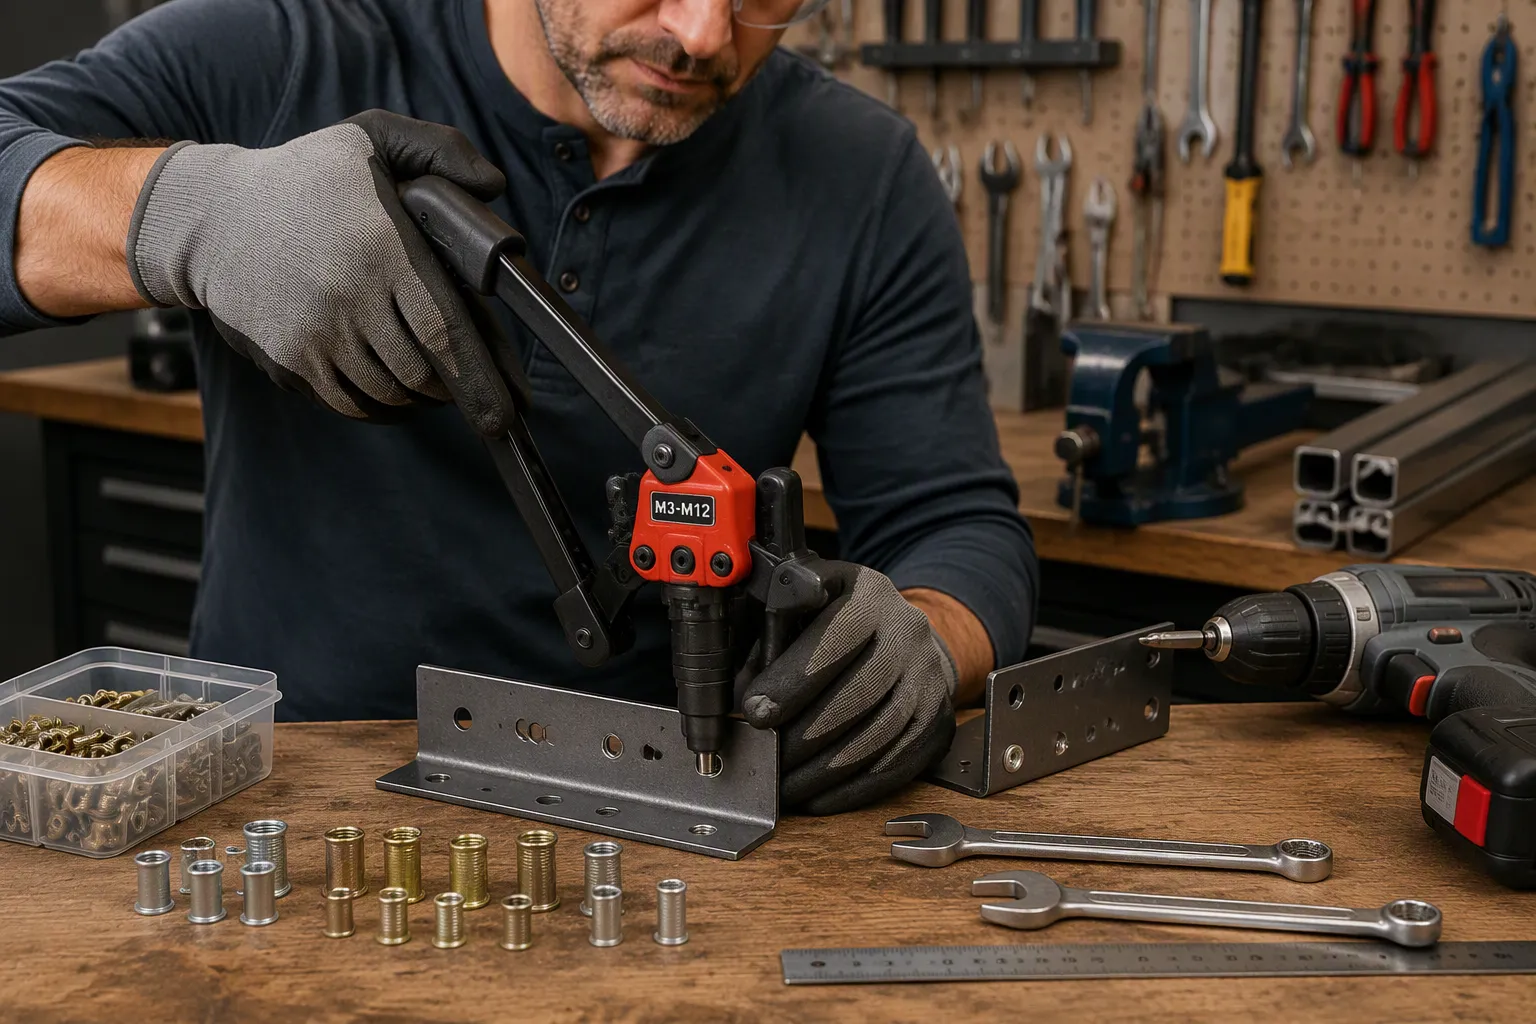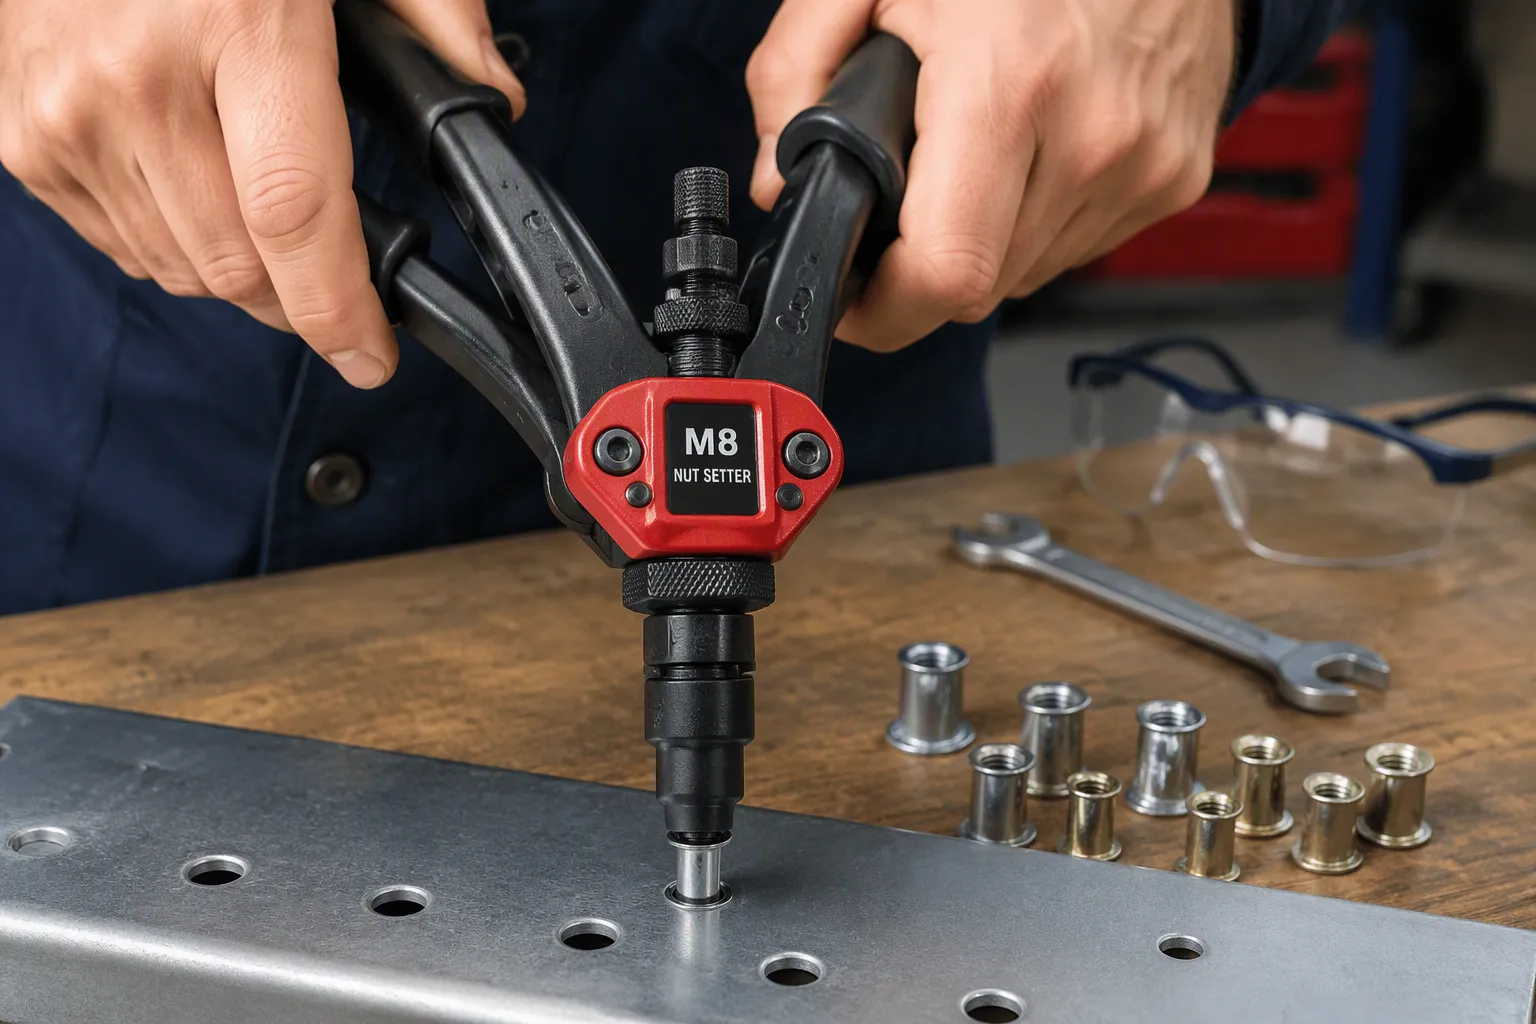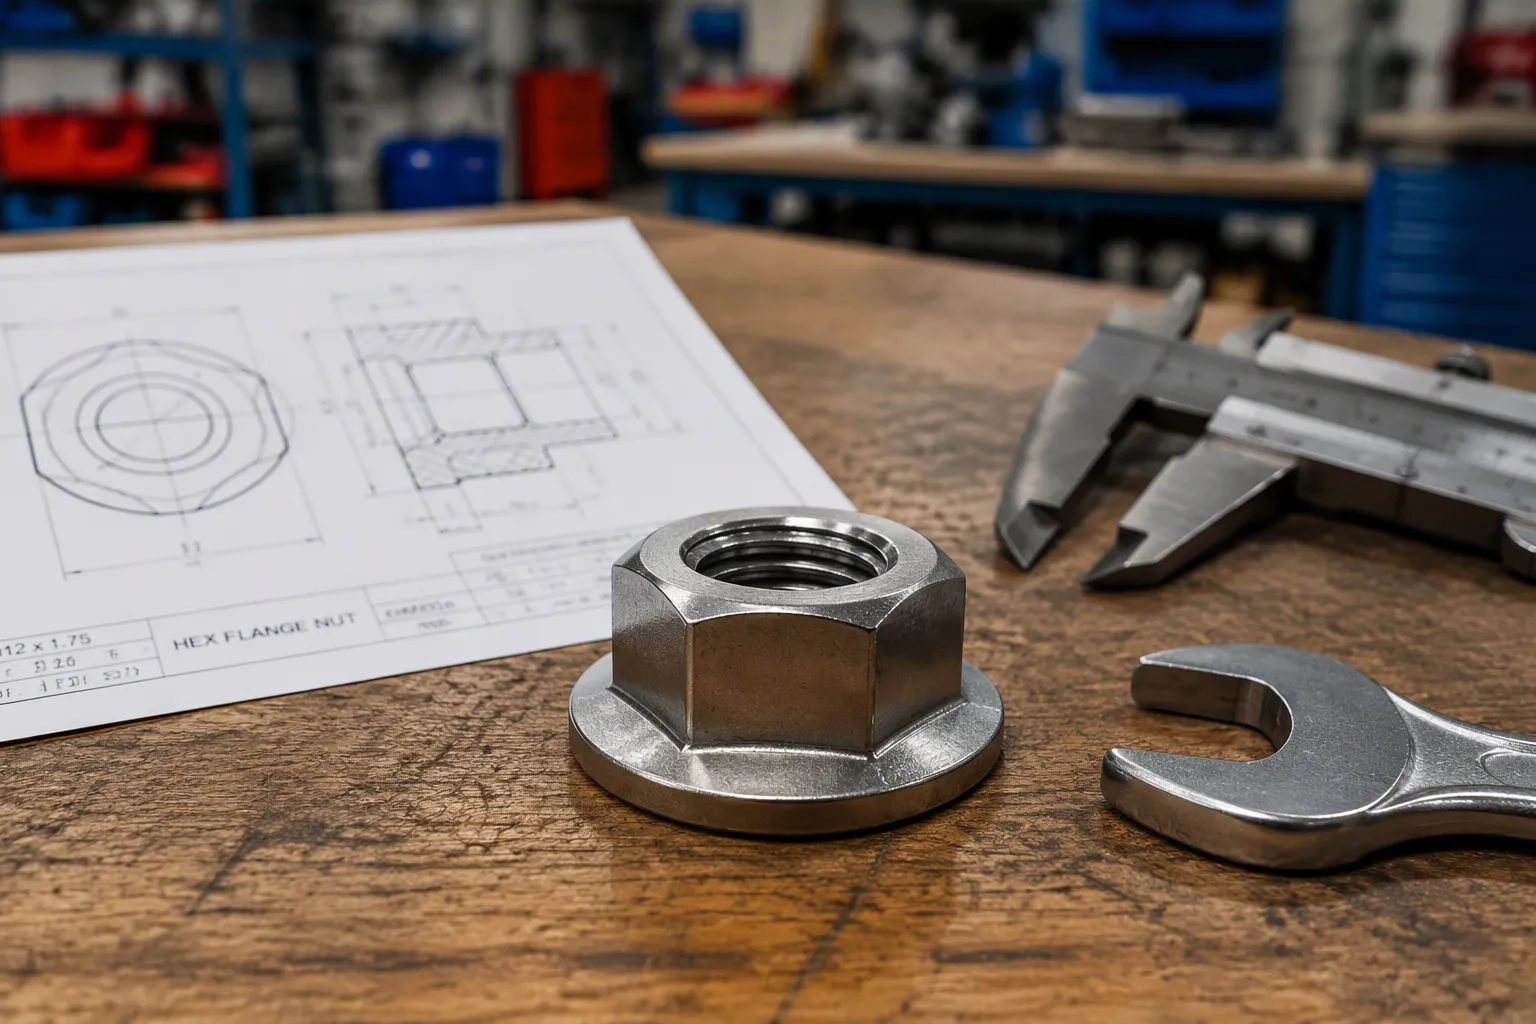
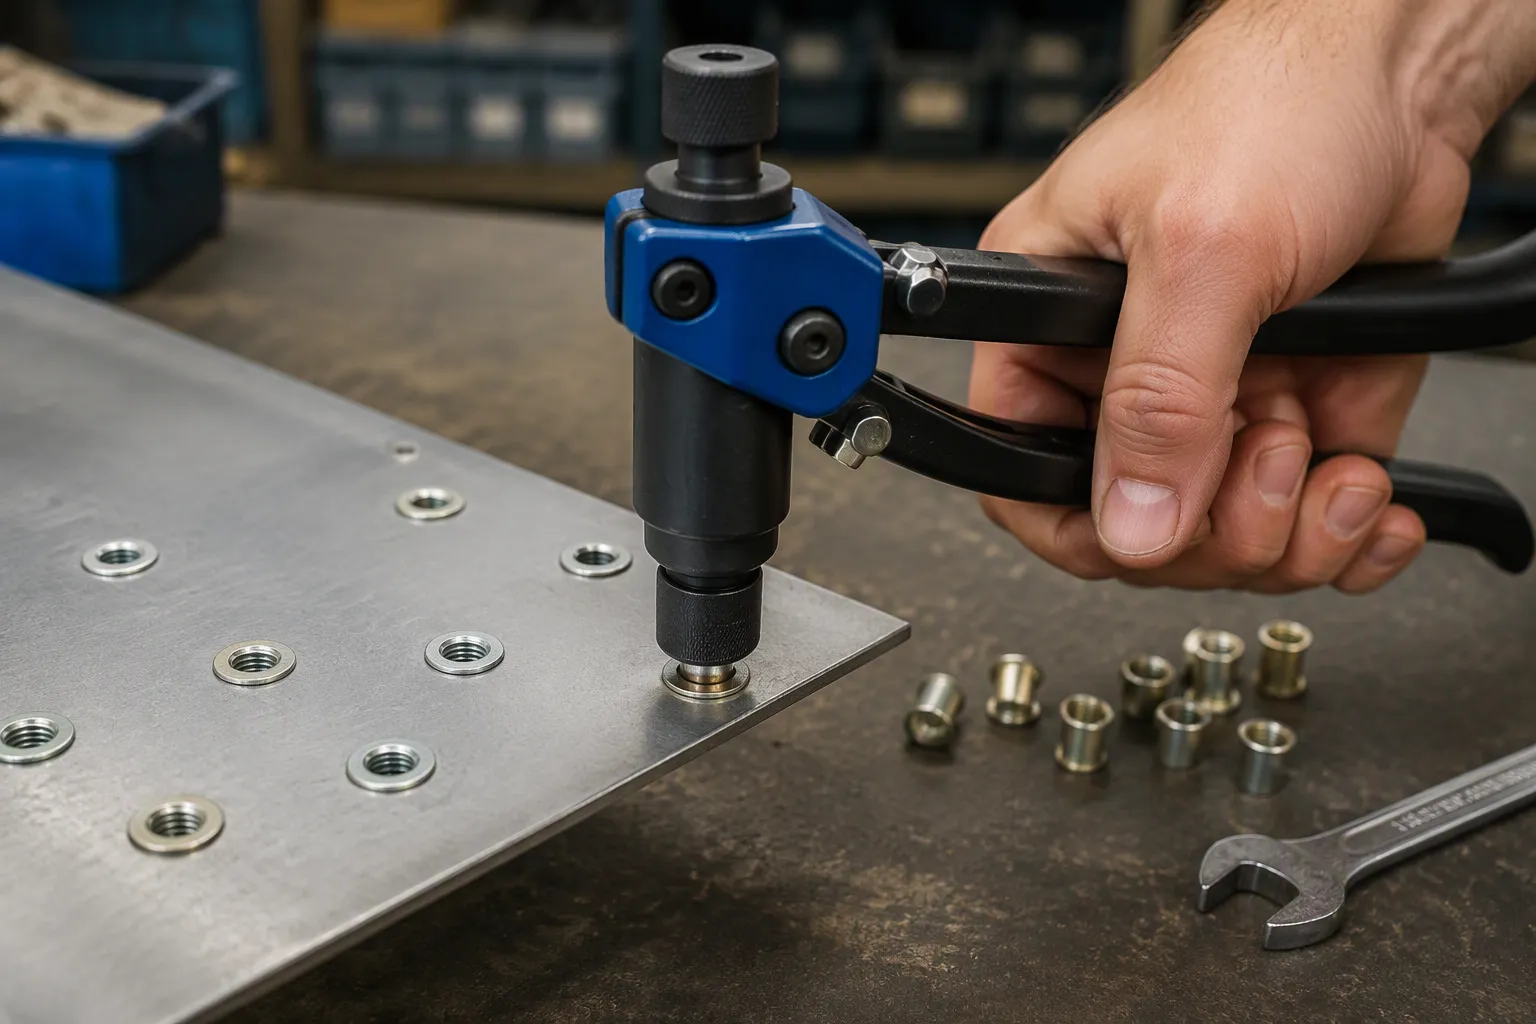
A صامولة برشام gun provides the fastest method to add strong, reusable threads to thin materials. This tool helps professionals and DIY enthusiasts install rivet nuts with confidence. A reliable مُصنِّع أدوات التثبيت المخصصة recommends this approach for durable results. The step-by-step installation process ensures proper seating every time. Technicians can install rivet nuts in metal sheets, plastics, and composites. These المثبتات المخصصة replace traditional المسامير والبراغي in tight spaces. Proper installation prevents spinning and thread damage. A quality rivet nut delivers long-lasting performance across many applications.
Tools and Materials for Step-by-step Installation
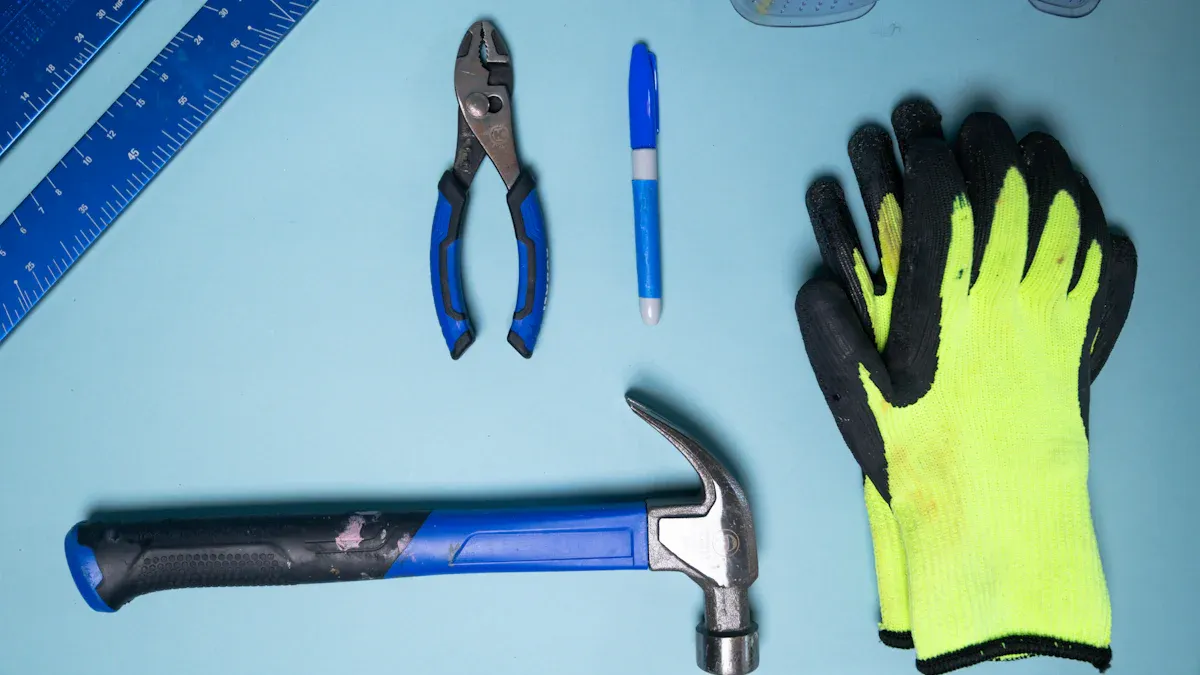
A successful step-by-step installation depends on having the right equipment ready before starting. Gathering everything in advance saves time and prevents errors during the process.
Essential Tools
Rivet nut gun (manual, pneumatic, or hydraulic)
الـ rivet nut gun serves as the primary installation tool for this task. Manual models work well for small projects and low-volume work. Pneumatic and hydraulic rivet nut guns suit high-volume production environments. Each type delivers the pulling force needed to compress the rivet nut properly.
Drill and correct-size drill bit
A power drill creates the hole that accepts the rivet nut. The drill bit must match the manufacturer’s recommended hole diameter for the specific rivet nut size. Using the wrong bit size leads to loose or failed installations.
Center punch and hammer
A center punch marks the exact hole location on the workpiece. The hammer strikes the punch to create a small dent. This dent prevents the drill bit from wandering during drilling.
Deburring tool or file
Sharp edges remain after drilling. A deburring tool or file removes these edges from both sides of the hole. Smooth edges allow the rivet nut to seat properly against the material surface.
Caliper or gauge
A caliper measures material thickness with precision. This measurement determines the correct grip range for the rivet nut. A gauge also verifies the hole diameter after drilling.
Materials and Supplies
Rivet nuts in the correct size and material
Select rivet nuts that match the bolt thread size and material thickness. Steel rivet nuts offer high strength for demanding applications. Aluminum rivet nuts provide corrosion resistance and reduce weight. Stainless steel rivet nuts perform well in outdoor and marine environments.
Cutting oil or lubricant
Cutting oil reduces friction and heat during drilling. A few drops on the drill bit extend tool life and produce cleaner holes. Lubricant also helps when threading the rivet nut onto the mandrel.
Shop rag or cloth
A shop rag cleans metal shavings from the workpiece and the installation tool. Keeping the work area clean prevents debris from interfering with the rivet nut installation tools.
Safety glasses and gloves
Safety glasses protect the eyes from flying metal chips. Gloves shield the hands from sharp edges and hot surfaces. These items represent essential personal protective equipment for any rivet nut tools operation.
Quality rivet nut tools and proper supplies make the job easier and safer. Professionals who invest in reliable rivet nut installation tools achieve consistent results across every project.
Step 1 – Prepare the Hole to Install the Rivet Nut
Proper hole preparation sets the foundation for a successful step-by-step installation. A clean, correctly sized hole allows the rivet nut to seat flush and hold strong under load.
Mark the Hole Location
Use a center punch to create a starting dent
A center punch creates a small indentation at the exact spot where the hole will go. The dent guides the drill bit and prevents it from wandering across the surface. A hammer strikes the punch firmly to leave a clear mark.
Double-check alignment with your part layout
The technician should verify the punch mark against the part layout or drawing. A quick measurement confirms the location matches the design. Correcting a misplaced mark before drilling saves time and material.
Drill the Correct Size Hole
Refer to the rivet nut manufacturer’s recommended hole diameter
Every rivet nut requires a specific hole diameter for proper function. The manufacturer provides this specification for each size and thread type. A caliper or gauge verifies the drill bit size before use.
Drill straight and perpendicular to the surface
The drill must remain perpendicular to the workpiece throughout the cut. A straight hole allows the rivet nut to sit flush against the material. An angled hole causes uneven seating and weakens the joint. Operators should drill a hole at a steady speed with light pressure.
Deburr the Hole
Remove sharp edges on both sides with a deburring tool or file
After drilling, small metal burrs and sharp edges should be removed with a deburring tool or round file. Clean holes help the rivet fit snugly. Deburring helps prevent cracks or weak spots. Both sides of the sheet should be checked for burrs. A smooth hole contributes to a better finish and a stronger joint.
Deburring the hole for rivet nut installation is strongly recommended because sharp edges can prevent flush seating.
Wipe away metal shavings with a rag
A shop rag removes loose shavings and debris from the hole and surrounding surface. Trapped particles interfere with the rivet nut and reduce grip strength. A clean work area also protects the installation tool from damage.
Deburring drilled holes is a recommended best practice because removing sharp edges and burrs helps prevent rivet damage during installation and supports a smooth, even fit. A technician who takes time to prepare the hole correctly will install the rivet nut with greater ease and achieve a more reliable result.
Step 2 – Select the Correct Rivet Nut
Selecting the right rivet nut before installation prevents loose joints and thread failure. The correct choice depends on thread size, grip range, and material compatibility.
Determine Thread Size and Type
Common sizes include M4, M5, M6, M8, M10, and UNC/UNF inch sizes
Metric and inch thread standards cover most rivet nut applications. Common metric sizes include M4, M5, M6, M8, and M10. Inch sizes follow UNC and UNF standards. Each thread type offers distinct advantages.
| نوع الخيط | المزايا | Limitations | Typical Use |
|---|---|---|---|
| Coarse thread | Easier assembly, better in dirty environments, less cross-threading risk | Lower adjustment precision | General machinery and construction |
| Fine thread | Better adjustment, larger minor diameter, can help in vibration-sensitive joints | Easier to damage, slower assembly | Automotive, precision machinery |
| UNC | Common U.S. coarse thread | Not compatible with metric | U.S. general assemblies |
| UNF | Common U.S. fine thread | More sensitive to damage | Automotive and equipment |
Match the rivet nut thread to the bolt you will insert later
The rivet nut thread must match the bolt that will go into it. A mismatch prevents assembly or damages the threads. The nut strength should also match the bolt class. An M12 Class 8.8 bolt normally uses a Class 8 nut. An M16 Class 10.9 bolt requires a Class 10 nut and proof load verification. If the nut is weaker than the bolt, the joint may strip before the bolt reaches preload.
Choose the Appropriate Grip Range
Grip range refers to the material thickness the rivet nut can clamp
Grip range defines the material thickness a rivet nut can secure. Each rivet nut part number specifies a minimum and maximum grip range. A grip range that is too wide for the material leads to loose fastening. A range that is too narrow can crack the material or strip the nut.
Measure material thickness with a caliper, then select a matching grip range
Measure each layer of the material stack individually with a caliper. Add the measurements together. Compare that total against the grip range on the datasheet for the exact rivet nut part number. For example, a 4.8 mm rivet nut with a grip range of 6.0–8.0 mm suits a 7 mm total stack thickness. A 5 mm or 9 mm stack falls outside the acceptable range.
Select Material for Your Application
Steel rivet nuts for high strength and durability
Carbon steel rivet nuts provide high strength for demanding applications. They require coatings to prevent corrosion. These nut inserts work well in general machinery and construction.
Aluminum for corrosion resistance and lightweight
Aluminum rivet nuts offer a lightweight, cost-effective option. They resist corrosion in dry environments. However, aluminum lacks the strength and corrosion resistance of stainless steel. Mixing aluminum with steel or stainless steel can cause galvanic corrosion.
Stainless steel for outdoor or marine environments
Stainless steel threaded inserts deliver outstanding corrosion resistance. Grade 316 contains 2–3% molybdenum for superior resistance to chloride attack. Grade 304 performs well in most environments but can suffer crevice corrosion in marine settings. Stainless steel rivet nuts cost more but reduce maintenance costs over time.
If the nut is much harder than the washer or mating surface, embedment can reduce clamp load after installation.
Step 3 – Insert the Rivet Nut into the Gun
Proper loading of the rivet nut onto the installation tool determines the success of the entire operation. A technician who loads the nut incorrectly risks thread damage, mandrel breakage, or an incomplete compression cycle. This step requires attention to mandrel selection, alignment, and tool configuration.
Identify the Correct Mandrel or Nosepiece
Each rivet nut size requires a specific mandrel
The mandrel serves as the threaded shaft that pulls the rivet nut during compression. Every rivet nut size demands a matching mandrel with the exact thread pitch and diameter. Using an incorrect mandrel size leads to stripping of the rivet nut’s internal threads, damaging the threads and preventing proper screw engagement. An incompatible mandrel can also cause mandrel breakage due to excessive force or repeated use. To avoid both issues, the mandrel must be compatible with the rivet nut’s thread size, ensuring a proper fit during installation.
Screw the mandrel into the rivet nut until fully seated
The technician rotates the mandrel clockwise into the rivet nut threads. The mandrel should advance smoothly without resistance. Full seating occurs when the mandrel reaches the bottom of the nut’s internal threads. A partially seated mandrel creates uneven pull during compression and produces a distorted final product.
Load the Rivet Nut onto the Mandrel
Hand-tighten the rivet nut until it stops against the nosepiece
After confirming the mandrel fits correctly, the operator threads the rivet nut onto the mandrel by hand. The nut travels along the mandrel threads until it contacts the nosepiece. Hand-tightening provides sufficient grip for the compression stroke. Using tools to tighten the nut onto the mandrel can over-stress the threads and complicate removal after installation.
Ensure the nut is straight and aligned with the gun axis
The rivet nut must sit perpendicular to the gun’s central axis. A tilted nut enters the workpiece hole at an angle and compresses unevenly. The technician visually checks the alignment from multiple angles before proceeding. Straight alignment ensures the nut collapses uniformly against the backside of the material.
Adjust the Gun Settings
For pneumatic or hydraulic guns, set the optimal pressure per manufacturer guidelines
Pneumatic and hydraulic rivet nut tools require specific air pressure or hydraulic fluid settings. The manufacturer provides recommended pressure ranges for each rivet nut size. Setting the pressure too low produces incomplete compression. Excessive pressure can over-compress the nut or damage the tool. The operator adjusts the regulator to match the specified value for the selected rivet nut.
For manual guns, check that the handles are fully opened before loading
دليل الاستخدام rivet nut guns operate through a lever mechanism. The handles must rest in the fully open position before loading the nut. This position provides the maximum stroke length for the compression cycle. A partially closed handle reduces the pulling distance and prevents full nut deformation. The technician confirms the handles open completely before inserting the rivet nut onto the mandrel.
A properly loaded rivet nut tool delivers consistent results across every installation. Taking time to verify mandrel compatibility, nut alignment, and tool settings prevents costly errors and ensures the rivet nut installs correctly on the first attempt.
Step 4 – Position the Gun and Rivet Nut
Correct positioning of the tool and fastener ensures the rivet nut collapses evenly inside the hole. This step demands steady hands and careful attention to alignment. A technician who rushes this stage risks a tilted or poorly seated rivet nut.
Insert the Rivet Nut into the Prepared Hole
Push the nut until the flange contacts the material surface
The operator guides the loaded tool toward the workpiece. They push the rivet nut into the hole until the flange rests against the material surface. The flange must contact the surface completely. A gap between the flange and the material indicates incomplete insertion. The technician applies light pressure to seat the nut fully.
Hold the gun perpendicular to the workpiece
الـ rivet nut gun must remain at a 90-degree angle to the workpiece surface. A perpendicular position allows the mandrel to pull the nut straight through the hole. The operator grips the tool firmly and maintains this angle throughout the compression cycle. Any tilt during this phase causes uneven deformation of the rivet nut.
Verify Alignment
The rivet nut should sit flush against the surface
A properly positioned rivet nut sits flush with the material surface. The flange makes full contact with no visible gap. The operator inspects the seating from multiple angles. A flush fit indicates correct insertion depth and proper alignment with the pre-drilled hole.
If the nut tilts, remove and reinsert straight
A tilted rivet nut requires immediate correction. The operator unscrews the nut from the mandrel and inspects the hole for debris or damage. They reload the rivet nut onto the mandrel and repeat the insertion process. Straight reinsertion prevents uneven compression and ensures a strong final install.
Proper positioning prevents common installation failures. A technician who verifies alignment before squeezing the handle achieves consistent, professional results. This careful approach saves time and reduces material waste.
Step 5 – Squeeze the Handle to Compress the Rivet Nut
Proper compression transforms the rivet nut into a permanent threaded anchor. The operator must apply force in a controlled manner to achieve uniform deformation. This step determines whether the fastener will carry the intended load without spinning or stripping.
Apply Steady, Controlled Force
For manual guns, squeeze the handles together smoothly
Manual rivet nut guns require a continuous, even pull through the full stroke. The operator brings the handles together at a steady pace without jerking or pausing. Smooth force allows the mandrel to draw the nut body evenly against the back of the sheet. A sudden yank can cause the nut to deform asymmetrically or break the mandrel.
For pneumatic or hydraulic guns, activate the trigger and hold until the cycle completes
Pneumatic and hydraulic tools deliver constant pulling force once the operator activates the trigger. The operator holds the trigger down until the tool automatically completes its stroke. Releasing early leaves the nut under‑compressed and loose. The tool settings must match the rivet nut size and material thickness to ensure a complete, reliable compression.
Understand the Proper Compression
The rivet nut will deform and collapse against the backside of the material
During installation, the mandrel pulls the threaded body axially, causing the unthreaded portion to buckle outward. This deliberate deformation creates a swollen collar that presses against the hidden side of the panel. The result is a tight mechanical lock that does not rely on the parent material’s strength alone. Several factors determine whether this collapse produces a secure grip: grip range must cover the actual panel thickness, hole size must match manufacturer specifications, and the hole must be clean and burr‑free. A correct collapse distributes clamping force uniformly, providing a durable anchor that resists pull‑out and torque.
Continue squeezing until you feel a solid stop or hear a click indicating full compression
For manual tools, the handles stop moving when the nut has fully collapsed. For power tools, a distinct click signals the end of the setting cycle. The operator must interpret these cues confidently. Stopping before the stop or click leaves the nut under‑set, while continuing beyond risks oversetting. Production environments often rely on stroke‑controlled or force‑monitored tools to eliminate guesswork. Regardless of tool type, the goal remains the same: to lock it into the hole with a complete, uniform deformation.
Avoid Over-Compression
Over-compression can strip the threads or distort the nut
Applying too much force damages the internal threads, either by compressing them beyond their elastic limit or by separating the threaded section from the body. Overset installations often show cracked or split bodies during visual inspection, and the damaged threads cause bolt insertion problems such as galling. Base material distortion may also occur; thin panels can bulge or crack under excessive axial load. The operator must stop immediately if the tool encounters hard resistance or the nut produces a cracking sound.
Stop immediately if you feel excessive resistance or hear cracking
Heavy resistance during the final portion of the stroke signals that the nut has reached its maximum compression. Continuing beyond this point yields no additional grip and only damages parts. Cracking sounds indicate that the rivet nut body or the parent material is fracturing. The operator should release the trigger or open the handles, inspect the installation, and discard any damaged nuts. To prevent over‑compression, calibrate the installation gun by setting pneumatic pressure to manufacturer specifications and regularly verify pressure with calibrated gauges. Routine tool maintenance ensures consistent force delivery across every cycle.
Step 6 – Release and Remove the Gun
The final compression stroke locks the صامولة برشام into place. The operator now shifts attention to releasing the tool and separating it from the installed fastener. This stage demands the same care as the compression step. A rushed removal can damage the fresh threads inside the rivet nut.
Release the Trigger or Handles
For manual guns, open the handles fully to release the mandrel
The operator opens the handles completely after the compression stroke ends. This action retracts the mandrel from the deformed rivet nut. Full handle movement releases the pulling force on the mandrel. The rivet nut tool then sits loose against the workpiece surface.
For pneumatic or hydraulic guns, release the trigger and the mandrel will retract
Power tools retract the mandrel automatically once the operator releases the trigger. The internal mechanism returns to its starting position. The operator waits for the mandrel to stop moving before proceeding. This brief pause prevents accidental thread damage.
Unscrew the Mandrel from the Installed Rivet Nut
Hold the gun steady and twist the mandrel counterclockwise by hand
The operator grips the installation tool with one hand and turns the mandrel with the other. A counterclockwise twist unscrews the mandrel from the rivet nut threads. The mandrel should turn freely once it disengages. Steady hand pressure prevents the tool from slipping.
Do not pull the gun away without unscrewing, as this can damage the threads
Pulling the tool away while the mandrel remains engaged strips the internal threads. A stripped rivet nut cannot accept a bolt later. The operator must always unscrew the mandrel first. This simple habit protects both the fastener and the tool.
Inspect the Mandrel for Wear
Check that the mandrel threads are not stripped or damaged
The operator examines the mandrel threads after each removal. Worn or flattened threads reduce pulling grip on the next rivet nut. A damaged mandrel produces incomplete compression and poor results. The operator replaces any mandrel that shows visible wear.
Clean the mandrel after each use to maintain its grip
Metal shavings and lubricant residue collect on the mandrel during use. A shop rag removes this buildup quickly. Clean threads engage the next rivet nut smoothly and evenly. Regular cleaning extends mandrel life and keeps every installation consistent.
Proper release and removal complete the mechanical portion of the job. The operator now holds a seated rivet nut ready for inspection. Careful handling at this stage preserves thread quality and tool performance for future work.
Step 7 – Inspect the Installation
Inspection confirms the rivet nut meets quality standards before the assembly enters service. A technician who skips this step risks installing a failed fastener. Three checks verify the fastener: flange position, thread quality, and base material condition.
Check the Flange Position
The flange should be flush with the surface with no gap or proud edge
The flanged end of the rivet nut must sit flat against the material surface. A gap between the flange and the panel indicates incomplete seating. A proud edge, where the flange stands above the surface, also signals incorrect compression. Both conditions reduce the load capacity of the joint.
Use a feeler gauge if necessary to confirm tightness
A feeler gauge measures the clearance between the flange and the material. A zero reading confirms a flush fit. Any measurable gap requires removal of the rivet nut and reinstallation with a new fastener. This simple check prevents loose assemblies.
Test the Threads
Insert the corresponding bolt by hand and it should thread smoothly without binding
The operator selects the correct bolt for the installed rivet nut. The operator must thread the rivet nut properly during this check. They thread it into the insert by hand. Smooth rotation without resistance confirms proper internal thread formation. Binding or roughness indicates damage during compression. After the check, the operator should back the bolt out of the insert.
Torque the bolt to your specified setting and the rivet nut must not spin in the hole
The operator applies torque with a calibrated tool. The rivet nut must remain stationary. During tightening the bolt, any rotation of the nut body signals a failed installation. Proper compression should prevent it from spinning under normal load.
Three mechanical tests confirm the rivet nut meets performance requirements:
| Test | What it confirms |
|---|---|
| Pull out strength test | Verifies the rivet nut remains securely anchored after installation |
| Spin out resistance test | Confirms the rivet nut will not rotate when torque is applied |
| Torque performance test | Validates the threads can withstand specified torque |
These quality assessments apply to stainless steel rivet nuts and other material types. A technician who performs these tests gains confidence in the joint. Regular testing also identifies potential issues before the assembly enters service.
Verify No Deformation of the Base Material
Look for cracks or bulges around the hole
The operator examines the material surface around the installed rivet nut. Cracks near the hole indicate excessive stress during compression. Bulges on the back side suggest the nut expanded beyond the hole limits. Both defects weaken the assembly. A visual inspection under good lighting catches most surface defects. The operator should check both sides of the panel for hidden damage.
If the material is damaged, the installation may be compromised
Damaged base material cannot support the required load. The operator must remove the rivet nut and evaluate the panel. A larger fastener or a backing plate may resolve the issue. Panel replacement may be necessary.
Common Mistakes During Step-by-step Installation
Even experienced technicians make errors during rivet nut installation. Recognizing these common mistakes helps operators avoid costly failures and wasted materials. The following errors represent the most frequent causes of weak or failed installations.
Wrong Hole Size
Always measure the rivet nut’s recommended hole diameter before drilling
Operators frequently select a rivet nut based only on thread size. They ignore the required mounting hole diameter. This oversight leads to improper fit and reduced holding strength. Technicians should verify the exact hole requirements before drilling. Drawings must specify diameter, tolerance, and hole shape. A caliper confirms the drill bit size matches the specification.
A hole that is too large will not allow the nut to grip, and too small may prevent insertion
An oversized hole prevents the rivet nut from collapsing properly against the material. The nut spins freely under torque and fails to hold. An undersized hole blocks insertion and may damage the nut body during forcing. Common measurement mistakes include:
- Using the wrong size drill bit for the application
- Failing to clean burrs from drilled holes
- Not clamping materials securely, leading to misalignment
- Holding the drill incorrectly, creating an oversized or irregular hole
Incorrect hole size remains a leading root cause of installation failure, even when the rivet specification itself is correct.
Incorrect Grip Range
Using a rivet nut with a grip range wider than material thickness leads to loose installation
Grip range defines the material thickness a rivet nut can secure. A grip range wider than the actual material thickness produces a loose joint. The nut cannot compress fully against the panel. The fastener wobbles and fails under load.
Using one with too narrow a range can crack the material or strip the nut
A grip range narrower than the material thickness forces excessive compression. The rivet nut may crack the base material or strip its own threads. Operators should measure each layer of the material stack with a caliper. They then compare the total thickness against the datasheet for the exact part number.
Uneven Squeezing or Pulling at an Angle
Keep the gun perpendicular throughout the entire compression stroke
The rivet nut gun must remain square to the workpiece during the full compression cycle. A tilted gun causes the nosepiece to sit unevenly against the rivet head. This misalignment deforms the manufactured head and sets the rivet crookedly. Operators should rock the gun slightly to find the angle where the nosepiece sits completely flat. They then hold that position steady while the mandrel pulls through.
Tilting causes the rivet nut to deform unevenly and weakens the hold
An angled pull creates asymmetric deformation of the rivet nut body. One side collapses more than the other. The result is a weak joint that cannot carry the intended load. Supporting practices help maintain perpendicularity. Technicians should drill holes perpendicular using a drill press and drill guide. They should also deburr holes thoroughly and clamp materials firmly with C-clamps or locking pliers.
Those actually work pretty good as they force the pull to be perpendicular to the surface. The large pop rivet type guns sometimes are out of position because they are big and the person doesn’t hold them square.
Avoiding these common mistakes ensures every rivet nut installation meets quality standards. Careful measurement, correct part selection, and steady technique produce strong, reliable threaded connections.
Over-Tightening the Mandrel in the Gun
Only hand-tighten the rivet nut onto the mandrel and do not use tools
The operator threads the rivet nut onto the mandrel by hand. Fingers provide enough grip to seat the nut against the nosepiece. This simple action keeps the threads aligned and prevents cross-threading. A wrench or pliers may seem faster, but these tools apply far more torque than the mandrel threads can handle. Hand-tightening gives the operator direct feedback. They feel the exact moment the nut stops turning. That feedback tells them the nut sits fully seated and ready for insertion. A tool removes this feedback entirely. The operator cannot sense when the threads reach their limit, so they keep turning past the safe point.
Overtightening can strip the mandrel or make removal difficult
Excessive torque damages the mandrel threads in two ways. The threads may flatten or shear off under the strain. A stripped mandrel then fails to grip the next rivet nut during compression. The installation stalls halfway through the stroke, and the operator must discard both the nut and the mandrel. Overtightening also jams the rivet nut onto the mandrel. The nut binds against the nosepiece with tremendous force. After compression, the operator cannot unscrew the mandrel by hand. They must resort to locking pliers, which scar the mandrel and ruin its threads. In severe cases, the seized nut twists the mandrel shaft and bends it out of alignment. A bent mandrel wobbles during every future installation and produces crooked results.
A mandrel costs far less than a ruined workpiece, so replace any worn mandrel without hesitation.
Proper hand-tightening protects both the tool and the fastener. The operator saves time, avoids frustration, and maintains consistent quality across every rivet nut installation. A few extra seconds of careful loading prevents hours of rework and replacement costs.
Troubleshooting Rivet Nut Installation Problems
Even careful installation procedures sometimes produce defective results. Recognizing common problems allows technicians to correct them quickly. A methodical approach to troubleshooting saves time and reduces material waste.
Rivet Nut Spins in the Hole
Possible cause is a hole that is too large or a grip range that is too short
A spinning rivet nut during bolt tightening signals a failed installation. Two primary causes produce this condition. The mounting hole may be too large. This situation often results from a worn drill bit, misaligned drilling, or rework that enlarged the bore. Alternatively, the grip range of the rivet nut may fall short of the material thickness. Round-body rivet nuts in smooth holes offer little resistance to rotation under torque loads. A loose fit prevents the fastener from anchoring securely.
Solution is to remove the nut, enlarge the hole to the correct size, or use a larger-body nut
Several solutions resolve a spinning rivet nut. The operator first removes the loose fastener and inspects the hole. If the hole exceeds specification, re-drilling to the correct diameter provides a fresh surface. Hex-body rivet nuts offer superior spin-out resistance. The external hex profile creates a mechanical interlock with hex-shaped or dimpled holes. This design prevents rotation under torque loads. For oversized or imperfect bores, PLUSNUTs or oversize grip range rivet nuts expand over a wider footprint. They grip the backside securely. Torque-controlled tools or preset stroke limits also prevent under-torquing, which contributes to loose fit.
Threads Are Stripped Inside the Rivet Nut
Cause is over-compression or using a damaged mandrel
Stripped internal threads prevent a bolt from engaging the rivet nut. Over-compression during installation crushes the threaded section beyond its elastic limit. A damaged mandrel with worn or flattened threads also strips the rivet nut during the pulling cycle. Technicians should inspect the mandrel before each use. Worn mandrels require immediate replacement to prevent thread damage.
Solution is to replace the rivet nut with a new one and verify mandrel condition
The operator must remove the stripped nut and discard it. A new rivet nut installs in the same hole if the base material remains undamaged. The technician checks the mandrel for wear before loading the replacement nut. Installing a fresh mandrel ensures proper thread engagement during the next compression cycle.
Gun Does Not Fully Compress the Nut
For manual guns, the handles may not open wide enough for the mandrel stroke
Incomplete compression leaves the rivet nut loose in the hole. Manual guns require the handles to open fully before starting each cycle. A closed or partially open handle position reduces the available stroke length. The operator must confirm the handles reach their full open position before loading the nut. This simple check prevents incomplete compression.
For pneumatic or hydraulic guns, check air pressure or hydraulic fluid level
Power tools depend on consistent pressure to complete the compression stroke. Low air pressure in pneumatic tools results in weak pulling force. Hydraulic guns require adequate fluid levels to produce full mandrel travel. Operators should verify pressure settings against manufacturer specifications before each use. Routine tool maintenance prevents pressure loss and ensures complete compression every cycle.
Flange Buckles or Cracks During Installation
Material may be too thin or too hard for the selected rivet nut
A buckled flange or a cracked rivet nut signals a mismatch between the fastener and the workpiece. Thin sheet metal offers little resistance to the compressive force of the mandrel. The flange bends upward or folds over the surface. Hard materials create the opposite problem. The rivet nut cannot deform against a rigid backing, so the flange cracks under the pulling load. Both defects ruin the rivet nut installation and leave the joint unfit for service.
Hardness plays a decisive role in this failure mode. A stainless steel rivet nut installed in hardened steel plate may split at the flange before the body collapses. The mandrel keeps pulling, and the threaded section separates from the head. Operators should check the material grade before selecting a fastener. A Rockwell or Brinell reading gives a reliable hardness value. Thin aluminum panels below 1 mm also fail under standard compression. The flange has no support, so it distorts instead of seating flat.
Solution is to use a rivet nut designed for harder materials or increase material thickness with a backing plate
The correct rivet nut solves most buckling and cracking problems. Manufacturers offer low-profile and large-flange rivet nut variants for thin panels. These designs spread the clamping force across a wider area. A rivet nut with a reduced grip range also limits the compression stroke. The operator then avoids excessive pull on a delicate flange.
A backing plate adds thickness and stiffness to the assembly. The plate sits behind the workpiece and gives the rivet nut a solid surface to collapse against. This approach works well for soft plastics and thin composites. The operator drills a matching hole in the plate and clamps both layers together. The rivet nut then deforms against the backing plate instead of the fragile panel.
Hardened materials require a different strategy. Annealed steel rivet nuts deform more easily than fully hardened ones. A technician can also pre-drill a slightly larger hole to reduce radial stress at the flange. For extreme cases, a threaded insert with a locking key replaces the rivet nut entirely. Each option protects the flange and preserves thread integrity.
Proper material selection prevents most flange failures. The operator measures thickness, checks hardness, and matches the rivet nut to both values. This disciplined approach delivers a strong, crack-free installation every time.
Safety Tips When You Install Rivet Nuts
Safety remains a critical concern during every rivet nut installation. Technicians who follow proper safety protocols protect themselves, their coworkers, and their equipment. The following guidelines help operators avoid common hazards associated with rivet nut work.
Personal Protective Equipment
Wear safety glasses to protect against metal shavings and debris
Metal shavings fly during drilling and deburring operations. These small particles can cause serious eye injuries. Safety glasses with side shields provide essential protection. The operator should wear them throughout the entire installation process. Debris also falls from the workpiece during rivet nut compression. Proper eye protection prevents painful accidents and costly medical visits.
Use gloves to prevent cuts from sharp edges and hot mandrels after repeated use
Sharp sheet metal edges can slice through bare hands. Cut-resistant gloves shield the fingers and palms from these hazards. The mandrel also heats up after repeated compression cycles. A rivet nut tool generates friction during each pull. Gloves protect against burns from a hot mandrel. The operator should select gloves that allow adequate dexterity for handling small fasteners.
Work in a Well-Ventilated Area
If using lubricants, avoid breathing fumes
Cutting oils and lubricants release vapors during use. These fumes can irritate the respiratory system. The technician should work in an area with good airflow. Open windows or ventilation fans help clear the air. A respirator may be necessary for confined spaces. Proper ventilation protects lung health during long installation sessions.
Keep the workspace clear of clutter to prevent tripping
A disorganized workspace creates tripping hazards. Tools, scrap material, and power cords can cause falls. The operator should maintain a clean work area. Store rivet nut tools in designated locations after use. Keep the floor free of debris and obstacles. Good housekeeping prevents accidents and improves efficiency.
Maintain Your Tool
Regularly clean and oil the moving parts of a manual gun
Manual rivet nut tools require routine maintenance. Metal shavings and dust accumulate in the mechanism over time. These particles cause wear and reduce performance. The operator should clean the moving parts after each use. A few drops of oil keep the handles and mandrel moving smoothly. Regular lubrication extends the life of the installation tool.
For pneumatic guns, drain moisture from the air line and replace worn seals
Pneumatic rivet nut tools depend on clean, dry air. Moisture in the air line causes rust and corrosion inside the tool. The operator should drain the compressor tank regularly. Air line filters and dryers help remove water vapor. Worn seals allow air to escape and reduce pulling force. Replace damaged seals promptly to maintain consistent performance.
Proper safety practices protect everyone in the workspace. A careful technician who follows these guidelines achieves reliable results without injury or equipment damage.
الـ step-by-step installation of a rivet nut becomes straightforward once a technician understands the key stages. They must prepare the hole correctly, select the right rivet nut for the material thickness and thread size, and apply smooth, controlled pressure during compression. Always inspect the final result by testing the threads and checking for movement. Practice on scrap material before working on an actual project to build confidence. With these steps, anyone can install strong, reusable threads in thin materials quickly and reliably.
الأسئلة الشائعة
What is a rivet nut and how does it work?
A صامولة برشام is a one-piece threaded fastener that installs into thin materials. The installer places it in a drilled hole and compresses it with a gun. The nut collapses against the backside and creates permanent threads. This blind fastener allows bolts to attach without access to the rear surface.
Can a technician install rivet nuts without a rivet nut gun?
Yes, a technician can install nut inserts manually. One method uses a tool using a nut, bolt, and two washers to draw the insert tight. This diy tool assembled approach works for low-volume jobs. However, a dedicated gun delivers faster and more consistent results.
What is the difference between rivet nuts and threaded inserts?
A blind threaded insert and a rivet nut serve similar purposes. Both create threads in thin materials. Threaded inserts often refer to press-fit or heat-set designs for plastics. Rivet nuts specifically deform mechanically to lock into sheet metal.
How does a technician choose the right grip range?
The technician measures the total material thickness with a caliper. They then compare that number against the manufacturer’s grip range for the specific part. A matching range ensures proper compression. A mismatch causes loose joints or cracked material.
Why does a rivet nut spin after installation?
A spinning rivet nut usually indicates an oversized hole or a grip range that is too short. The operator removes the failed fastener and inspects the bore. Re-drilling to the correct diameter or switching to a hex-body nut solves the problem.
How does a technician prevent over-compression?
The operator stops squeezing when the handles reach a solid stop or the power tool clicks. Excessive force strips threads and distorts the nut body. Calibrating pneumatic pressure to manufacturer specifications prevents damage. Regular tool maintenance ensures consistent force delivery.
What safety gear does a rivet nut installation require?
Safety glasses protect the eyes from flying metal shavings during drilling and deburring. Cut-resistant gloves shield hands from sharp sheet metal edges and hot mandrels. Good ventilation clears lubricant fumes. A clean workspace prevents tripping hazards.
How does a technician maintain a rivet nut gun?
The operator cleans and oils the moving parts of a manual gun after each use. Pneumatic tools require regular moisture draining from the air line. Worn seals need prompt replacement. A clean mandrel ensures smooth thread engagement on every cycle.