Человек может установить анкеров для полых стен сначала просверлив в гипсокартоне пилотное отверстие соответствующего размера. Затем необходимо аккуратно вбить дюбель в отверстие до тех пор, пока его головка не окажется заподлицо с поверхностью стены. Затягивание винта раскрывает усики дюбеля за гипсокартоном. Это создает прочную удерживающую силу для настенного крепления.
Примечание: Профессионал производитель крепежных изделий на заказ может произвести специальные анкерные болты. Эти специализированные полые дюбели и Анкерные болты обеспечивают оптимальную производительность для конкретных применений.
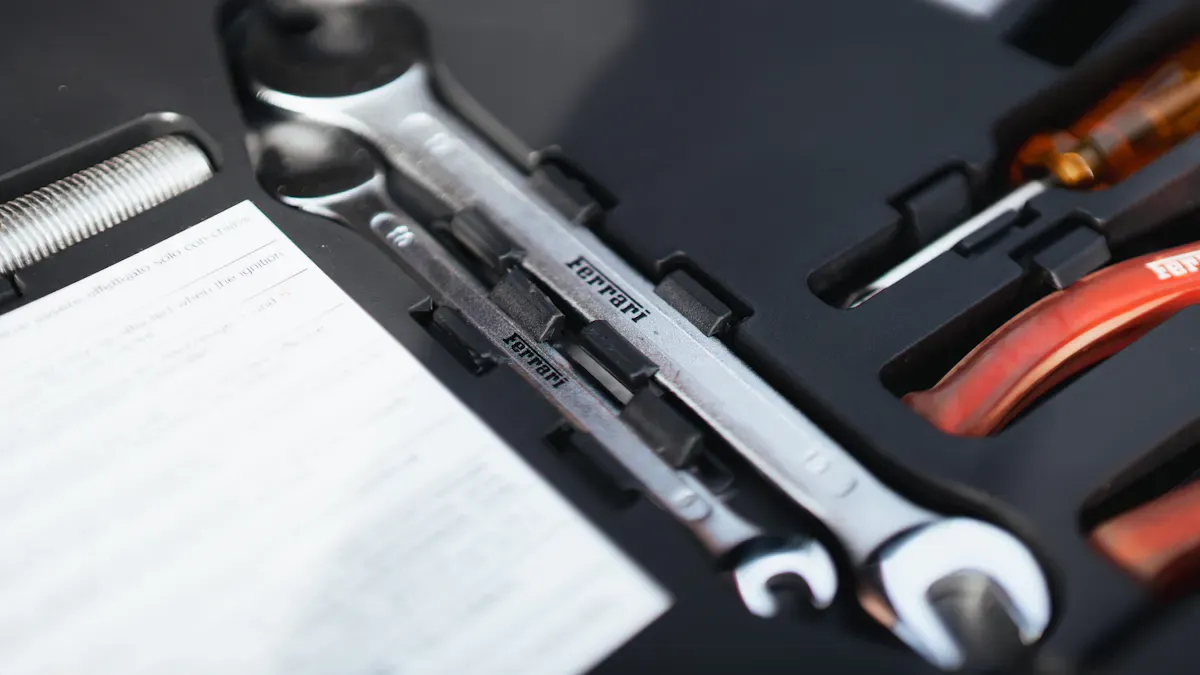
Инструменты и материалы для установки дюбелей

Успешная установка настенных дюбелей начинается со сбора правильного оборудования. Наличие под рукой нужных инструментов и материалов предотвращает ошибки и обеспечивает надежный, профессиональный результат. Такая подготовка оптимизирует весь процесс от начала до конца.
Основные инструменты
Перед началом работы следует подготовить несколько основных инструментов. Эти предметы являются фундаментальными для правильной установки.
Электродрель или шуруповерт
Электродрель необходима для создания пилотного отверстия и вкручивания винта. Для некоторых типов дюбелей дрель также помогает установить крепление, раскрывая его внутри стены. Ручная или электрическая отвертка может использоваться для затягивания винтов, но электродрель обеспечивает более высокую эффективность и крутящий момент.
Сверла
Для работы требуется сверло, соответствующее указанному диаметру дюбеля. Использование правильного размера критически важно для плотной посадки.
- Сверло правильного размера создает начальное отверстие для дюбеля.
- Некоторые комплекты, например, для определенных полых дюбелей, удобно включают в себя соответствующее сверло.
Молоток или резиновая киянка
Молоток или резиновая киянка обеспечивают усилие, необходимое для аккуратного забивания дюбеля в гипсокартон. Резиновая киянка предпочтительнее, так как она снижает риск повреждения поверхности стены или головки дюбеля.
Рулетка
Точные измерения необходимы для правильного размещения предметов. Рулетка гарантирует, что место установки находится именно там, где нужно.
Карандаш
Простой карандаш позволяет отметить точное место сверления на стене. Четкая отметка исключает догадки и приводит к более аккуратной установке.
Необходимые материалы
Основными компонентами работы являются сами дюбели и соответствующие винты.
Анкеры для полых стен
Необходимо выбирать дюбели, рассчитанные на вес предмета, который планируется повесить. На упаковке, как правило, указана эта важная информация о несущей способности.
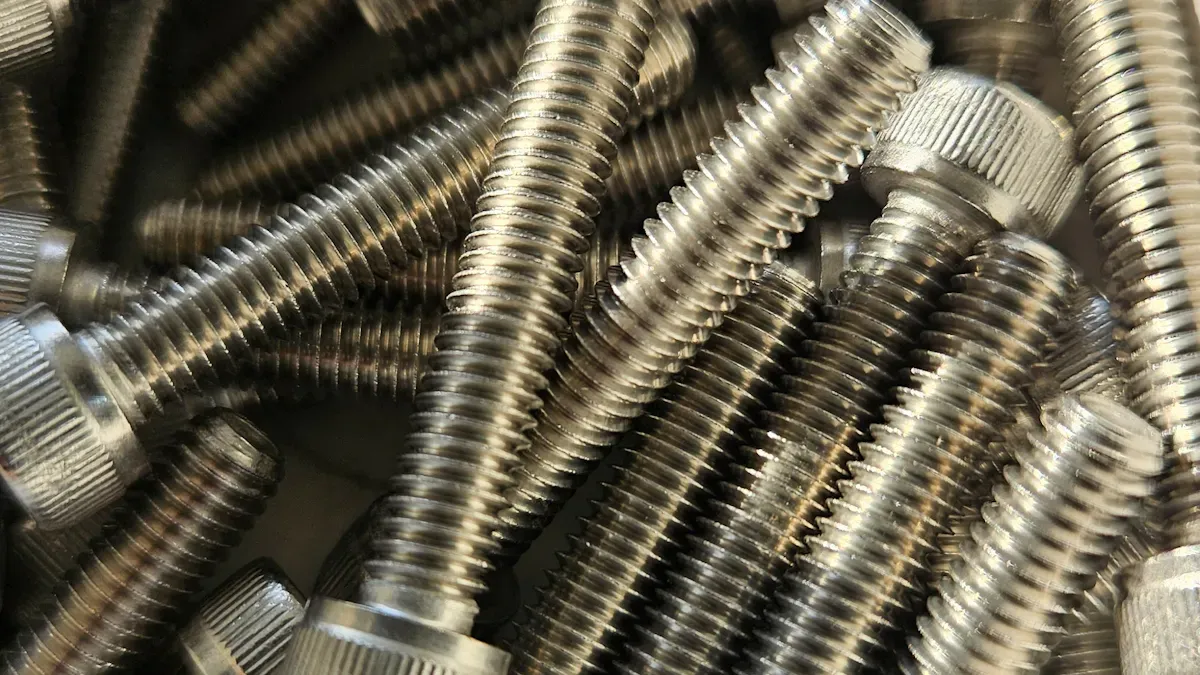
Винты (если не входят в комплект с дюбелями)
Большинство настенных дюбелей поставляются в комплекте с винтами правильного размера. Если винты не входят в комплект, их необходимо приобрести отдельно, убедившись, что они соответствуют требованиям дюбеля по диаметру и длине.
Дополнительное, но полезное оборудование
Эти предметы не являются строго обязательными, но могут значительно улучшить качество и безопасность установки.
Требуемый диаметр твердосплавного сверла Хотя и необязательные, такие инструменты, как детектор стоек и уровень, настоятельно рекомендуются. Они помогают избежать распространенных проблем при установке и обеспечивают идеально расположенный, надежный результат.
Карандаш позволяет пользователю отметить точное место для сверления.
Детектор стоек — это электронное устройство, которое определяет расположение деревянных стоек за гипсокартоном. Избегание стоек необходимо при использовании дюбелей, предназначенных для полых полостей.
Этот электронный прибор критически важен для обнаружения и избегания настенных стоек (деревянных/металлических каркасов), использование которых исключило бы необходимость в
Уровень гарантирует, что полки, рамки для картин и другие предметы повешены идеально ровно. Он незаменим для любого проекта, где важна горизонтальная или вертикальная выравнивание.
Средства защиты органов слуха: Перфоратор создает значительный шум, который со временем может повредить слух.
Защитные очки защищают глаза от пыли и осколков, образующихся при сверлении. Их ношение — простая, но важная мера предосторожности.
Выбор правильных полых дюбелей
Выбор правильного дюбеля — самое важное решение для надежной установки. На рынке представлено большое разнообразие настенных дюбелей, каждый из которых предназначен для определенной нагрузки и применения. Необходимо оценить как вес предмета, так и конструкцию дюбеля, чтобы предотвратить повреждение стены и обеспечить долговечное крепление.
Соответствие прочности дюбеля весу предмета
Первый шаг — определение веса объекта который планируется повесить. На упаковке дюбеля всегда указывается максимальная нагрузка. Пользователь всегда должен выбирать дюбели с номинальной нагрузкой, которая с запасом превышает фактический вес предмета, для обеспечения безопасного запаса прочности.
Безопасность прежде всего: Всегда завышайте вес вашего предмета. Указанная грузоподъемность дюбеля рассчитана на идеальные условия. Такие факторы, как качество гипсокартона, могут повлиять на его реальную удерживающую способность.
Дюбели легкой нагрузки (до 11 кг)
Эти дюбели подходят для подвешивания небольших легких предметов. Обычно используются для маленьких рамок для картин, датчиков дыма и настенных часов. Пластиковые распорные дюбели являются популярным выбором в этой категории благодаря простоте установки и низкой стоимости.
Дюбели средней нагрузки (11–23 кг)
Для более тяжелых предметов требуются дюбели средней нагрузки. Они обеспечивают более существенное крепление для таких вещей, как карнизы для штор, держатели для полотенец и зеркала среднего размера. Резьбовые или саморежущие дюбели являются отличным вариантом здесь, предлагая хороший баланс прочности и простоты использования.
Дюбели тяжелой нагрузки (23+ кг)
Дюбели тяжелой нагрузки необходимы для крепления значительных нагрузок. Их следует использовать для монтажа больших зеркал, стеллажей, небольших шкафчиков и плоских телевизоров. Анкерные болты с откидной гайкой и ременные анкеры обеспечивают наилучшую удерживающую способность в гипсокартоне для этих требовательных применений.
Распространенные типы дюбелей для гипсокартона
Различные полые дюбели используют уникальные механизмы для захвата задней стороны гипсокартона. Понимание этих типов помогает пользователю выбрать наилучший вариант для своего проекта. Распространенные типы включают:
- Саморезы для гипсокартона
- Пластиковые анкерные дюбели
- Анкеры-бабочки (Toggle Bolts)
- Универсальные дюбели
В таблице ниже сравниваются преимущества, недостатки и наилучшие области применения популярных типов дюбелей.
| Тип анкера | Преимущества | Недостатки | Несущая способность | Наилучшие сферы применения |
|---|---|---|---|---|
| Пластиковый распорный анкер | Недорогой и простой в установке. | Ограниченная несущая способность; может вырваться при перегрузке. | Низкая (4,5–11 кг) | Небольшие картины, датчики дыма. |
| Саморезы (резьбовые анкеры) | Не требует предварительного сверления; быстрая установка. | Может сорвать гипсокартон при чрезмерном затягивании. | Средняя (11–23 кг) | Карнизы, полотенцедержатели, средние декоративные элементы. |
| Анкеры типа «Молли» (металлические) | Прочнее пластиковых; некоторые многоразовые. | Требует предварительно просверленного отверстия; может быть сложно установить заподлицо. | Средне-высокая (11–34 кг) | Средние зеркала, светильники, полки. |
| Анкеры-бабочки (пружинные) | Отличная несущая способность для тяжелых нагрузок. | Требует большого отверстия; пружинный механизм теряется при выкручивании винта. | Высокая (23–45+ кг) | Большие телевизоры, тяжелые полки, шкафы, поручни. |
| Ременные анкеры-бабочки | Очень прочные; многоразовые; просты в установке. | Более дорогие; требуют большего отверстия. | Высокая (23–45+ кг) | Тяжелые полки, крупные произведения искусства, шкафы. |

Распорные анкеры (типа «Молли»)
Также известны как анкеры «Молли». Эти металлические анкеры имеют гильзу, которая расширяется за стеной при затягивании винта. Это создает очень надежное крепление, подходящее для средних и тяжелых нагрузок.
Резьбовые/самонарезающие анкеры
Эти крупные резьбовые анкеры вкручиваются непосредственно в стену. Многие из них изготовлены из нейлона или цинкового сплава (Zamac). Они быстро устанавливаются и обеспечивают надежную несущую способность для задач средней тяжести.
Анкеры-бабочки (Toggle Bolts)
Классическое решение для тяжелых нагрузок. Анкер-бабочка состоит из винта и пружинного механизма (крыльев). Крылья складываются для прохождения через монтажное отверстие, а затем раскрываются внутри полости стены, распределяя нагрузку по большой площади.
Ременные анкеры-бабочки
Ременные анкеры-бабочки — это современная эволюция классического анкера-бабочки. Они состоят из пластикового ремня и металлического канала с пружинным механизмом. Такая конструкция позволяет установить анкер без предварительной вставки болта, что значительно упрощает монтаж предмета.
Как установить анкеры для полых стен: пошаговое руководство

Имея под рукой подходящие анкеры и инструменты, монтажник может приступать к процессу установки.. Эти шаги по установке анкера в гипсокартон обеспечивают прочное и надежное крепление для любого предмета. Точность на каждом этапе является ключом к профессиональному результату.
Шаг 1: Разметьте место установки
Точное размещение — основа успешного монтажа. Следует тщательно разметить место, чтобы конечный объект был повешен именно так, как задумано.
Используйте детектор стоек, чтобы избежать их
Анкеры для полых стен специально предназначены для использования в пустых полостях между стойками стены. Попытка установить анкер в деревянную стойку не удастся и может повредить анкер.
- Монтажнику следует использовать детектор стоек, чтобы найти стойки стены.. Это критически важный первый шаг.
- После определения расположения стоек монтажник должен выбрать для анкера место, где стойка отсутствует.
- Этот метод гарантирует, что у анкера будет пространство для правильного раскрытия за гипсокартоном.
Требуемый диаметр твердосплавного сверла Если необходимо повесить очень тяжелый предмет и найдены стойки, то вкручивание винта непосредственно в стойку обеспечит максимально возможную поддержку. Анкеры для стен являются следующим лучшим решением, когда стойка недоступна.
Измерьте и отметьте точное местоположение
Точная разметка предотвращает ошибки и обеспечивает аккуратный, профессиональный вид.
- Следует использовать рулетку и уровень, чтобы определить точное место для анкера.
- Затем можно отметить место установки легким нажатием карандаша.. Это особенно важно при установке нескольких анкеров для одного объекта, например, полки.
- Монтажнику следует Тщательно перепроверьте все отметки перед сверлением, чтобы убедиться в их выравнивании и расположении.
Шаг 2: Просверлите монтажное отверстие
Создание аккуратного монтажного отверстия правильного размера крайне важно для плотной посадки и правильной работы анкера.
Выберите сверло правильного размера
Размер сверла должен соответствовать конкретному используемому анкеру. На упаковке анкера почти всегда указан требуемый диаметр сверла.
- Распорные анкеры (типа «Молли»): Обычно требуют монтажного отверстия, точно соответствующего диаметру анкера, часто от 3 до 6 мм..
- Резьбовые анкеры: Следует выбрать сверло, соответствующее указанному размеру монтажного отверстия для анкера, обычно от 5 до 8 мм.
- Анкеры-бабочки: Для них требуется отверстие большего размера, чтобы вместить сложенные крылья, как правило, необходимо сверло от 3 до 6 мм или больше.
- Саморезы по бетону/анкеры-шурупы: Эти дюбели с острым наконечником не требуют пилотного отверстия или сверла.
Техника сверления для чистого отверстия
Правильная техника сверления предотвращает растрескивание или разрыв гипсокартона.
- Установщик должен держать дрель прямо и устойчиво, перпендикулярно стене.
- Использование низкой скорости сверления дает установщику больше контроля и снижает риск “увода” сверла или повреждения бумажной поверхности.
- Ношение защитных очков необходимо для защиты глаз от пыли гипсокартона.
Примечание: Хотя некоторые незначительные ошибки в гипсокартоне можно легко исправить, сверление чистого отверстия с первого раза экономит время и силы. Действуйте осторожно, чтобы предотвратить ненужные повреждения.
Шаг 3: Вставьте дюбель в гипсокартон
После подготовки пилотного отверстия следующим шагом является вставка дюбеля. Техника немного различается в зависимости от Тип анкера.
Забивание анкера заподлицо со стеной
Для большинства анкеров, требующих предварительного отверстия, необходимо обеспечить их надежную посадку.
- Монтажник должен вручную аккуратно вдавить анкер в отверстие до упора.
- Затем можно использовать резиновую киянку или молоток, чтобы слегка постучать по головке анкера.
- Постукивание следует продолжать до тех пор, пока головка анкера не окажется заподлицо с поверхностью стены, не выступая наружу.
Установка распорных анкеров (анкеров типа «Молли»)
Анкеры типа «Молли» имеют небольшие острые зубцы под головкой, которые должны врезаться в гипсокартон, чтобы предотвратить проворачивание.
- После вставки болта в предварительно просверленное отверстие монтажник забивает его заподлицо.
- Затем он использует отвертку для затягивания винта. Это действие расширяет гильзу анкера за стеной, фиксируя его на месте.
- После того как анкер зафиксирован, монтажник может выкрутить винт, чтобы прикрепить предмет.
Установка резьбовых/самонарезающих анкеров
Эти анкеры являются одними из самых простых в установке.
- Необходимо отметить желаемую точку крепления.
- Затем следует вдавить заостренный наконечник анкера в гипсокартон, чтобы создать начальную точку.
- Используя крестовую отвертку или дрель на малом крутящем моменте, монтажник вкручивает анкер в стену до тех пор, пока его головка не окажется заподлицо.
Установка анкеров-бабочек (такель-болтов)
Анкеры-бабочки обеспечивают огромную удерживающую силу, но требуют особого метода установки.
- Монтажник сверлит отверстие, достаточно большое, чтобы сложенные крылья-бабочки прошли через него.
- Он выкручивает винт из крыльев, продевает винт через монтажный кронштейн предмета, который нужно повесить, а затем снова накручивает его на крылья.
- Монтажник прижимает крылья, проталкивает их через отверстие и прислушивается, чтобы они раскрылись внутри стены.
- Наконец, он тянет винт на себя, чтобы прижать крылья к обратной стороне гипсокартона, одновременно затягивая винт для фиксации предмета.
Шаг 4: Зафиксируйте анкер и прикрепите предмет
На этом заключительном этапе анкер становится надежной точкой крепления. Правильное выполнение действий здесь гарантирует, что анкер будет работать, как задумано, и безопасно удержит ваш предмет. Соблюдение этих завершающих действий крайне важно при установке анкеров для полых стен.
Фиксация анкера путем затягивания винта
Фиксация анкера — это процесс его расширения за гипсокартоном для создания надежного сцепления. Техника немного различается в зависимости от типа анкера.
- Для распорных анкеров (типа «Молли»): Монтажник поворачивает винт по часовой стрелке отверткой. Он почувствует возрастающее сопротивление, когда металлическая гильза анкера расширится и прижмется к внутренней поверхности стены. Необходимо продолжать закручивать, пока винт не сядет плотно и надежно.
- Для анкеров-бабочек: Монтажник должен потянуть болт на себя, чтобы удерживать крылья прижатыми к обратной стороне гипсокартона. Сохраняя это натяжение наружу, он затягивает винт, чтобы зафиксировать анкер на месте.
- Для резьбовых анкеров: Эти анкеры фиксируются, как только их вкручивают заподлицо со стеной. Затем можно вкрутить винт, чтобы повесить предмет.
Требуемый диаметр твердосплавного сверла Если винт анкера «Молли» начинает проворачиваться, не затягиваясь, значит, зубцы анкера не вцепились должным образом в гипсокартон. Монтажник может попробовать приложить легкое усилие на отрыв к головке винта во время закручивания, чтобы помочь зубцам врезаться в стену.
Вкручивание окончательного винта для навешивания предмета
После фиксации анкера монтажник теперь может установить объект. Метод зависит от того, был ли винт удален в процессе фиксации.
- Если винт был удален (как в случае с анкером «Молли»): Монтажник располагает монтажное отверстие предмета прямо над зафиксированным анкером. Затем он снова вставляет винт через предмет в анкер и затягивает его до тех пор, пока объект не будет плотно прижат к стене.
- Если винт уже на месте (как в случае с анкером-бабочкой): Предмет уже находится на болте. Монтажник просто продолжает затягивать винт до тех пор, пока объект не окажется заподлицо и надежно закреплен на поверхности стены.
- Для самонарезающих или резьбовых анкеров: Монтажник вкручивает прилагаемый винт в центр анкера до тех пор, пока предмет не будет надежно закреплен.
Проверка надежности крепления
Прежде чем дать полную нагрузку на крепление, следует проверить целостность установки. Эти заключительные проверки являются самыми важными из всех шагов по установке анкера в гипсокартон.
- Монтажник должен слегка, но уверенно потянуть установленный предмет в нескольких направлениях.
- Предмет и анкеры должны ощущаться абсолютно неподвижными, без люфта, смещения или отрыва от стены.
- Любое движение указывает на проблему, такую как слишком большое предварительное отверстие или анкер, который не раскрылся правильно. Ненадежный анкер требует удаления и повторной установки. Качественная установка обеспечивает надежную удерживающую силу на долгие годы.
Распространенные ошибки при вкручивании шурупов в гипсокартон
Даже при тщательной подготовке у монтажников могут возникнуть проблемы при вкручивании шурупов в гипсокартон с анкерами. Понимание этих распространенных ошибок помогает быстро устранять неполадки и избегать повреждения стены. Большинство ошибок можно исправить правильным подходом.
Предварительное отверстие слишком велико
Правильно подобранное по размеру предварительное отверстие является обязательным условием для надежной установки. Это одна из самых частых и досадных ошибок.
Проблема: Слабый анкер
Когда монтажник сверлит предварительное отверстие, которое слишком велико, анкеру не за что зацепиться. Анкер может казаться болтающимся или проворачиваться на месте, когда пытаются затянуть винт. Отсутствие плотной посадки мешает анкеру зафиксироваться, делая его бесполезным для поддержания какого-либо веса. Окружающий гипсокартон также может быть поврежден, что еще больше ослабит участок.
Решение: Использовать анкер большего размера или заделать отверстие
У монтажника есть два эффективных решения этой проблемы.
- Самый простой способ — удалить болтающийся анкер и использовать анкер большего размера, который плотно войдет в слишком большое отверстие.
- Если использование большего анкера невозможно, необходимо удалить анкер и заделать отверстие шпаклевкой. После того как заплатка высохнет, будет отшлифована и покрашена, можно просверлить новое предварительное отверстие правильного размера в том же месте.
Сорванная резьба анкера или винта
Сорванная резьба анкера или винта — еще одна распространенная проблема, которая определяется, когда винт бесконечно проворачивается, не затягиваясь.
Проблема: Винт проворачивается, не затягиваясь
Это вращение указывает на то, что резьба дюбеля или окружающий гипсокартон были сорваны. Дюбель больше не имеет надежной фиксации и не может обеспечить надежную опору. Это может быть вызвано несколькими факторами:
- Чрезмерный крутящий момент: Использование дрели на высоком значении крутящего момента может легко сорвать материал.
- Неправильное пилотное отверстие: Слишком большое отверстие не позволяет резьбе зацепиться за стену.
- Слабый гипсокартон: Старый или поврежденный влагой материал может крошиться вместо того, чтобы обеспечивать надежную фиксацию для дюбелей.
Решение: Используйте винт немного большего размера или замените дюбель
Чтобы устранить сорванный дюбель, монтажник может сначала попробовать использовать винт немного большего диаметра. Более широкая резьба может зацепить дюбель. Если это не поможет, лучшим решением будет удалить поврежденный дюбель, заделать отверстие и установить новые дюбели в соседнем месте.
Дюбель не раскрывается правильно
Все назначение полого настенного дюбеля заключается в его способности раскрываться за стеной. Сбой в этом механизме означает, что установка не является надежной.
Проблема: Дюбель вытягивается из стены
Если дюбель выходит из стены при легком рывке, значит, он не раскрылся должным образом. Это часто происходит, когда винт не затянут достаточно для полного раскрытия крыльев или гильзы дюбеля. Дюбель просто находится в отверстии, не зацепляясь за тыльную сторону стены.
Решение: Обеспечьте правильную технику затяжки
Решение заключается в том, чтобы убедиться, что дюбель установлен правильно.
Важно: Для анкеров-бабочек монтажник должен тянуть винт наружу во время затяжки. Это натяжение удерживает крылья прижатыми к внутренней стороне стены, позволяя винту зафиксировать их на месте. Для молли-болтов следует закручивать винт до ощущения значительного сопротивления, что сигнализирует о полном раскрытии гильзы.
Вы случайно попали в стойку
Монтажник может тщательно использовать искатель стоек и все же попасть в деревянную стойку. Это распространенная ситуация, а не серьезная проблема. На самом деле, обнаружение стойки может быть удачной ошибкой, поскольку она обеспечивает более надежную точку крепления по сравнению с полостью в стене. Распознавание признаков и знание правильных действий превращает эту проблему в возможность для более прочного монтажа.
Проблема: Дюбель не входит
Основным признаком попадания в стойку является внезапное, сильное сопротивление. Монтажник почувствует, как сверло проходит через мягкую бумагу и гипс гипсокартона, а затем резко остановится, ударившись о твердую древесину. Любая попытка вставить дюбель не увенчается успехом. Дюбель войдет только на толщину стеновой панели и не сядет заподлицо.
Принудительное вкручивание дюбеля в этот момент является ошибкой. Это действие может вызвать несколько проблем:
- Сам дюбель может сломаться или деформироваться.
- Может быть повреждена окружающая поверхность стены.
- Дюбель не раскроется и не выдержит никакого веса.
Полые настенные дюбели специально разработаны для пустого пространства за стеной; они не могут функционировать, когда им мешает твердый объект, такой как стойка.
Решение: Удалите дюбель и используйте шуруп по дереву
Когда монтажник попадает в стойку, ему следует отказаться от дюбеля и воспользоваться более прочным основанием. Это обеспечивает максимально надежную точку крепления. Решение простое и приводит к гораздо более надежной фиксации тяжелых предметов.
- Монтажник сначала удаляет частично вставленный дюбель. Обычно плоскогубцами можно захватить головку дюбеля и вытащить его прямо из отверстия.
- Затем он выбирает шуруп по дереву. Винт должен быть достаточно длинным, чтобы пройти через монтажный кронштейн предмета, гипсокартон и войти в деревянную стойку не менее чем на 1–1,5 дюйма.
- Затем монтажник вкручивает шуруп по дереву прямо в существующее пилотное отверстие. Новое сверление не требуется.
- Он затягивает винт до тех пор, пока предмет не будет надежно закреплен на стене.
Удачная ошибка: Попадание в стойку часто лучше, чем использование дюбеля. Винт, вкрученный непосредственно в стойку, создает значительно более прочное крепление, чем любой полый настенный дюбель. Монтажник всегда должен предпочитать этот метод при подвешивании тяжелых или ценных предметов.
Удаление полых настенных дюбелей
В конечном итоге может потребоваться удалить анкеров для полых стен для перемещения предмета или ремонта стены. Процесс удаления зависит от типа установленного дюбеля. Следование правильной процедуре минимизирует повреждение гипсокартона и упрощает процесс заделки.
Удаление распорных дюбелей (молли-болтов)
Молли-болты раскрываются за стеной, что делает их удаление немного более сложным по сравнению с другими типами. Существует несколько эффективных методов на выбор.
Выкручивание винта
Первый шаг — использовать отвертку, чтобы повернуть винт против часовой стрелки. Монтажник должен выкрутить винт, но не удалять его полностью. Оставление его вкрученным на несколько оборотов обеспечивает захват для вытягивания или простукивания дюбеля.
Вдавливание дюбеля в стену или вытягивание его
Частично выкрутив винт, монтажник может выбрать лучший метод удаления. Вдавливание дюбеля в стену часто является самым аккуратным методом.
- Можно поместить отвертку с широким жалом или шпатель над головкой дюбеля.
- Затем следует аккуратно постучать по инструменту молотком. Это действие слегка вдавливает головку дюбеля в гипсокартон.
- В качестве альтернативы монтажник может полностью удалить винт и использовать пробойник, чтобы протолкнуть весь корпус дюбеля в полость стены, где он безвредно упадет между стойками.
- Если вдавливание невозможно, можно крепко захватить головку дюбеля плоскогубцами и вытащить его прямо. Этот метод может создать большее, более рваное отверстие.
Удаление резьбовых дюбелей
Резьбовые дюбели, как правило, легче удалить, потому что они вкручиваются непосредственно в материал стены.
Выкручивание дюбеля из гипсокартона
Самый простой способ — использовать отвертку, чтобы выкрутить анкер против часовой стрелки, извлекая его из стены, как обычный винт.
Требуемый диаметр твердосплавного сверла Для упрямых металлических анкеров, которые расклепались за стеной, монтажник может вкрутить исходный винт на несколько оборотов. Легкий удар молотком по головке винта может выпрямить распорные лапки, что позволит аккуратно извлечь анкер.
Заделка оставшегося отверстия
После удаления анкеров остается отверстие, которое необходимо заделать для чистого результата. Правильная заделка делает ремонт практически незаметным.
Нанесение шпаклевки или шовного состава
Выбор наполнителя зависит от размера отверстия. Легкая шпаклевка подходит для небольших отверстий, в то время как для более крупных ремонтов требуется более прочный шовный состав.
- Монтажник должен нанести первый слой состава, плотно вдавливая его в отверстие.
- Необходимо растушевать края состава на окружающую поверхность стены, чтобы создать плавный переход.
Шлифовка и покраска для безупречной отделки
Безупречная отделка требует терпения и нескольких простых шагов.
- Монтажник должен дать составу полностью высохнуть, что может занять до 24 часов.
- После высыхания следует отшлифовать область мелкозернистой наждачной бумагой до тех пор, пока она не станет гладкой и на одном уровне со стеной.
- Всегда следует наносить слой грунтовки на заделанное место. Это герметизирует состав и предотвращает тусклый или неравномерный вид краски.
- После высыхания грунтовки можно нанести два слоя краски для стен в тон окружающей области, завершив ремонт.
Монтажник может успешно установить анкеры для полых стен, следуя нескольким ключевым принципам. Следует помнить эти основные шаги для надежного крепления в гипсокартоне:
- Просверлите направляющее отверстие, соответствующее размеру анкера.
- Вставьте анкер до тех пор, пока он не встанет вровень со стеной.
- Затяните винт, чтобы полностью раскрыть механизм анкера.
Монтажник всегда должен выбирать стеновые анкеры с номинальной нагрузкой, которая безопасно превышает вес подвешиваемых предметов. Следование этим рекомендациям гарантирует, что можно с уверенностью закреплять предметы на любой поверхности из гипсокартона.
Частые вопросы
Можно ли повторно использовать анкер для полых стен?
Некоторые анкеры можно использовать повторно. Распорные анкеры (молли) с заостренной гильзой позволяют выкручивать и вкручивать винт заново. При извлечении винта у стандартного анкера-бабочки крылья остаются внутри стены. Однако ременные анкеры-бабочки допускают повторное использование.
Что делать, если нет электрической дрели?
Некоторые анкеры можно установить без электрической дрели. Самонарезающиеся анкеры требуют только крестовой отвертки. Для других монтажник может сделать направляющее отверстие с помощью шила и ручного давления, а затем вкрутить винт ручной отверткой.
Как определить вес предмета?
Можно использовать стандартные напольные весы для определения веса предмета. Сначала следует взвеситься самому, затем взвеситься, держа предмет. Разница между двумя измерениями покажет вес предмета. Всегда выбирайте анкер с более высоким номинальным весом.
Можно ли устанавливать анкеры для полых стен в потолке?
Да, монтажник может использовать анкеры для полых стен в гипсокартонном потолке. Необходимо учитывать, что сила тяжести создает прямое вытягивающее усилие. Для наиболее надежного монтажа на потолке следует выбирать усиленные анкеры-бабочки или ременные анкеры-бабочки.
Какой тип анкера для гипсокартона самый прочный?
Анкеры-бабочки и ременные анкеры-бабочки обеспечивают наибольшую удерживающую способность в гипсокартоне. Их крыльевая или канальная конструкция распределяет нагрузку на большую площадь за стеной. Эти анкеры являются лучшим выбором для крепления тяжелых предметов, таких как шкафы или большие телевизоры.
Почему анкер проворачивается при затягивании винта?
Анкер проворачивается, когда направляющее отверстие слишком велико или его зубья не цепляются за гипсокартон. Это мешает правильной установке анкера. Монтажник должен удалить его, заделать отверстие и начать заново, используя сверло правильного размера.