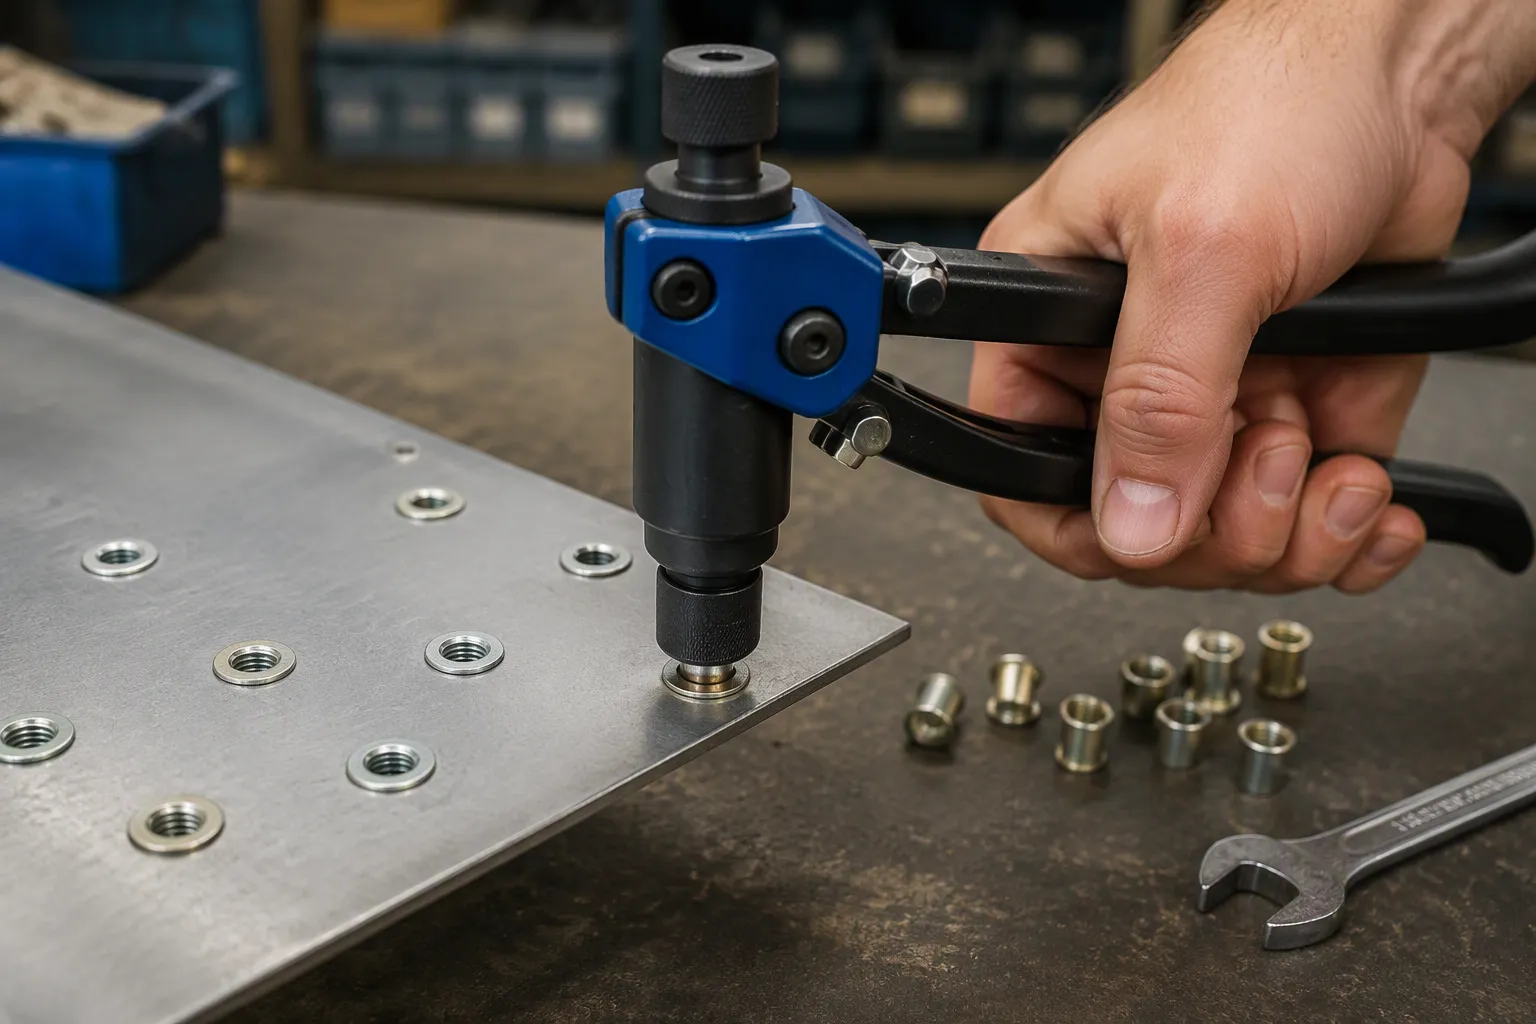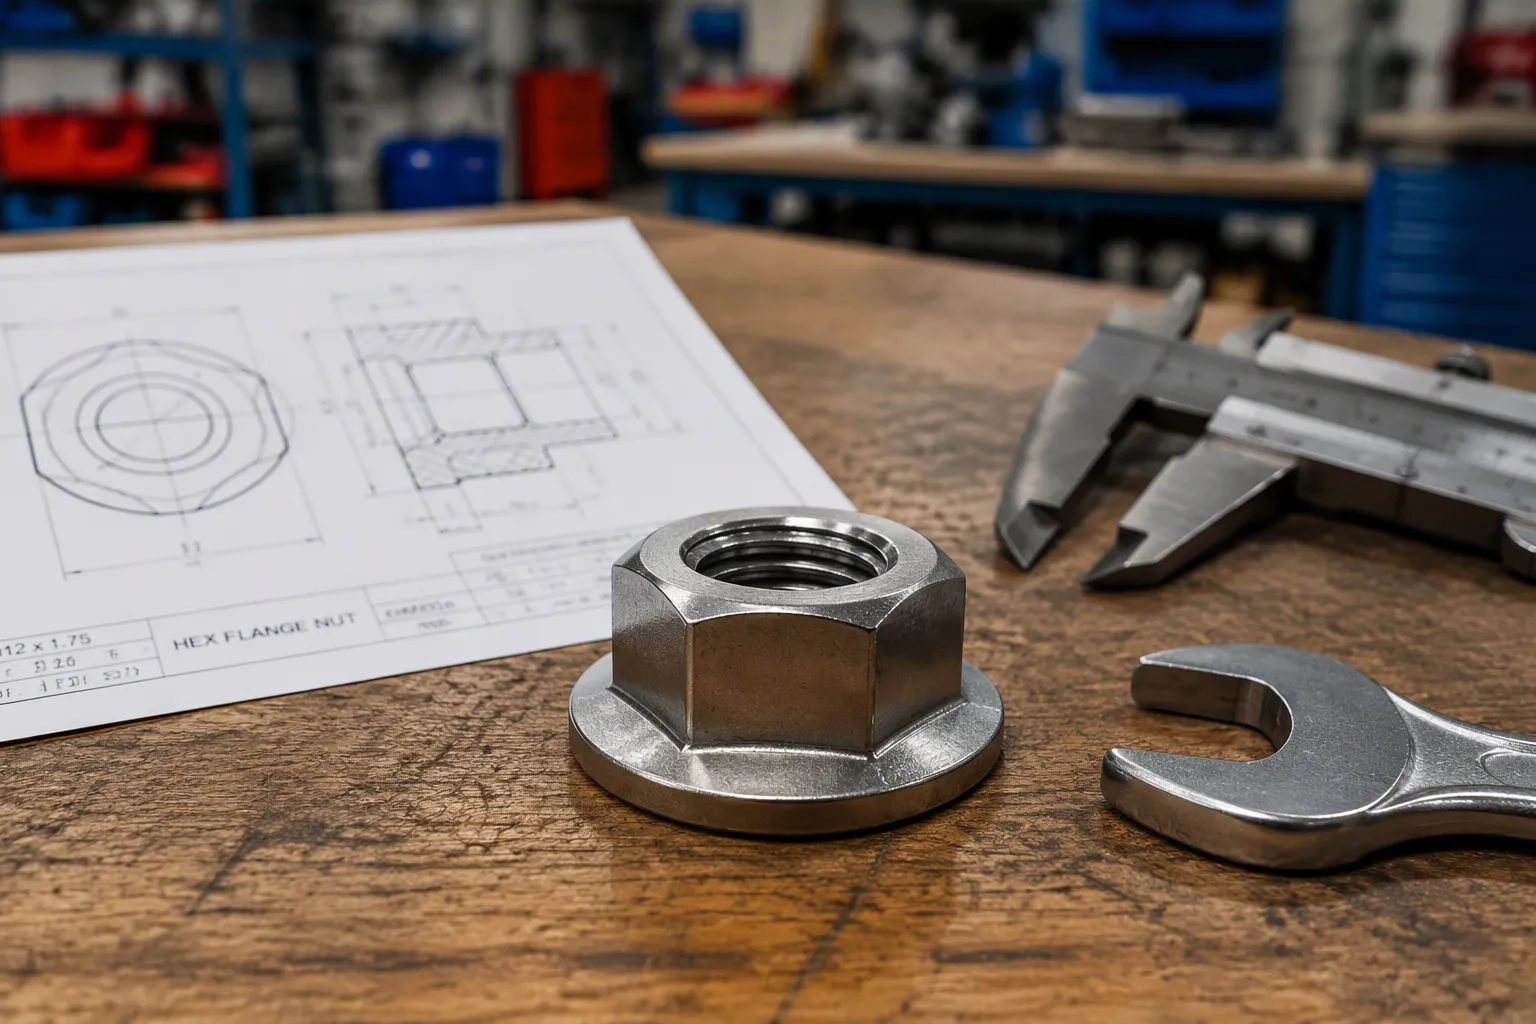
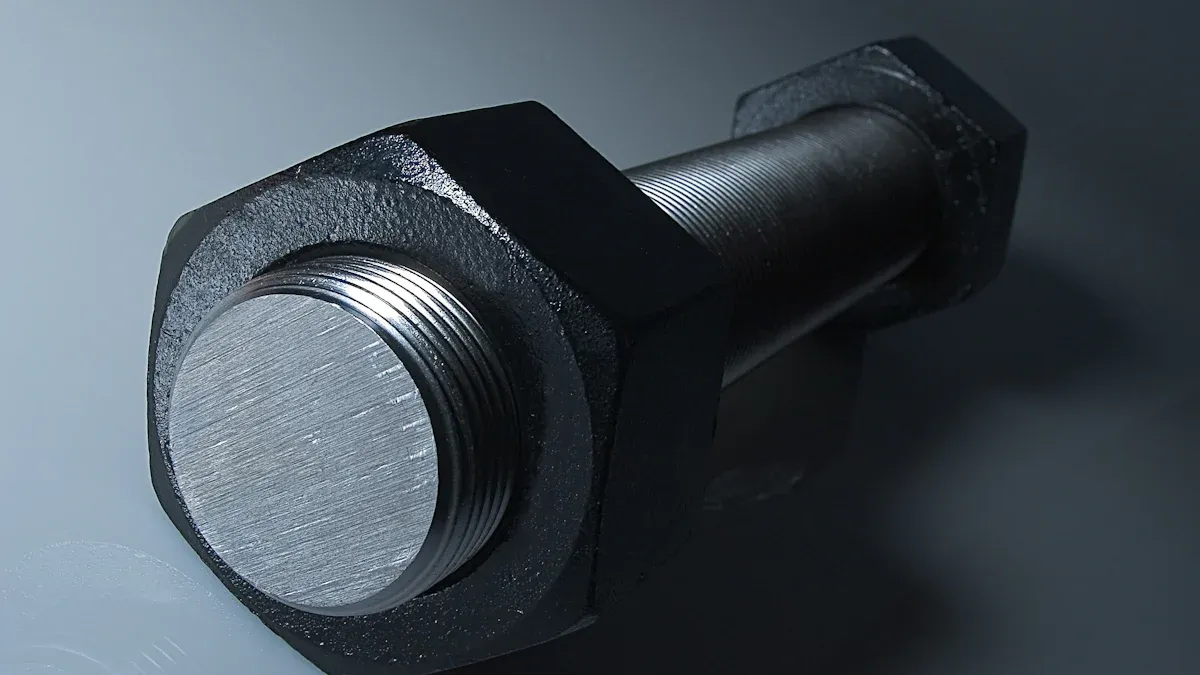
Choisir vis à expansion est une étape cruciale pour la sécurité structurelle. Un professionnel commence par identifier les exigences du projet et les facteurs clés à prendre en compte lors du choix des ancrages pour béton. Ce processus comprend le calcul des charges et la sélection du type d'ancrage adapté à l'application.
Remarque : Choisir le bon ancrage, c'est aussi adapter son matériau à l'environnement pour garantir sa durabilité.
Pour des besoins spécifiques, un fabricant de fixations sur mesure peut fournir boulons d'ancrage sur mesure. La sélection finale de Boulons d'ancrage ou tout autre type de tire-fond doit tenir compte de l'état du béton afin d'éviter toute défaillance.
Premiers pas pour choisir des chevilles à expansion
Avant de choisir un produit spécifique, un professionnel doit comprendre les principes fondamentaux de fonctionnement de ces éléments de fixation ainsi que les graves conséquences qu’une erreur pourrait entraîner. Le processus consistant à Choisir des chevilles à expansion commence par une solide maîtrise de la théorie mécanique et des impératifs de sécurité.
Comment les chevilles à expansion assurent une fixation solide
Les ancrages à expansion développent une force de maintien exceptionnelle en tirant parti des principes fondamentaux de la physique. Ils assurent une fixation solide en exerçant une force vers l'extérieur contre les parois intérieures d'un trou percé dans le béton. Cette action transfère la charge de l'élément de fixation directement dans le béton.
Le principe de la dilatation mécanique
Le principe fondamental repose sur l'expansion contrôlée. L'installateur actionne un mécanisme qui force certaines parties de l'ancrage à se dilater vers l'extérieur, les plaquant ainsi fermement contre le béton. Cela crée un verrouillage mécanique très solide. Les deux principales méthodes permettant d'y parvenir sont les suivantes :
- Ancrages à couple contrôlé: Un installateur applique un couple précis sur un écrou ou une tête de boulon. Ce mouvement enfonce une cale conique dans un manchon d'expansion, ce qui force ce dernier à se dilater et à se fixer dans le trou. Chevilles à coin en sont un exemple typique.
- Ancrages à déplacement contrôlé : Ces ancrages à expansion fonctionnent avec une cheville interne. L'installateur utilise un outil de mise en place pour enfoncer la cheville dans le corps de l'ancrage, ce qui provoque l'expansion du manchon contre le béton.
Le rôle du frottement et de l'adhérence dans le béton
La force d'expansion n'est qu'une partie de l'explication. Cette pression vers l'extérieur génère une friction incroyable entre l'ancrage et le béton. Le manchon métallique s'enfonce dans les pores microscopiques et les granulats du béton, créant un effet de “ clavetage ” ou d'interverrouillage. C'est cette combinaison de frottement et de clavetage mécanique qui empêche l'ancrage de se détacher sous l'effet de forces de traction (vers l'extérieur) ou de se déplacer sous l'effet de forces de cisaillement (latérales).
Pourquoi il est essentiel de faire le bon choix pour garantir la sécurité
Le choix de la fixation appropriée n'est pas seulement une question technique ; il s'agit d'une décision cruciale en matière de sécurité. L'intégrité de l'ensemble du montage, voire de la structure elle-même, dépend des performances de chaque ancrage.
Comprendre les risques liés à la défaillance des éléments de fixation
La défaillance d'une fixation peut avoir des conséquences catastrophiques. Dans 2007, une dalle de béton au Centre des congrès de Pittsburgh s'est effondré près d'un joint de dilatation, une défaillance en partie attribuée à un boulon qui s'est contracté sous l'effet d'un froid extrême avant de céder sous la charge. Quelques décennies plus tôt, les toitures d'entrepôts de deux bases de l'armée de l'air distinctes s'étaient effondrées parce que des joints de dilatation défectueux n'avaient pas réussi à évacuer les contraintes dues aux variations thermiques, provoquant ainsi une défaillance structurelle majeure. Ces incidents soulignent l'importance de respecter des consignes de sécurité strictes lors du choix et de la pose des éléments de fixation.
Garantir l'intégrité structurelle à long terme
Un choix judicieux garantit la stabilité d'un élément de fixation tout au long de sa durée de vie. La réussite d'un projet repose sur un ancrage capable de résister non seulement aux charges permanentes et variables initiales, mais aussi aux facteurs environnementaux tels que les variations de température et les vibrations, et ce pendant de nombreuses années. Un choix approprié constitue la première étape pour réaliser une fixation à la fois solide et durable, qui apporte une tranquillité d'esprit et garantit l'intégrité structurelle à long terme.
Une analyse approfondie des différents types d'ancrages pour béton

Il est essentiel de bien comprendre les différents types d'ancrages pour béton afin de choisir la fixation la plus adaptée. Chaque modèle présente des avantages propres et est conçu pour un type de charge et un matériau de support spécifiques. Un professionnel évalue ces différents types d'ancrages pour béton afin de trouver celui qui convient le mieux à l'ouvrage. Ce processus d'adaptation des ancrages aux applications garantit à la fois la sécurité et l'efficacité de tout projet.
Ancrages à coin : la solution pour les applications lourdes
Les ancrages à coin constituent le choix incontournable pour les assemblages à haute résistance dans le béton massif. Les professionnels les qualifient souvent d'ancrages à usage intensif en raison de leur capacité de charge exceptionnelle.
Anatomie et fonction
Une cheville à expansion se compose d'un goujon fileté, d'un écrou, d'une rondelle et d'une bague d'expansion à sa base. L'installateur perce un trou, le nettoie, puis enfonce la cheville à coups de marteau. Le serrage de l'écrou tire la tige vers le haut, ce qui force la bride d'expansion à s'évaser et à se caler fermement contre les parois du trou. Ce mécanisme à couple contrôlé génère une friction et une force de maintien considérables.
Applications recommandées : acier de construction, rayonnages
La résistance supérieure des ancrages à coin en fait des solutions idéales pour la fixation de charges lourdes. Ils sont couramment utilisés pour la fixation de poteaux en acier de structure, de rayonnages à palettes, de machines lourdes et de traverses de soutien. Leurs performances dans des conditions exigeantes sont largement attestées. À titre d’exemple, les fabricants fournissent des tableaux de charges détaillés indiquant leur capacité.
Valeurs typiques de charge maximale dans le béton à 3 000 PSI Le tableau suivant présente des exemples de valeurs de charge maximale pour les ancrages à coin courants. Un ingénieur doit appliquer un coefficient de sécurité à ces chiffres afin de déterminer la charge maximale d'utilisation (CMU) pour une application spécifique.
| Type d'ancre | Résistance du béton (PSI) | Résistance à la traction (lb) | Résistance au cisaillement (lb) |
|---|---|---|---|
| DeWALT® Power-Stud® diamètre 3/8 pouces | 3000 | 1600 | 1840 |
| Simpson Strong-Tie® WA75812, diamètre 3/4 pouce | 3000 | 2840 | N/A |
Restrictions : béton massif uniquement
La principale limite d'une cheville à coin réside dans le fait qu'elle nécessite un matériau de support solide. Elle est exclusivement conçue pour le béton solide et durci. Un installateur ne doit jamais utiliser une cheville à coin dans du parpaing, de la brique ou tout autre matériau creux ou tendre, car la force d'expansion peut provoquer la fissuration ou la rupture du matériau de support. Bien que De nombreuses ancrages à coin modernes sont homologués pour une utilisation aussi bien dans du béton fissuré que non fissuré., il est essentiel de vérifier cette information sur la fiche technique du produit.
Ancrages à manchon : la solution polyvalente par excellence
Ancrages à manchon Elles offrent une solution de fixation fiable sur une gamme de matériaux plus large que les ancrages à coin, ce qui en fait un choix polyvalent pour les travaux de charge moyenne.
Anatomie et fonction
Un ancrage à manchon est une fixation pré-assemblée composée d'un boulon ou d'un goujon fileté, d'un écrou évasé de forme conique, d'une rondelle et d'un manchon d'expansion sur toute la longueur. Lorsque l'installateur serre la tête du boulon, le cône est entraîné à l'intérieur de la douille. Ce mouvement provoque l'expansion de la douille, qui vient alors s'appuyer contre la paroi interne du trou percé, créant ainsi une fixation solide par friction.
Utilisations recommandées : mains courantes, châssis de fenêtres
Grâce à sa conception, la cheville à manchon permet de fixer des objets sur du béton massif, de la brique et des parpaings. Cette polyvalence en fait un choix très prisé pour la fixation de :
- Mains courantes et garde-corps
- Châssis de fenêtres et de portes
- Étagères et supports
- Colliers de fixation pour conduits
Lorsqu’il est utilisé dans des environnements extérieurs, par exemple pour des mains courantes, le matériau de l’ancrage doit résister à la corrosion. Les normes industrielles telles que ASTM A153/A153M et AASHTO M 232M/M 232 régissent souvent les revêtements de zinc par immersion à chaud requis pour ce type de quincaillerie afin d'en garantir la durabilité à long terme.
Quand recourir à une alternative
Bien que polyvalentes, les ancrages à manchon ne constituent pas le meilleur choix dans toutes les situations. Leur capacité de retenue est généralement inférieure à celle des ancrages à coin, ce qui les rend inadaptés aux charges structurelles très lourdes. De plus, les ancrages à manchon standard ne sont pas recommandés pour les applications dans du béton fissuré lorsque l’activité sismique ou des vibrations importantes constituent un risque. Dans ces cas-là, un ingénieur prescrira un ancrage présentant une résistance sismique.
Ancrages à enfoncer : pour les installations affleurantes et en hauteur
Les ancrages à encastrer sont des ancrages femelles conçus pour supporter des charges moyennes dans du béton massif. Leur principale caractéristique est leur finition affleurante, idéale pour les applications en hauteur et les situations où la présence d’un goujon saillant n’est pas souhaitable.
Anatomie et fonction
Une cheville à enfoncer est une douille métallique cylindrique dotée d'un filetage intérieur et d'un expansor interne préinstallé. Une fois que l'installateur a percé un trou et placé la cheville à l'intérieur, il utilise un outil de mise en place spécial pour enfoncer l'expansor vers le bas. Cela provoque l'expansion des parois de la cheville, qui se verrouillent ainsi dans le béton. Le filetage interne est alors prêt à accueillir une tige filetée ou un boulon pour la fixation.
Utilisations recommandées : suspension de tuyaux, chemins de câbles
Grâce à leur conception encastrée, les ancrages à encastrer sont idéaux pour les travaux en hauteur. Les installateurs les utilisent généralement pour :
- Tige filetée de suspension pour supports de tuyaux
- Installation de conduits de climatisation et de chemins de câbles suspendus
- Fixation des profilés en U aux plafonds
- Systèmes d'arrosage à ancrage
Une fois le boulon installé, cette ancrage offre un rendu net et soigné, ce qui la rend particulièrement esthétique pour les plafonds apparents.
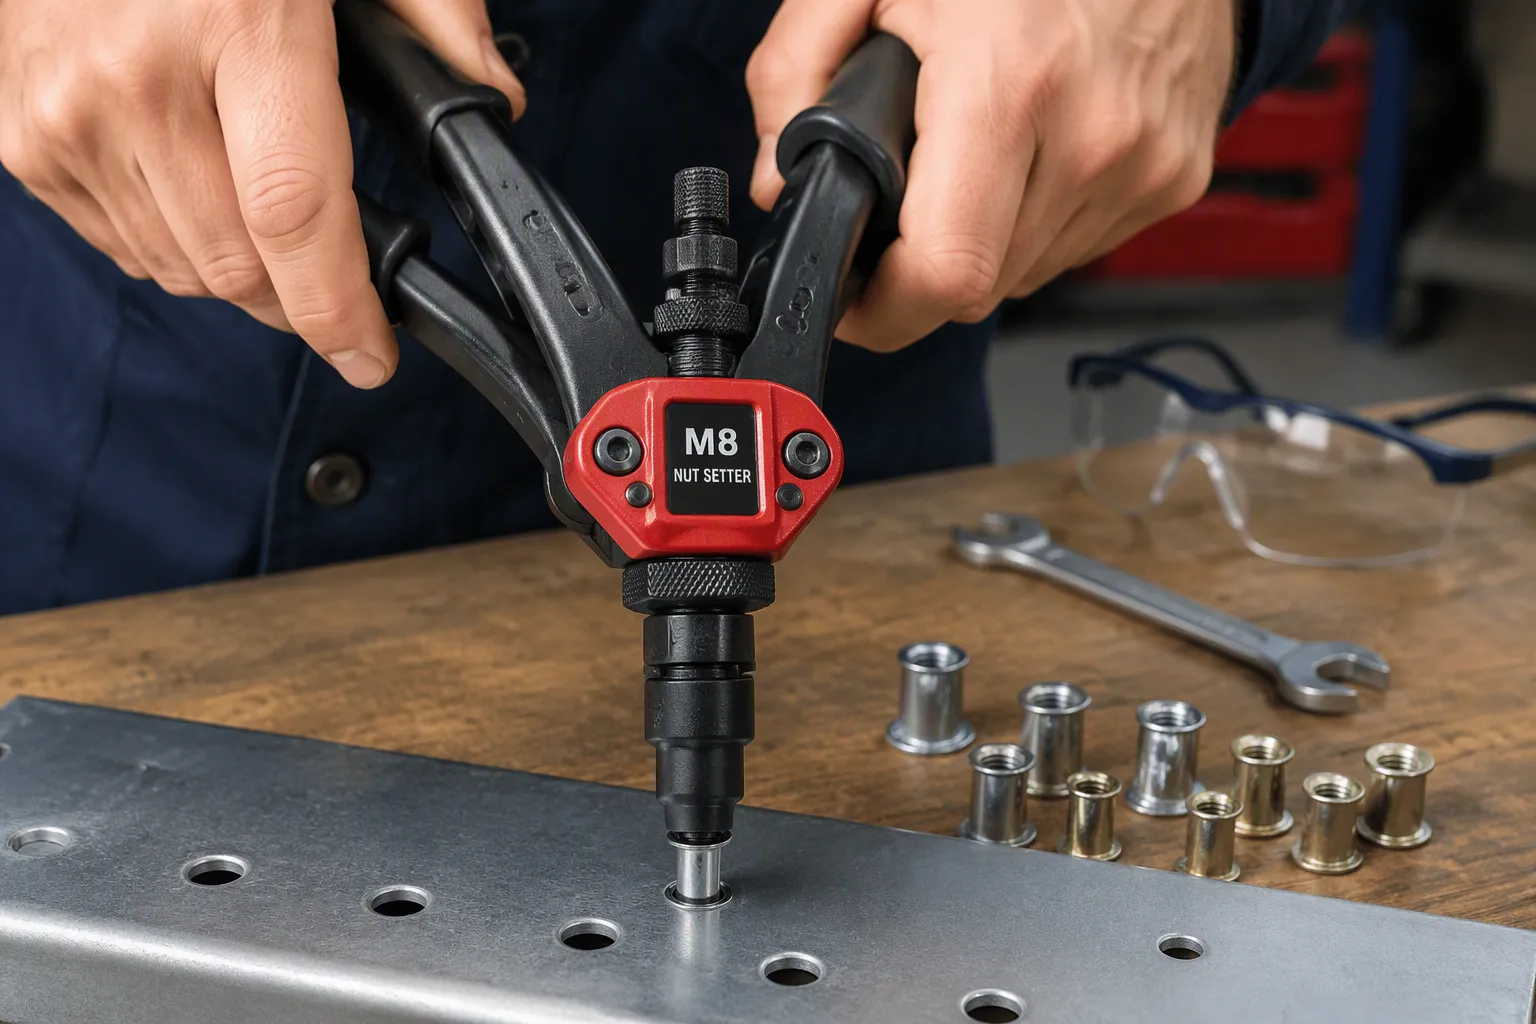
Outils spéciaux : l'outil de pose « Drop-In »
La pose correcte d'un ancrage à enfoncer nécessite un outil spécifique : un outil de pose pour ancrages à enfoncer. Il est essentiel d'utiliser correctement cet outil pour obtenir la capacité de retenue maximale de l'ancrage. Un installateur doit suivre une procédure précise.
- Percez un trou du diamètre et de la profondeur indiqués à l'aide d'une perceuse à percussion.
- Nettoyez soigneusement le trou pour éliminer toute trace de poussière et de débris à l'aide d'une brosse métallique et d'air comprimé.
- Insérez la cheville, l'extrémité rainurée en premier, jusqu'à ce qu'elle affleure la surface du béton.
- Insérez l'outil de pose dans le corps de l'ancrage et frappez-le fermement avec un marteau jusqu'à ce que l'épaulement de l'outil vienne buter contre le haut de l'ancrage. Cela permet de s'assurer que la cheville interne est bien en place.
💡 Conseil de pro : Un installateur professionnel détecte tout changement de son lors de l'impact de l'outil de réglage. Un son serein et retentissant indique souvent que l'ancrage est bien en place. Il s'agit de l'un des types d'ancrages dans le béton les plus importants pour la sécurité en hauteur.
Autres ancrages à expansion courants
Outre les ancrages à coin, à manchon et à emboîtement classiques, les professionnels disposent d’autres types d’ancrages spécialisés pour le béton. Ces fixations offrent souvent des solutions simples et rapides pour des applications nécessitant une charge légère à moyenne. La connaissance de ces options supplémentaires aide le prescripteur à choisir la fixation la plus efficace et la plus rentable pour le chantier.
Ancrages à enfoncer (ancrages à marteau)
Un ancrage à frappe est un ancrage à déplacement contrôlé, conçu pour allier rapidité et simplicité dans les applications à charge moyenne. Il se compose d'un corps tubulaire et d'une tige en forme de clou.
- Installation : L'installateur perce un trou, le nettoie, puis enfonce la cheville dans le trou à l'aide d'un marteau. Il enfonce ensuite la goupille interne à l'aide d'un marteau jusqu'à ce qu'elle affleure la tête de la cheville. Ce mouvement provoque l'expansion du corps de la cheville, assurant ainsi une fixation solide.
- Utilisation : Les ancrages de frappe sont exclusively designed for use in solid concrete. Their ease of installation makes them a popular choice for fastening wood furring strips, electrical junction boxes, and HVAC strapping.
Remarque : This anchor is a permanent, non-removable fastener. A professional must be certain of the placement before setting it.
Lag Shield Anchors
Lag shield anchors are female-style anchors used to fasten items to concrete, brick, or block using a lag screw. They are available in short and long versions to accommodate different base materials.
- Fonction : An installer drills a hole and inserts the lag shield anchor until it is flush with the surface. The installer then places the fixture over the anchor and drives a lag screw through the fixture into the shield. As the screw turns, its threads engage the anchor’s internal ribs, causing the shield to expand and grip the base material.
- Cas d'utilisation : These are intended for light-duty applications. Common uses include attaching signs, pipe clamps, and lightweight brackets. The short version works well in hard, dense materials, while the long version provides more surface area for a better grip in softer or more questionable base materials.
Split Drive Anchors
Split drive anchors are one-piece, light-duty fasteners known for their exceptionally simple installation. They feature a split, expanding base and a rounded or flat head. An installer simply drills a hole of the correct diameter and hammers the anchor in until the head is seated against the fixture. The compression force of the concrete on the split base creates the holding power.
These types of concrete anchors are best for static, light to medium-duty applications in concrete or masonry. Installers often use them for:
- Securing cabinets and shelves
- Attaching electrical fixtures
- Fastening cladding materials
Important Limitation: Split drive anchors have a limited weight capacity compared to other metal anchors. A professional should not use them in outdoor or damp environments, as they are typically made from zinc-plated steel. They also lack high vibration resistance.
The following table summarizes the general load capacities for these concrete anchor types.
| Type d'ancre | Applications courantes | Typical Load Range |
|---|---|---|
| Strike Anchors | Furring strips, junction boxes | Medium-duty (100-500 lbs) |
| Lag Shield Anchors | Signs, pipe clamps | Light-duty (Under 100 lbs) |
| Split Drive Anchors | Shelves, electrical fixtures | Light to medium-duty |
How to Calculate Load and Select Anchor Size
Properly choosing expansion bolts requires a professional to perform careful calculations. This process ensures the selected fastener can safely handle all anticipated forces throughout its service life. The selection process moves from understanding the load requirements to applying a safety factor and finally to interpreting manufacturer specifications.
Step 1: Determine the Load Requirements
The first step in any fastening project is to quantify the forces the anchor must resist. A professional must identify and calculate all potential loads to determine the maximum weight the anchor needs to support. These loads fall into distinct categories based on their source and direction.
Calculating Dead Loads (Static Weight)
Dead loads are constant, unchanging forces. They include the self-weight of the structure and any permanently attached fixtures. A specifier calculates dead loads by multiplying the volume of an object by the unit weight of its material.
For example, to find the dead load of a concrete slab, an engineer uses a simple formula:
Dead Load per Area = Slab Thickness × Unit Weight of ConcreteA concrete slab that is 0.25 meters thick with a material unit weight of 25 kN/m³ would have a dead load of 6.25 kN/m².
Professionals find the unit weights for common materials in engineering handbooks and building codes.
Identifying Live Loads (Dynamic Forces)
Live loads are temporary or moving forces. They are much more difficult to predict than dead loads. These forces come from furniture, equipment, occupants, snow, and wind. Due to their variable nature, professionals do not calculate live loads from scratch. Instead, they refer to design codes and standards like ASCE 7-16. These documents provide standardized live load values for different types of buildings and occupancies, ensuring a consistent and safe approach.
Understanding Tensile vs. Shear Forces
Forces also act in different directions, which significantly impacts anchor performance. An installer must consider two primary force types:
- Tensile Force: This is a pulling force that tries to pull the anchor straight out of the concrete.
- Shear Force: This is a sideways force that acts perpendicular to the anchor, trying to slice it off.
An anchor’s capacity to resist these forces depends on concrete strength, embedment depth, and spacing. When tensile and shear forces act on an anchor simultaneously, its overall strength is reduced. This interaction is critical; an anchor that is strong enough for a tensile load alone may fail when a shear load is also applied.
Step 2: Apply the 4:1 Safety Factor
Safety is the most important consideration in structural fastening. A professional never designs a connection to meet only the minimum calculated load. Instead, they apply a safety factor to create a crucial buffer between the expected load and the anchor’s breaking point.
What is a Safety Factor?
A safety factor is a multiplier applied to the calculated working load to determine the required minimum strength of a fastener. For static loads, the industry standard is a 4:1 safety factor. This means the anchor must be at least four times stronger than the load it is expected to hold. This accounts for unforeseen circumstances, material variations, and degradation over time.
How to Calculate Your Minimum SWL
To determine the required strength, a professional first calculates the total load. Then, they apply the safety factor.
- Calculate Total Load:
Total Load = Dead Load + Live Load - Apply Safety Factor:
Minimum Required SWL = Total Load × 4
The result of this calculation gives the minimum Safe Working Load (SWL) that the selected anchor must have. This ensures the connection remains secure well below its ultimate failure point.
Step 3: Read Manufacturer Load Charts
After calculating the minimum required SWL, the next step is to consult the technical data sheets provided by the anchor manufacturer. These charts contain the performance data needed to select the correct size and type of anchor for the specific requirements of the job.
Safe Working Load (SWL) vs. Ultimate Load
Manufacturer charts list two important values:
- Ultimate Load: This is the force at which the anchor failed during laboratory testing. A professional should never use this value for design purposes.
- Safe Working Load (SWL): Also called the Allowable or Design Load, this is the maximum load the manufacturer recommends for the anchor. This value already has a safety factor (typically 4:1) built-in.
A specifier must ensure the anchor’s listed SWL is greater than or equal to the minimum required SWL calculated in the previous step.
How Embedment Depth Affects Strength
Load charts show that an anchor’s strength is not a single number. It changes based on several factors, primarily embedment depth and the compressive strength of the concrete. Deeper embedment gives the anchor more concrete to grip, increasing its pull-out resistance. Likewise, stronger concrete (measured in PSI) provides a more robust base material, which also increases holding power.
The following chart illustrates how allowable tension loads for an anchor increase with deeper embedment and higher-strength concrete.
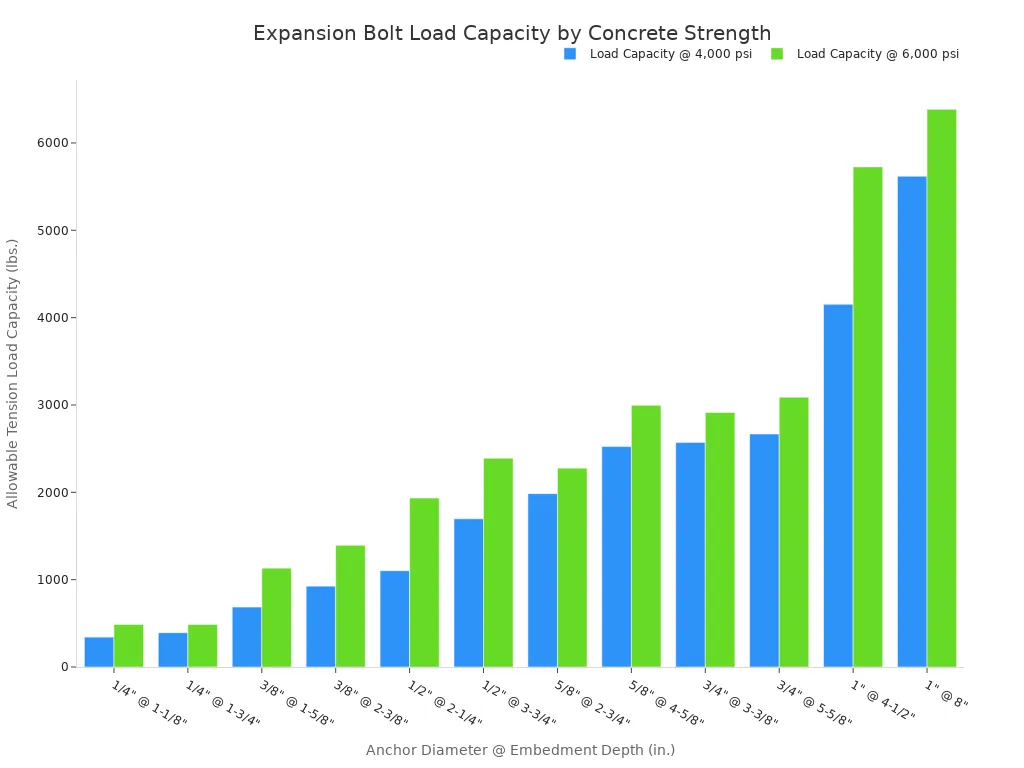
As shown, a 1/2″ anchor embedded 2-1/4″ deep in 4,000 PSI concrete has an allowable load of 1,103 lbs. Increasing the embedment to 3-3/4″ raises that capacity to 1,697 lbs. A professional uses these tables to find a diameter and embedment combination that safely exceeds the project’s calculated load.
Assessing Your Concrete and Environment
A successful fastening project depends on more than just the anchor itself. A professional must thoroughly evaluate the concrete base material and the surrounding environment. This assessment ensures the chosen fastener will perform safely and have a long service life.
Evaluating the Base Material
The condition and type of concrete are critical factors that directly influence an expansion bolt’s holding power. An installer must verify the concrete’s suitability before drilling the first hole.
Cured vs. “Green” Concrete
Expansion anchors require fully cured concrete to achieve their specified strength. Concrete cures over time, gaining compressive strength in the process. Installing an anchor in “green” or uncured concrete is a critical error. The expansion forces can easily damage the soft material, leading to a weak connection or complete failure.
💡 Rule of Thumb: Most concrete requires at least 28 days to reach its designed compressive strength. Always verify the concrete’s age and cure status before installation.
Checking for Cracks, Voids, or Spalling
A visual inspection of the concrete surface is essential. An installer looks for pre-existing cracks, voids (hollow spots), or spalling (flaking or chipped surfaces). Fastening into or near these defects significantly compromises the anchor’s capacity. If the concrete quality is questionable, a professional may need to select a different location or use a specialized anchor designed for cracked concrete.
Light vs. Normal Weight Concrete
Concrete is not all the same. It can be normal weight or lightweight, which affects its density and strength. Lightweight concrete has lower compressive strength, which reduces the holding power of expansion anchors. As the concrete’s compressive strength increases, so does the anchor’s tension capacity.
| Taille de l'ancre | Embedment Depth | Concrete Strength (PSI) | Tension Capacity (lbs) | Shear Capacity (lbs) |
|---|---|---|---|---|
| 3/8-inch | 2-3/8 inch | 2,500 | 3,485 | 2,540 |
| 3/8-inch | 2-3/8 inch | 6,000 | 5,400 | 2,540 |
The Importance of Concrete Thickness
The thickness of the concrete slab or wall limits the anchor’s embedment depth. This relationship is crucial for preventing base material failure.
Matching Embedment Depth to Thickness
An installer must select an anchor with an embedment depth appropriate for the concrete’s thickness. A general guideline is that the concrete thickness should be at least 1.5 times the anchor embedment depth. This ensures there is enough material to support the stress cone created by the anchor.
How to Prevent Concrete “Blowout”
Concrete “blowout” occurs when an anchor is installed too deep in thin concrete. The expansion force pushes a cone of concrete out from the opposite side, causing a catastrophic failure. Adhering to the manufacturer’s minimum thickness requirements is the only way to prevent this.
Choosing the Right Material for Durability
The anchor’s material must be able to withstand the environmental conditions of the installation site. Choosing the wrong material can lead to premature corrosion and failure.
Indoor Use: Zinc-Plated Carbon Steel
For dry, indoor applications, zinc-plated carbon steel is the standard and most economical choice. The zinc coating provides a minimal layer of corrosion protection suitable for controlled interior environments.
Outdoor/Wet Use: Hot-Dip Galvanized Steel
When fasteners are exposed to moisture or outdoor elements, hot-dip galvanized steel is necessary. This process applies a thick, durable layer of zinc that offers substantial protection against rust and corrosion.
Corrosive Environments: Stainless Steel (304 & 316)
For the harshest conditions, stainless steel is the superior choice.
- Acier inoxydable de type 304 is ideal for freshwater environments and areas with chemical exposure.
- Acier inoxydable de type 316 contains molybdenum, giving it maximum corrosion resistance. It is essential for saltwater and coastal marine environments.
In marine settings, a galvanized fastener may only last a few years, while a Type 316 stainless steel fastener can last for a decade or more. This longevity makes it the safest choice for critical applications near the coast.
A Guide to Proper Expansion Bolt Installation

Selecting the right anchor is only half the battle; its performance depends entirely on correct installation. A professional follows a meticulous process, using specific tools and techniques to ensure the connection is safe and achieves its full engineered strength. This commitment to proper installation is what separates a reliable fixture from a potential failure.
Essential Tools for the Job
Using the correct equipment is the first step toward a successful outcome. A professional installer’s toolkit contains specific items designed for precision and safety. Major manufacturers recommend a core set of tools for any expansion bolt project.
- Hammer drill
- Correctly sized carbide drill bit
- Marteau
- Properly sized machine bolt/screw
Hammer Drill and ANSI-Standard Carbide Bits
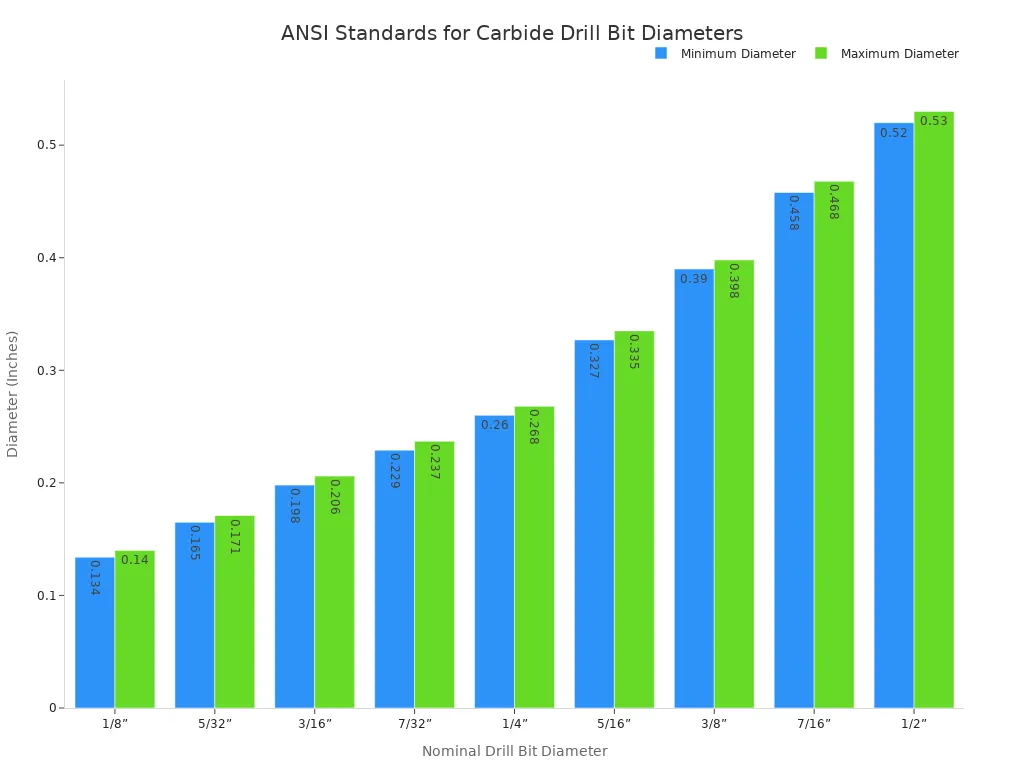
A rotary hammer or hammer drill is essential for efficiently drilling into concrete. The quality of the drill bit is equally important. Professionals use carbide-tipped bits that meet the American National Standards Institute (ANSI) standard B212.15. This standard dictates a very tight tolerance for the bit’s diameter, ensuring the drilled hole is not too large or too small for the anchor.
Hole Cleaning Tools: Wire Brush and Air Blower
A wire brush and a source of compressed air (like a hand pump or air blower) are non-negotiable. These tools remove the concrete dust and debris left behind after drilling. A clean hole is critical for achieving the anchor’s maximum holding power.
Calibrated Torque Wrench
For torque-controlled anchors like wedge anchors, a calibrated torque wrench is mandatory. It allows the installer to apply the exact amount of rotational force specified by the manufacturer, ensuring the expansion mechanism is properly engaged without over-stressing the bolt or the concrete.
The Drilling Process
The drilling phase requires precision. The diameter and depth of the hole must perfectly match the requirements of the selected fastener.
Matching Drill Bit Diameter to the Anchor
The relationship between the drill bit diameter and the anchor diameter is critical. For many common fasteners, such as wedge and sleeve anchors, the rule is simple: the drill bit diameter is the same as the anchor diameter. However, this is not a universal rule. Other types of anchors require a hole that is larger than the fastener itself. An installer must always follow the manufacturer’s directions, as the specified hole size is integral to the product’s performance testing.
| Type d'ancre | Taille de l'ancre | Drill Bit Size |
|---|---|---|
| Ancres à clavettes | Any | Same as Anchor |
| Ancres à douille | Any | Same as Anchor |
| Drop-In Anchors | 1/4″ | 3/8″ |
| 3/8″ | 1/2″ | |
| Lag Screw Shields | 1/4″ | 1/2″ |
| 3/8″ | 5/8″ |
Drilling to the Correct Depth
An installer must drill the hole to the minimum depth specified in the anchor’s technical data. This ensures the fastener achieves the required embedment. Drilling too shallow prevents the anchor from being set correctly, while drilling too deep can be inefficient and may cause issues with setting certain anchor types.
The Critical Step: Cleaning the Drilled Hole
Many fastener failures can be traced back to a single, overlooked step: cleaning the hole. This simple action has a massive impact on the final strength of the installation.
Why Debris Reduces Holding Power
Concrete dust acts as a lubricant. If left in the hole, it prevents the expansion sleeve from making solid contact with the base material. This dramatically reduces the friction needed for the anchor to resist pull-out forces, compromising its load capacity.
The Brush-Blow-Brush-Blow Method
Professionals use a simple yet effective procedure to guarantee a clean hole. An installer inserts a wire brush to the bottom of the hole and scrubs the sides. Then, they use an air blower to force all the loose dust out. They repeat this process—brush, then blow—at least twice to ensure the hole is completely free of debris.
Setting the Anchor and Applying Torque
With the hole drilled and cleaned, the final steps of the installation involve physically setting the fastener and applying the precise amount of torque. This stage activates the anchor’s expansion mechanism, creating the secure connection that will support the intended load. A professional executes this phase with precision to guarantee a safe and reliable outcome.
Tapping the Anchor into Place
An installer first positions the fixture over the drilled hole. They then insert the anchor through the fixture and into the concrete. For a wedge anchor, the installer gently taps the nut end with a hammer. This drives the fastener into the hole until the washer rests firmly against the surface of the fixture. This process should be done carefully to avoid damaging the threads on the bolt. For a drop-in anchor, the installer uses a setting tool to expand the anchor before inserting a bolt.
💡 Conseil de pro : When setting a wedge anchor, an installer should leave the nut on the end of the threads. This protects the threads from being damaged by the hammer strikes.
Following Manufacturer Torque Specifications
Applying the correct torque is the most critical part of the installation for torque-controlled fasteners. This rotational force pulls the expansion clip into the sleeve, generating the outward pressure that locks the anchor into the concrete. Using a calibrated torque wrench is not optional; it is essential for meeting the manufacturer’s requirements.
- Under-torquing fails to expand the sleeve sufficiently, resulting in a weak hold that could pull out under load.
- Over-torquing can stress the bolt beyond its yield point, causing it to break. It can also crack the surrounding concrete, leading to a complete failure of the connection.
Torque values are not universal. They vary based on the anchor’s diameter, material grade, and surface coating. A galvanized coating, for example, increases friction and requires a higher torque value than a plain or lubricated bolt. A professional always consults the technical data for the specific fastener.
| Bolt Size | Material Grade | Tightening Torque (ft lbs) – Plain | Tightening Torque (ft lbs) – Galv | Tightening Torque (ft lbs) – Galv+Waxed |
|---|---|---|---|---|
| 3/8″ | ASTM A307 | 12 | 15 | 6 |
| 1/2″ | ASTM A307 | 29 | 37 | 15 |
| 3/8″ | ASTM A449 / SAE Grade 5 | 31 | 39 | 15 |
| 1/2″ | ASTM A449 / SAE Grade 5 | 75 | 94 | 38 |
| 5/8″ | ASTM A325 | 198 – 240 | N/A | 99 – 120 |
Following these specifications ensures the fastener performs exactly as engineered, completing a safe and durable installation.
Best Practices for Installation Spacing
A professional understands that the placement of an expansion bolt is as critical as the installation technique. The concrete surrounding the fastener must be sufficient to handle the immense expansion forces. Following best practices for installation spacing ensures the base material does not become the point of failure. This involves respecting two key measurements: the distance from an edge and the spacing between adjacent fasteners.
Maintaining Minimum Edge Distance
The location of an anchor relative to the edge of a concrete slab or wall directly impacts its performance. Placing a fastener too close to an unsupported edge is a common and dangerous mistake.
What is Edge Distance?
Edge distance is the measurement from the centerline of an anchor to the nearest free edge of the concrete. When an expansion bolt is tightened, it exerts outward pressure, creating a cone of stress in the concrete. If this stress cone reaches an edge, it can cause the concrete to crack and break away, a failure known as “blowout.” To prevent this, installers must adhere to minimum edge distance requirements.
- A general guideline for wedge anchors suggests a minimum edge distance of 5 anchor diameters from an unsupported edge.
- Inadequate edge distance can lead to severe concrete cracking and a drastic reduction in load capacity.
- Ultimately, failing to maintain proper distance can cause a complete anchor failure.
Finding Edge Distance on a Technical Data Sheet
Manufacturers provide precise minimum edge distance values on the technical data sheet for each product. A professional always consults this document before drilling. These specifications are not suggestions; they are requirements based on extensive laboratory testing. Following these values is essential for a safe and reliable connection.
Ensuring Minimum Anchor Spacing
When a project requires multiple fasteners in a group, the distance between them becomes just as important as the edge distance. This measurement is known as anchor spacing.
Why Spacing Between Anchors Matters
Each anchor creates its own cone of stress within the concrete. If two fasteners are installed too close together, their stress cones will overlap. This overlap creates a weak point between the fasteners, significantly reducing the pull-out capacity of the entire group. The concrete in the overlapping zone is essentially being pulled in two different directions, making it highly susceptible to failure under load.
How to Avoid Overlapping Stress Cones
Professionals use established guidelines to prevent stress cone overlap. A common rule recommends a minimum spacing of 3 times the effective embedment depth (3*hef). Other guidelines suggest a minimum spacing of at least 12 times the fastener’s diameter. For full load capacity, some manufacturers recommend a spacing of 16 times the diameter. These best practices for installation ensure each fastener can develop its full holding power without interfering with its neighbors. A specifier must always check the manufacturer’s data for the exact spacing requirements for the specific anchor being used.
Comparing Alternatives When Choosing Concrete Anchors
A professional specifier understands that expansion anchors are not the only solution for fastening to concrete. The selection process often involves comparing different concrete anchor types to find the best fit for a project’s specific demands. Two common alternatives are concrete screws and adhesive anchors, each with distinct advantages and limitations.
Expansion Anchors vs. Concrete Screws
Concrete screws, often known by brand names like Tapcon®, offer a different fastening mechanism than expansion bolts. A professional evaluates their unique characteristics for light to medium-duty tasks.
Strength and Application Differences
Concrete screws are designed for light and medium-duty loads. They function by cutting their own threads directly into the concrete, creating a secure connection. This makes them ideal for fastening electrical boxes, furring strips, and window frames. In contrast, expansion anchors generate much higher holding power through friction and are necessary for heavy structural loads like pallet racking or support columns.
Removability and Reusability
A primary advantage of concrete screws is their removability. An installer can easily back them out, making them perfect for temporary installations or fixtures that may need adjustment. Most expansion anchors, once set, create a permanent connection and cannot be removed without damaging the concrete.
Expansion Anchors vs. Adhesive (Epoxy) Anchors
Adhesive anchors, also known as epoxy anchors, use a chemical bond to secure a threaded rod into concrete. They represent one of the strongest concrete anchor types available.
Load Capacity and Performance
Adhesive anchors often provide superior load capacity, particularly in challenging conditions. Professionals recognize their enhanced security, as the adhesive distributes stress throughout the anchor, rather than concentrating it at one point. This characteristic significantly reduces the likelihood of the base material cracking. Adhesive anchors are highly effective in cracked concrete because their resin forms a powerful bond with the existing aggregate. While mechanical anchors provide a robust initial interlock, adhesive systems are often preferred in high-vibration environments because they are less prone to loosening over time.
Installation Complexity and Cure Time
The installation of an adhesive anchor is more involved. It requires meticulous hole cleaning, injecting the two-part epoxy, and inserting the threaded rod. The most significant difference is the need for cure time.
⏱️ Cure Time is Critical: An adhesive anchor cannot be loaded until the epoxy has fully hardened, a process that can take from a few hours to over a day depending on the product and ambient temperature. This contrasts with expansion anchors, which can handle their full load immediately after proper torquing, making them a better choice for a time-sensitive application.
A successful project hinges on a clear formula when choosing expansion bolts: correct selection, precise calculation, and meticulous installation. A professional prioritizes safety, applying a 4:1 safety factor and matching the anchor material to the environment for long-term durability. Ultimately, proper installation is non-negotiable. Even the best anchor fails without it, making correct drilling, cleaning, and torquing essential for optimal performance.
FAQ
Can an expansion bolt be reused?
A professional should never reuse an expansion bolt. Once set, the anchor’s expansion mechanism permanently deforms. Removing and reinstalling it compromises its holding power and creates a significant safety risk. A new anchor is always required for a new installation.
What happens if the hole is not cleaned?
Failure to clean the drilled hole drastically reduces an anchor’s strength. Concrete dust acts as a lubricant, preventing the anchor from properly gripping the base material. This can lead to the anchor pulling out under a much lower load than its design capacity.
Why is a torque wrench necessary?
A calibrated torque wrench ensures an installer applies the precise rotational force specified by the manufacturer.
- Under-torquing results in a weak hold.
- Over-torquing can break the bolt or crack the concrete. Proper torque is essential for activating the anchor correctly and safely.
Can expansion bolts be used in brick?
Some expansion bolts, like ancrages à manchon, are suitable for brick or block. However, heavy-duty wedge anchors are not. A professional must always verify the anchor’s specifications. Using the wrong anchor in a hollow or soft material can cause the base material to fail.
How long do expansion bolts last?
The lifespan of an expansion bolt depends on its material and environment.
A zinc-plated bolt may last for decades indoors. In a wet or coastal setting, a hot-dip galvanized or stainless steel anchor is necessary to prevent corrosion and ensure long-term structural integrity.
What is the strongest type of concrete anchor?
For pure strength, adhesive (epoxy) anchors often provide the highest load capacities. They distribute stress over a large area and bond chemically with the concrete. Among mechanical anchors, heavy-duty wedge anchors are typically the strongest option for solid concrete applications.