Selecting the correct expansion bolts from the many available options is critical for a secure installation. This guide to the top 10 bolts for concrete simplifies the choice.
Top Recommendations at a Glance:
- #1 Wedge Anchor: Professionals choose this concrete anchor bolt for its unmatched holding power in heavy-duty structural applications.
- #2 Sleeve Anchor: Its adaptability makes it a go-to for medium-duty tasks across concrete, brick, and block.
- #3 Hammer Drive Anchor: This option provides the fastest installation for light-duty, static-load projects.
While many standard Anchor Bolts exist, a custom fasteners manufacturer can produce custom anchor bolts for specialized project requirements.
A Detailed Review of the Top 10 Expansion Bolts
Choosing the right hardware is the most important step for a secure and lasting installation. This detailed review of the top 10 bolts for concrete explores the specific uses and advantages of each type, starting with the most common and powerful expansion bolts available.
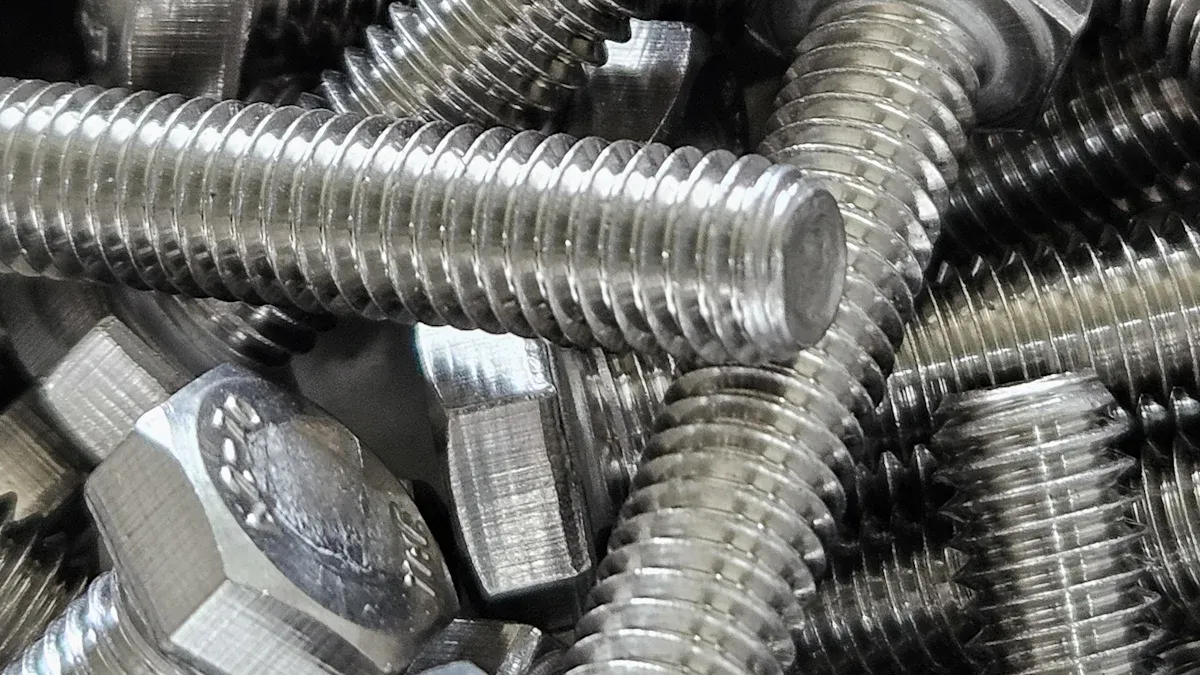
1. Wedge Anchor
A wedge anchor bolt is a fully threaded, torque-controlled anchor designed exclusively for solid concrete. Installers drill a hole, insert the anchor, and tighten the nut. This action pulls the anchor body upward, forcing an expansion clip at the base to wedge tightly against the concrete walls. This mechanism creates immense friction and holding power.
Best Use: Heavy-duty structural anchoring.
Professionals rely on the wedge anchor for critical structural connections. Common applications include securing steel support columns, heavy machinery, pallet racking, and structural ledgers to concrete foundations. Its strength makes it ideal for applications where safety and load-bearing capacity are non-negotiable.
Key Features: High load capacity, through-bolting design.
The anchor’s primary feature is its exceptional capacity to handle both tensile (pull-out) and shear (side-to-side) loads. The through-bolting design allows installers to drill through the fixture directly into the concrete, simplifying placement and alignment.
Pro Tip: Load Capacities and Safety Factors The ultimate load capacity of a wedge anchor depends on its diameter, embedment depth, and the concrete’s strength. The values below are for anchors in 4000 PSI uncracked concrete.
Nominal Anchor Diameter (in.) Minimum Embedment Depth (in.) Ultimate Tension Load Capacity (lbs.) Ultimate Shear Load Capacity (lbs.) 1/4″ 1-1/8″ 1,107 2,615 3/8″ 1-5/8″ 2,136 5,510 1/2″ 2-1/4″ 3,084 7,116 5/8″ 2-3/4″ 6,054 9,043 3/4″ 3-3/8″ 7,971 15,723 These ultimate loads must be reduced by a safety factor (minimum of 4.0) to determine the allowable working load. A design professional should be consulted for life-safety applications.

Primary Advantage: Highest holding power in solid concrete.
No other expansion-style anchor matches the wedge anchor’s holding values in solid concrete. Its simple, effective design ensures a reliable and robust connection. For structural use, these anchors must meet strict industry standards.
- ICC-ES AC193: This is the acceptance criteria for post-installed mechanical anchors.
- ACI 318-19 Chapter 17: This code governs anchor design in concrete.
- ACI 355.2: This standard qualifies anchors through rigorous testing.
- ICC-ES Evaluation Reports (ESRs): These reports document an anchor’s compliance and performance.
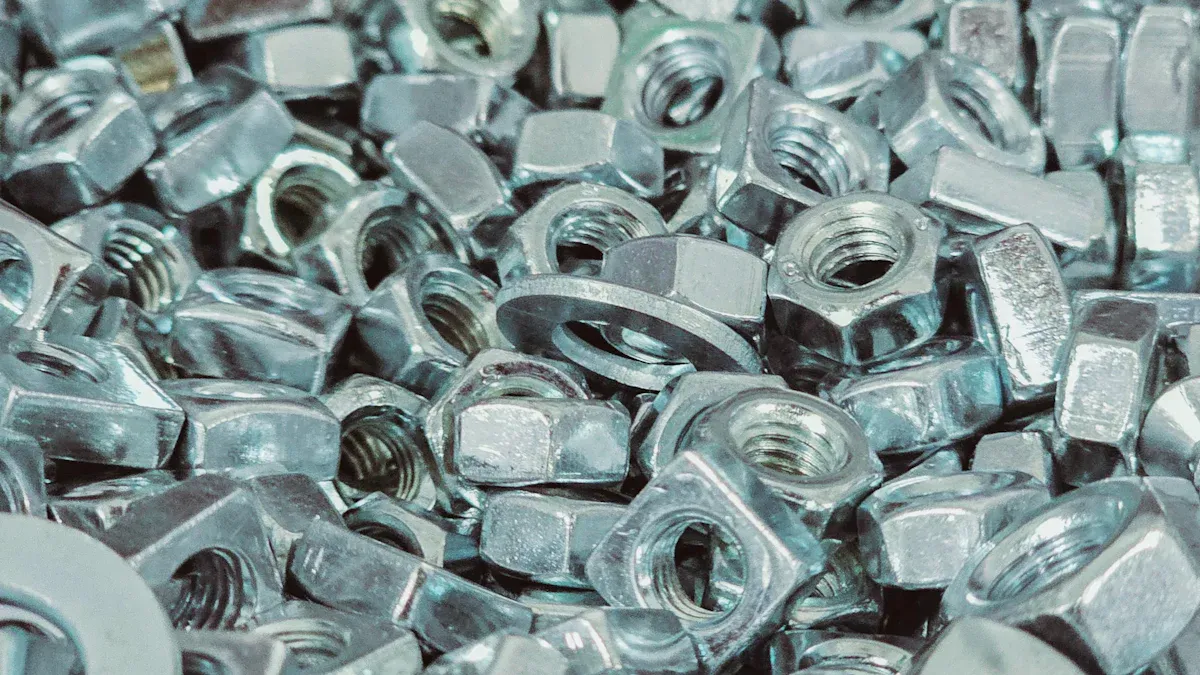
2. Sleeve Anchor
The sleeve anchor bolt is a versatile fastener known for its wide range of applications. It consists of a threaded bolt, a flared cone-shaped expander, and a cylindrical sleeve that runs the length of the anchor. Tightening the head or nut pulls the bolt’s cone into the sleeve, causing the sleeve to expand and press against the walls of the hole.
Best Use: Versatile medium-duty fastening.
This anchor is the jack-of-all-trades for medium-duty projects. It is suitable for fastening items like handrails, window frames, shelves, and HVAC equipment. Its design allows it to work effectively in a variety of base materials.
Key Features: Works in concrete, brick, and block.
The key feature of the sleeve anchor is its adaptability. The expanding sleeve provides a large contact area, which allows it to grip securely not only in solid concrete but also in hollow or weaker materials like brick and concrete block (CMU). This makes it a valuable anchor to have on hand for jobs with unknown or mixed base materials.
Primary Advantage: Adaptable for various base materials.
The primary advantage is its unmatched versatility. While masonry anchors designed only for solid concrete typically offer stronger holding values, the sleeve anchor provides reliable performance across multiple substrates. This adaptability simplifies material lists and makes it a dependable choice for general-purpose fastening in residential and commercial construction.
3. Drop-In Anchor
The drop-in anchor bolt is a female-threaded anchor designed for flush-mounting in solid concrete. It has a cylindrical body with an expansion cone at the bottom. After an installer places the anchor in a pre-drilled hole, they use a special setting tool to drive the internal cone upward, which expands the anchor body securely against the concrete.
Best Use: Overhead applications (e.g., threaded rod).
This anchor is the industry standard for overhead work. It is perfect for suspending threaded rod to hang pipes, sprinkler systems, cable trays, and light fixtures. It is also used in floor applications where a flush surface is required to avoid creating a trip hazard.
Key Features: Female thread, flush-mount finish.
The internal (female) threading is a key feature, allowing an installer to use any bolt or threaded rod of the correct diameter. This provides flexibility in fastener length. Once set, the anchor sits flush with or just below the concrete surface, creating a clean and unobtrusive finish.
Primary Advantage: Creates a permanent, clean anchor point.
The main benefit of the drop-in anchor is its ability to create a permanent and reusable threaded anchor point inside the concrete. An item can be bolted, removed, and re-bolted without compromising the anchor’s integrity. This makes it ideal for machinery or fixtures that may require periodic removal for service.
4. Strike Anchor
The Strike Anchor, also known as a hit anchor, is a heavy-duty, impact-set expansion anchor for solid concrete. It features a body, a nut, a washer, and an internal expander pin. An installer drills a hole, places the anchor through the fixture into the hole, and drives the internal pin with a hammer. This action expands the anchor base, creating a secure, permanent hold.
Best Use: Medium-duty, tamper-resistant fastening.
Strike Anchors are excellent for applications where a secure, non-removable fastening is required. They are commonly used to attach steel plates, support ledgers, and machinery feet to concrete. Their design makes them inherently tamper-resistant once set, providing an added layer of security.
Key Features: Impact-set design.
The defining feature is its installation method. Unlike torque-controlled anchors, the Strike Anchor sets through the force of a hammer blow. This makes the installation process straightforward and visually verifiable. Once the head of the pin is flush with the top of the anchor body, the anchor is properly set.
Primary Advantage: Fast installation and secure hold.
The primary benefit is the combination of installation speed and reliable performance. Installers can set these anchors very quickly without the need for a torque wrench. The positive expansion from the pin drive creates a strong, dependable connection in solid concrete.
Note on Embedment and Load Capacity The embedment depth is critical for a Strike Anchor to achieve its rated load capacity. Manufacturers provide specific data for each anchor size. Deeper embedment generally increases holding power. For example, a common anchor size demonstrates the following capacities in 2000 PSI concrete:
Anchor Size Minimum Embedment Ultimate Pull-Out (lbs.) Ultimate Shear (lbs.) 1/2″ x 4-3/4″ 2″ 2700 5400 Installers must drill the hole at least 1/2 inch deeper than the anchor’s embedment. This extra space allows room for dust and debris, ensuring the anchor sets correctly. Always consult the manufacturer’s technical data to select an anchor with an allowable load that exceeds your project’s design load.
5. Lag Shield Anchor
A Lag Shield Anchor is a two-part expanding shield made from a zinc alloy. It is designed to accept a corresponding diameter lag screw. As an installer drives the lag screw into the shield, the two halves of the anchor expand outward, pressing firmly against the interior walls of the drilled hole in the base material.
Best Use: Fastening items with lag screws.
This anchor is the ideal solution for projects that specify lag screws for attachment. It is frequently used to mount signs, shelving brackets, and pipe supports to concrete and brick masonry. It provides a simple way to create a strong anchor point for this common screw type.
Key Features: Short and long versions available.
Lag Shield Anchors come in two primary lengths to accommodate different base materials, a key feature that enhances their versatility.
- Short Lag Shield Anchors work best in hard, dense base materials like high-strength concrete.
- Long Lag Shield Anchors provide a larger surface area for better grip in softer or lower-grade materials like old concrete or brick.
Primary Advantage: Simple, effective anchoring for lag bolts.
The main advantage is its simplicity and compatibility with standard hardware. It transforms a simple lag screw into a robust masonry anchor. The choice between short and long versions allows professionals to adapt to job site conditions, ensuring a secure hold even in less-than-perfect base materials. Long versions offer significantly higher holding values, especially in larger diameters.

Holding Values for Lag Shield Anchors (2000 PSI Concrete) The following table shows average ultimate pull-out values. A safety factor of 4:1 (25% of the ultimate load) is recommended to determine the safe working load.
Size Type Minimum Embedment Ultimate Pull-Out (lbs.) 1/4” Long 1-1/2″ 225 3/8” Long 2-1/2″ 555 1/2” Long 3″ 1095
6. Split Drive Anchor
The Split Drive Anchor is a one-piece, pre-expanded anchor with a flat or rounded head. It features a split at the base with two pre-expanded legs. When an installer drives the anchor into a properly sized hole in concrete, the two legs compress and then spring back, wedging the anchor permanently in place.
Best Use: Light-duty, permanent anchoring.
This anchor is designed for light-duty, static load applications where speed and permanence are desired. Common uses include fastening electrical junction boxes, conduit clips, roof flashing, and maintenance signs to solid concrete. It is a permanent anchor and cannot be removed without damaging the concrete.
Key Features: One-piece design with a split end.
Its key feature is its extreme simplicity. As a single-component anchor, it requires no assembly and has no nuts to tighten. The pre-formed split at the base is the entire expansion mechanism, making it one of the most basic mechanical anchors available.
Primary Advantage: Extremely simple and quick to install.
The Split Drive Anchor offers one of the fastest installation processes of any concrete anchor. An installer simply drills a hole and hammers the anchor until it is flush with the surface. This simplicity makes it highly efficient for repetitive fastening tasks. Its installation speed is much faster than a multi-step epoxy anchor bolt, which requires hole cleaning, injection, and cure time.
7. Hammer Drive Anchor (Zamac Nail-In)
The Hammer Drive Anchor is a light-duty anchor consisting of a zamac alloy body and a pre-inserted steel or stainless steel pin. An installer drills a hole through the fixture into the concrete, inserts the anchor, and hammers the pin. Driving the pin forces the anchor’s split body to expand, locking it securely into the concrete.
Best Use: Light-duty fastening of furring strips or signs.
This anchor excels in high-volume, light-duty applications. It is the preferred choice for attaching wood furring strips, electrical boxes, conduit straps, and lightweight signage to concrete or block walls. Its design is optimized for speed in repetitive tasks where loads are static and minimal.
Key Features: Nail-in pin for expansion.
The defining feature is its integrated nail-like pin, which acts as the expansion mechanism. This two-part, pre-assembled design simplifies handling and installation. The anchor body is typically made from a corrosion-resistant zinc alloy called zamac, making it suitable for indoor and some protected outdoor environments.
Primary Advantage: Fastest installation for light loads.
The primary advantage of the Hammer Drive Anchor is its unmatched installation speed. The simple drill-and-hammer process takes only seconds per anchor. This efficiency makes it far superior to a multi-step epoxy anchor bolt, which requires extensive hole preparation and cure time, for light-duty, non-structural jobs.
8. Stainless Steel Wedge Anchor
The Stainless Steel Wedge Anchor is a specialized version of the standard wedge anchor, manufactured from stainless steel instead of carbon steel. It functions identically, using a torque-controlled mechanism to expand a clip at its base. Its purpose is to provide the high strength of a wedge anchor in environments where corrosion is a primary concern.
Best Use: Outdoor or corrosive environments.
Installers use this anchor for structural and non-structural connections exposed to weather, moisture, and chemicals. Applications include attaching railings on coastal balconies, securing equipment in food processing plants, and anchoring structures in wastewater treatment facilities.
Key Features: 304 or 316 stainless steel construction.
Its key feature is its material composition. These anchors are available in two main grades of stainless steel, each suited for different levels of corrosive exposure.
- Type 304 Stainless Steel: Offers good corrosion resistance in freshwater and general atmospheric conditions.
- Type 316 Stainless Steel: Contains added molybdenum, providing superior protection against chlorides found in saltwater and de-icing salts.
Primary Advantage: Superior corrosion and rust resistance.
The main benefit is its ability to maintain structural integrity and appearance over time in harsh conditions. Choosing the correct grade is critical for long-term safety and performance. While Type 304 is sufficient for many outdoor projects, Type 316 is mandatory for marine applications.
Pro Tip: Choosing Between 304 and 316 Stainless Steel The chemical makeup of the steel dictates its performance. The addition of molybdenum in 316-grade stainless steel provides the necessary resistance to chloride-induced corrosion, making it the only suitable choice for saltwater environments.
Feature 304 Stainless Steel 316 Stainless Steel Composition 18% chromium, 8% nickel 16% chromium, 10% nickel, 2-3% molybdenum Corrosion Resistance Good for freshwater and mild environments Superior – marine-grade, saltwater resistant Saltwater Use Not recommended – will eventually corrode Required – designed for saltwater exposure Cost Less expensive Typically 20-30% more than 304 Best Applications Freshwater docks, inland architectural jobs Coastal infrastructure, saltwater piers, chemical plants
9. Titen HD Heavy-Duty Screw Anchor
The Titen HD is a high-strength screw anchor that installs directly into concrete. Unlike expansion anchors, it does not use a sleeve or wedge. Instead, its specialized, serrated threads tap into the concrete, creating a secure mechanical interlock. An installer drills a pilot hole and simply drives the screw in with an impact wrench or ratchet.
Best Use: High-load applications requiring removability.
This anchor is ideal for heavy-duty jobs where future removal might be necessary. Common uses include temporary bracing, racking installation, formwork, and seating attachment. Its ability to be removed and reinstalled (in a new hole) makes it highly versatile for both permanent and temporary fixtures.
Key Features: Serrated threads cut into concrete.
The anchor’s patented thread design is its most important feature. These threads are engineered to cut into the concrete efficiently while resisting pull-out forces. This design allows for a fast, simple installation without the high stress points created by traditional expansion anchors.
Primary Advantage: Removable and approved for cracked concrete.
The Titen HD offers two major advantages. First, it is fully removable, leaving a clean hole that can be easily patched. Second, many versions carry an ICC-ES approval for use in both cracked and uncracked concrete. This makes it a reliable choice for modern construction where seismic and structural codes require anchors qualified for cracked concrete conditions.
10. Shield Anchor (Heavy-Duty)
The Heavy-Duty Shield Anchor is a multi-piece mechanical anchor designed for high-load capacity, especially in questionable or lower-strength concrete. It typically consists of a threaded stud, a cone-shaped nut, and a robust, multi-part expansion shield. An installer tightens the nut, which pulls the cone into the shield. This action forces the shield segments to expand outward with immense force, creating a powerful grip inside the hole.
Best Use: Securing machinery or in weak concrete.
This anchor is the premier choice for securing heavy, vibrating machinery to concrete floors. Its design makes it suitable for anchoring large lathes, presses, and industrial equipment. Professionals also turn to the Shield Anchor for projects involving older, cracked, or low-strength concrete where the concentrated stress from a wedge anchor could cause the base material to fail.
Key Features: Large expansion shield for wide load distribution.
Its defining feature is the large, heavy-duty shield that provides a full 360-degree contact area within the drilled hole. Unlike anchors that expand at a single point, the shield distributes the expansion force and the subsequent load over a much larger surface area of the concrete. This feature is critical for performance and safety.
Anchor Performance in Sub-Optimal Concrete ⚙️ The large bearing surface of the shield is what makes this anchor so effective. It minimizes the pressure (pounds per square inch) exerted on the concrete wall, reducing the risk of a blowout or cracking in the base material.
Primary Advantage: Excellent performance in lower-strength base materials.
The primary advantage of the Shield Anchor is its reliability in less-than-ideal conditions. The wide load distribution allows it to achieve high holding values in base materials that might not support other anchor types. The design provides a more forgiving installation in softer or older concrete by creating a superior grip across a wider area. This mechanical interlock provides immediate load-bearing strength, unlike a chemical epoxy anchor bolt which requires a specific cure time before it can be loaded. This makes it an invaluable problem-solver for challenging anchoring situations.
Quick Comparison of Top Concrete Anchor Bolts
Choosing the right fastener requires a quick way to compare key performance metrics. This section provides a snapshot of how these top anchors stack up against each other in load capacity, material durability, and installation requirements.
Anchor Performance at a Glance
Anchor Type vs. Load Rating
An anchor’s load rating is its most critical specification. Anchors fall into distinct duty categories based on their design and holding power.
- Heavy-Duty (Over 1000 lbs): Wedge Anchors, Titen HD Screw Anchors, and Heavy-Duty Shield Anchors provide the highest capacities for structural and machinery applications.
- Medium-Duty (200-1000 lbs): Sleeve Anchors, Strike Anchors, and Lag Shield Anchors offer reliable strength for general-purpose fastening.
- Light-Duty (Under 200 lbs): Hammer Drive, Split Drive, and Drop-In anchors are designed for static, low-load tasks.
Comparing Load Data Correctly ⚠️ Manufacturers may publish ultimate holding values or safe working loads. The safe working load is typically 25% of the ultimate load. To compare different products, an installer must either multiply the safe working load by 4 or divide the ultimate load by 4. Consistent anchor diameters, concrete PSI ratings, and embedment depths are also essential for an accurate comparison.
Load ratings vary significantly by size. For example, a manufacturer’s data for a Sleeve Anchor might look like this:
| Anchor Diameter | Pull-Out (lbs.) | Shear (lbs.) |
|---|---|---|
| 1/2″ | 2925 | 2855 |
| 5/8″ | 5185 | 7120 |
Material vs. Corrosion Resistance
The anchor’s material dictates its lifespan in different environments. Selecting the wrong material can lead to premature failure from rust and corrosion.
| Material | Corrosion Resistance | Best Environment |
|---|---|---|
| Zinc-Plated Carbon Steel | Low | Indoor, dry conditions only. |
| Zamac Alloy | Moderate | Indoor or protected outdoor areas. |
| 304 Stainless Steel | High | Outdoor, freshwater, and humid areas. |
| 316 Stainless Steel | Superior | Marine, saltwater, and chemical exposure. |
Installation Ease vs. Application
Installation speed often correlates with the anchor’s complexity and load rating. Simple, fast-installing concrete anchor bolts are ideal for light-duty, repetitive tasks, while high-strength anchors require more steps. For instance, the multi-step process for an epoxy anchor bolt is much slower than a simple mechanical anchor.
| Installation Ease | Anchor Type(s) | Typical Application |
|---|---|---|
| Fastest | Hammer Drive, Split Drive | Repetitive light-duty fastening (e.g., furring strips). |
| Fast | Strike Anchor, Titen HD | Medium to heavy-duty fastening where speed is key. |
| Standard | Wedge Anchor, Sleeve Anchor | General-purpose fastening requiring a torque wrench. |
| Requires Special Tool | Drop-In Anchor | Overhead applications needing a setting tool. |
Key Factors for Selecting Concrete Anchor Bolts
Selecting the right fastener involves more than just picking one from a list. A professional installer evaluates three critical factors to ensure a safe and durable connection: the load requirements, the condition of the concrete, and the surrounding environment. A thorough assessment of these elements guarantees the anchor’s long-term performance.
Assess Your Load Requirements
The first step is to determine the weight and forces the anchor must support. Manufacturers provide load data for their concrete anchor bolts, but an installer must understand how to interpret these values for a specific application.
Understanding Tensile and Shear Loads
Every connection is subject to two primary forces.
- Tensile Load: This is a pull-out force that tries to pull the anchor straight out of the hole. Hanging a heavy light fixture creates a tensile load.
- Shear Load: This is a side-to-side force that acts perpendicular to the anchor. A ledger board attached to a wall experiences shear load from the weight it supports.
Light-Duty Applications (Under 200 lbs)
For light, static loads, installers often choose anchors designed for speed and simplicity. These applications include mounting signs, conduit straps, or small shelves. Hammer Drive and Split Drive anchors are excellent choices for these tasks.
Medium-Duty Applications (200-1000 lbs)
Medium-duty projects require a balance of strength and versatility. Fastening handrails, shelving, and window frames falls into this category. Sleeve Anchors and Lag Shield Anchors provide reliable holding power for these general-purpose jobs.
Heavy-Duty Applications (Over 1000 lbs)
Heavy-duty applications demand the highest level of performance for structural integrity and safety. These include securing machinery, support columns, and pallet racking. Wedge Anchors and Titen HD anchors are engineered for these high-stress connections. The anchor’s diameter and embedment depth directly impact its capacity.
Allowable Load Capacities for Wedge Anchors (4000 PSI Concrete)
Diameter (in.) Minimum Embedment Depth (in.) Allowable Tension Load (lbs.) Allowable Shear Load (lbs.) 1/2″ 2-1/4″ 1,103 1,614 3/4″ 3-3/8″ 2,571 3,716 1″ 4-1/2″ 4,153 7,107 Note: These values use a safety factor of 4.0. Always consult engineering specifications for life-safety applications.

Evaluate the Concrete Condition
The base material itself is a major factor in anchor performance. Not all concrete is the same, and its condition directly affects an anchor’s holding power.
Cracked vs. Uncracked Concrete
Modern building codes often require designers to assume concrete will crack under load. A crack running through a drilled hole can significantly reduce an anchor’s capacity, sometimes by 25% or more. Standard expansion bolts may lose their preload in a crack. Installers must use concrete anchor bolts specifically qualified for cracked concrete in these situations, as they are designed with “follow-up expansion” to maintain their grip.
Concrete Strength and Age
Older concrete may have a lower compressive strength (PSI) than new concrete. An installer should select an anchor that performs well in weaker base materials, such as a Heavy-Duty Shield Anchor, which distributes the load over a larger area.
Proximity to Edges and Other Anchors
Anchors installed too close to an edge or to each other can cause the concrete to break out. Manufacturers specify minimum edge and spacing distances for each anchor. Adhering to these guidelines is essential to prevent connection failure.
Match the Bolt to the Environment
The anchor’s material must be able to withstand its surrounding environment to prevent failure from corrosion.
Indoor, Dry Environments
For indoor applications with no moisture exposure, standard zinc-plated carbon steel anchors provide sufficient protection and performance.
Outdoor, Wet, or Humid Environments
Outdoor projects expose fasteners to rain, snow, and humidity. In these conditions, installers should use anchors made from Type 304 stainless steel to resist rust and corrosion.
Corrosive or Chemical Exposure Areas
Marine locations, industrial plants, and areas with de-icing salts demand the highest level of protection. Type 316 stainless steel is the required material for these harsh environments due to its superior resistance to chlorides and chemicals.
Step-by-Step Installation Guides for Expansion Bolts

Proper installation is essential for all expansion bolts to achieve their specified holding values. Following the manufacturer’s instructions ensures a safe and secure connection. This guide provides the fundamental steps for installing the most common anchor types.
How to Install a Wedge Anchor
Tools and Materials Needed
- Hammer Drill with a carbide-tipped bit matching the anchor diameter
- Torque Wrench and socket
- Wire brush and compressed air for hole cleaning
- Safety glasses and gloves
Drilling the Hole to Spec
An installer drills a hole into the solid concrete using a hammer drill. The hole’s diameter must equal the diameter of the wedge anchor bolt. The hole depth must be at least 1/2 inch deeper than the anchor’s intended embedment to allow space for debris.
Cleaning the Hole Thoroughly
Critical Step: Debris in the hole can prevent the anchor from setting correctly and will reduce its load capacity.
An installer must clean the hole of all dust and debris. This is done by blowing it out with compressed air, scrubbing the sides with a wire brush, and blowing it out a final time.
Setting and Torquing the Anchor
The installer places the anchor through the fixture and into the cleaned hole, tapping it gently with a hammer until the nut and washer are snug against the fixture. They then tighten the nut with a torque wrench to the manufacturer’s specified torque value. This action pulls the anchor up, engaging the expansion clip.
How to Install a Sleeve Anchor
Required Tools and Hardware
- Hammer Drill
- Carbide-tipped drill bit
- Wrench or screwdriver (depending on head style)
- Safety glasses
Drilling and Preparing the Hole
Sleeve Anchors are versatile fasteners suitable for solid concrete, brick, and block. For installation, the “same-size rule” applies; the drill bit diameter must be identical to the anchor diameter. Installers can use tools like a CONFAST® Straight Shank Hammer Bit or an SDS Carbide Bit. The hole should be drilled to a depth at least 1/2 inch deeper than the anchor’s length.
Inserting and Tightening the Anchor
The installer inserts the sleeve anchor through the fixture and into the hole until the washer and head are flush. They then turn the nut or screw head. This pulls the cone-shaped expander into the sleeve, causing it to expand and grip the base material securely.
How to Install a Drop-In Anchor
Tools and Required Setting Tool
- Hammer Drill with a carbide-tipped bit
- Drop-In Anchor Setting Tool (specific to the anchor diameter)
- Hammer
- Compressed air and wire brush
Drilling to the Correct Depth
An installer drills a hole to the specified diameter and depth for the drop-in anchor bolt. The anchor is designed to sit flush with or just below the concrete surface, so accurate depth is crucial.
Using the Setting Tool Correctly
After cleaning the hole, the installer drops the anchor in. The proper procedure for expansion is simple but must be done correctly.
- Insert the correct setting tool into the anchor.
- Strike the setting tool firmly with a hammer until its shoulder lip meets the top of the anchor.
This action guarantees the internal plug has fully expanded the anchor body.
How to Install a Hammer Drive Anchor
The Hammer Drive Anchor, also known as a zamac nail-in, offers one of the fastest installation methods for light-duty fastening. Its simple design allows an installer to secure fixtures to concrete or masonry with just a few quick steps. Following the correct procedure ensures the anchor sets properly for a reliable hold.
Necessary Tools
An installer needs only a few basic tools for this type of anchor, which contributes to its efficiency on the job site. The required equipment is minimal and standard for most masonry work.
- Hammer Drill with a carbide-tipped masonry bit
- Hammer
- Safety glasses
- Tape measure
Drilling the Pilot Hole
The first step is to drill a pilot hole for the anchor. The installer positions the item to be fastened against the concrete wall and drills through the fixture’s mounting hole directly into the base material. The drill bit diameter must match the diameter of the anchor body. For example, a 1/4″ anchor requires a 1/4″ hole. The hole depth should be at least 1/4″ to 1/2″ deeper than the anchor’s embedment length. This extra space provides a pocket for any remaining dust, ensuring the anchor can be fully inserted.
Installation Tip: Hole Depth and Fixture Thickness 💡 The length of the Hammer Drive Anchor must be sufficient to pass through the fixture and achieve the required embedment in the concrete. An installer calculates the required anchor length by adding the fixture thickness to the minimum embedment depth.
Inserting and Driving the Nail
With the hole prepared, the installation process is straightforward and rapid. This speed is a significant advantage over a chemical fastener like an epoxy anchor bolt, which requires mixing, injection, and curing time.
- The installer inserts the Hammer Drive Anchor assembly through the fixture and into the pre-drilled hole.
- He taps the anchor head gently with a hammer until it sits flush against the fixture.
- Using firm hammer strikes, he drives the steel pin into the anchor body. The pin must be driven until its head is flush with the head of the anchor body.
This final action forces the split end of the anchor to expand, wedging it tightly against the walls of the concrete hole. The fixture is now securely fastened.
Common Installation Mistakes and How to Avoid Them

Even the best expansion bolts will fail if installed incorrectly. An installer can avoid the most common pitfalls by paying close attention to three key areas: hole size, hole cleanliness, and torque application. These simple checks prevent catastrophic connection failures and ensure the anchor performs as designed.
Drilling an Incorrect Hole Size
The relationship between the anchor and the hole is the foundation of a secure connection. Using the wrong size drill bit is a critical error.
The Problem with a Hole That’s Too Big
An oversized hole is a fatal flaw. The anchor’s expansion mechanism has nothing to press against. It cannot create the necessary friction to grip the base material. The anchor will either spin in the hole when tightened or pull out with minimal force, offering virtually no holding power.
The Problem with a Hole That’s Too Shallow
A hole that is not deep enough prevents the anchor from reaching its specified embedment depth. This significantly reduces its load capacity because the anchor is not engaging a sufficient amount of concrete. For some designs, a shallow hole can also stop the expansion mechanism from setting correctly.
Failing to Clean the Drilled Hole
Concrete dust left inside a drilled hole can ruin an installation. Proper cleaning is a non-negotiable step for achieving rated holding values.
How Debris Reduces Holding Power
Concrete dust and debris act like a layer of ball bearings between the anchor and the concrete wall. This fine powder prevents the anchor from making solid contact. The expansion mechanism cannot generate the required friction, which can reduce the anchor’s ultimate holding power by over 50%.
Proper Cleaning Techniques
Professionals use a simple but effective process to ensure a clean hole.
- Blow the hole out with compressed air to remove the bulk of the dust.
- Scrub the interior walls of the hole with a properly sized wire brush.
- Blow the hole out a final time to remove all loosened particles.
Over-Torquing or Under-Torquing the Anchor
Applying the correct amount of rotational force, or torque, is crucial for expanding the anchor properly. Both too much and too little torque will compromise the connection.
Risk of Concrete Failure from Over-Torquing
Over-torquing an expansion anchor creates extreme stress on the base material. This can damage the concrete, the anchor itself, or the fixture being fastened. The immense pressure can cause the concrete to crack or “spall,” leading to a complete failure of the anchor point.
Why Under-Torquing Prevents Full Expansion
Under-tightening an anchor prevents the sleeve or clip from flaring correctly. This results in little to no holding power, as the anchor cannot achieve its required tension. The fastener will feel loose and will not support its intended load.
The Importance of Using a Torque Wrench
A torque wrench is the only tool that guarantees the manufacturer’s specified torque is applied. It removes the guesswork from tightening and ensures the anchor is expanded enough to hold but not so much that it damages the concrete. This precision is what separates a professional installation from a potential failure, a different kind of precision than what is required for a chemical epoxy anchor bolt.
Ignoring Edge and Spacing Distances
An anchor’s performance depends heavily on the mass of concrete surrounding it. The forces generated by an expansion anchor radiate outward into the base material. Placing an anchor too close to an edge or another anchor concentrates these forces, creating a high risk of concrete failure. Professionals always adhere to manufacturer-specified minimum distances to ensure the connection’s safety and integrity.
Understanding Minimum Edge Distance Rules
Minimum edge distance is the shortest distance from the center of an anchor to an unsupported edge of the concrete slab or wall. Expansion anchors create significant outward pressure as they are tightened. If an anchor is installed too close to an edge, this pressure has nowhere to go, which can cause the concrete to crack and break away in a “blowout” failure. This completely compromises the anchor’s holding power.
Rule of Thumb for Edge Distance 📏 Manufacturers provide specific edge distance requirements for each anchor size and type. These values are critical for a safe installation and must be followed without exception.
For example, a common industry standard for a 1/2-inch diameter expansion anchor is a minimum edge distance of five anchor diameters. This calculation means an installer must place the anchor at least 2.5 inches (5 x 0.5 inches) from any unsupported edge to prevent failure.
Maintaining Minimum Spacing Between Anchors
Minimum spacing distance refers to the required distance between the centers of two or more anchors. Each anchor creates a cone-shaped zone of stress in the concrete below it. If anchors are installed too close together, these stress cones overlap. This overlap means the anchors are competing for the same concrete mass to provide holding power, which significantly reduces the capacity of the entire anchor group.
- Overlapping Stress Zones: Reduces the pull-out strength of each anchor.
- Group Capacity: The total load capacity of the group becomes less than the sum of the individual anchors.
The industry standard minimum spacing for 1/2-inch diameter expansion anchors is typically ten anchor diameters, requiring a 5-inch gap between each anchor. This spacing ensures each anchor can develop its full load capacity without interfering with its neighbor. The concentrated mechanical stress from an expansion anchor is very different from the chemical bond of an epoxy anchor bolt, which distributes load through adhesion rather than friction. Ignoring spacing rules is a common mistake that leads to connection failure, especially under heavy loads.
Safety Precautions When Working with Expansion Bolts
An installer’s safety is the top priority on any job site. Working with concrete and power tools introduces risks that require careful management. Following established safety protocols for installing expansion bolts protects the installer from injury and ensures the project’s integrity. This involves using the correct personal protective equipment (PPE), handling tools properly, and maintaining awareness of the work environment.
Personal Protective Equipment (PPE)
Using the right PPE is the first line of defense against common construction hazards. Each piece of equipment protects against a specific risk associated with drilling into concrete.
Eye and Face Protection
Drilling concrete creates high-velocity dust and debris. An installer must wear safety glasses or goggles rated for impact resistance. This simple step prevents serious eye injuries from flying particles.
Hearing Protection
Hammer drills operate at noise levels that can cause permanent hearing damage. Installers should always use hearing protection, such as earplugs or earmuffs, to mitigate this risk.
Respiratory Protection from Dust
Concrete dust contains crystalline silica, a hazardous substance that can cause long-term respiratory illness. A dust mask or, preferably, a respirator is essential to prevent the inhalation of these harmful particles.
Tool and Equipment Safety
Proper tool handling and inspection are critical for preventing accidents. A well-maintained tool used correctly is a safe tool.
Proper Use of Hammer Drills
Operating a hammer drill requires both skill and caution. An installer must maintain control of the tool at all times.
- Maintain a Firm Grip: He should hold the drill firmly with both hands to manage its power and torque.
- Keep a Balanced Stance: A stable, shoulder-width stance prevents loss of balance if the drill bit binds.
- Apply Steady Pressure: The installer should let the tool do the work, applying steady pressure without forcing it.
Inspecting Anchors Before Installation
Before use, an installer must inspect all anchors for damage or defects. He should check that threads are clean and intact and that expansion clips or sleeves move freely. A damaged anchor will not perform to specification and must be discarded.
Site and Environmental Awareness
An installer must be aware of his surroundings to avoid hidden dangers within the work area. A thorough site inspection is a crucial step before drilling begins.
Checking for Rebar or Utilities
Drilling into hidden rebar, electrical conduits, or water pipes can cause severe tool damage, electric shock, or flooding. An installer should use a utility scanner to check the drilling location for subsurface obstructions before starting work.
Working at Heights
Projects that require working on ladders, scaffolding, or lifts introduce the risk of falls. An installer must ensure his platform is stable and secure. He should always maintain three points of contact while climbing and avoid overreaching, which can lead to a loss of balance.
An installer’s choice of fastener directly impacts project safety and longevity. The top recommendations provide a clear starting point for any task.
- Heavy-Duty: The Wedge Anchor offers maximum strength for structural work.
- Medium-Duty: The Sleeve Anchor provides reliable, versatile performance.
- Light-Duty: The Hammer Drive Anchor delivers unmatched installation speed.
The first choice an installer considers can act as a mental anchor, biasing the final decision. He must always verify the project’s load, material, and environmental needs against the specifications for the selected concrete anchor bolts to ensure a secure, lasting installation.
FAQ
Can an installer reuse expansion bolts?
Most mechanical expansion bolts are single-use items. Removing them damages the anchor and compromises its holding power. An installer must use a new anchor for re-installation. The Titen HD screw anchor is a notable exception, as it is designed for removal and reuse in a new hole.
What happens if an installer hits rebar?
An installer must stop drilling immediately upon hitting rebar. Drilling through rebar can damage the drill bit and compromise the structure’s integrity. The best practice is to abandon the hole and drill a new one at least a few inches away, following spacing guidelines.
Why is cleaning the hole so important?
Concrete dust prevents the anchor from making solid contact with the base material. This debris reduces friction and can cut the anchor’s holding power by more than 50%. Proper cleaning ensures the anchor achieves its full, rated load capacity for a safe installation.
When should an installer use a stainless steel anchor?
An installer chooses stainless steel anchors for projects exposed to moisture or corrosive elements.
- Type 304: Best for outdoor, freshwater environments.
- Type 316: Required for saltwater, marine, and chemical applications.
Can expansion bolts be used in cracked concrete?
Only anchors specifically tested and rated for cracked concrete should be used in such conditions. These anchors, like certain Titen HD models, are designed with follow-up expansion to maintain their grip if a crack forms or widens, ensuring a safe connection.
How long does an installer wait before loading an anchor?
Mechanical expansion anchors can be loaded immediately after being torqued to specification. This provides a significant speed advantage over a chemical fastener like an epoxy anchor bolt, which requires a specific cure time before it can support any weight.
What is the difference between ultimate load and working load?
Ultimate load is the absolute maximum force an anchor can hold before it fails. The safe working load is a fraction of that value (typically 25%), providing a crucial safety factor. An installer must always use the safe working load for design calculations.