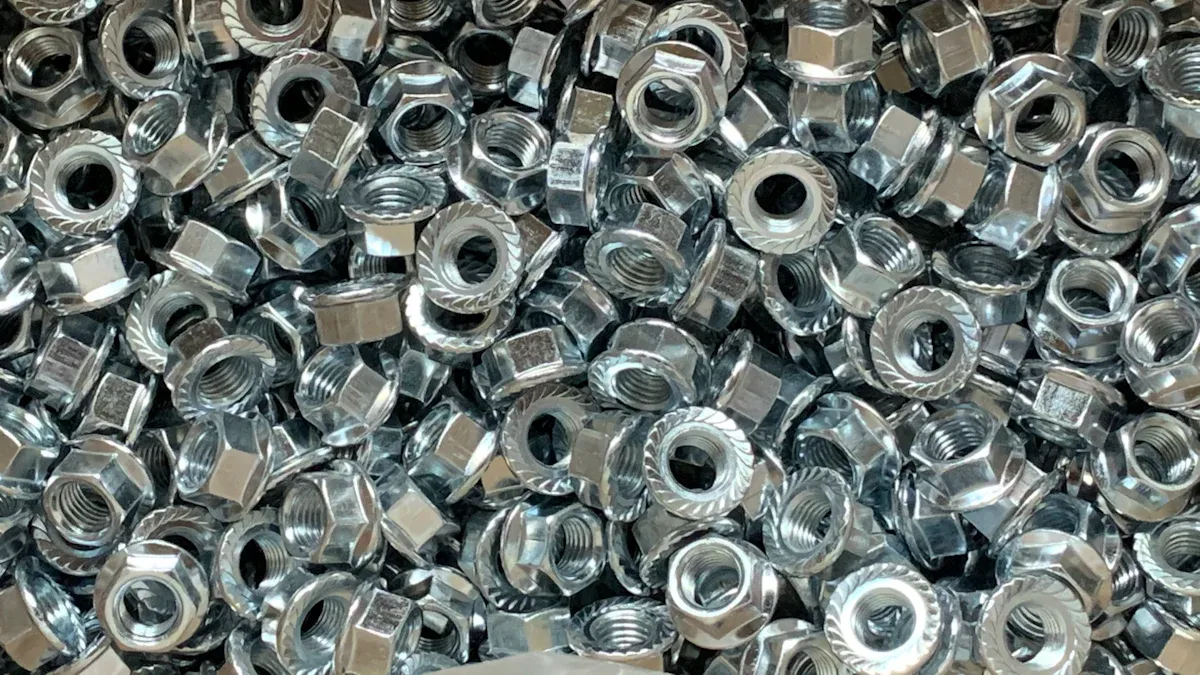
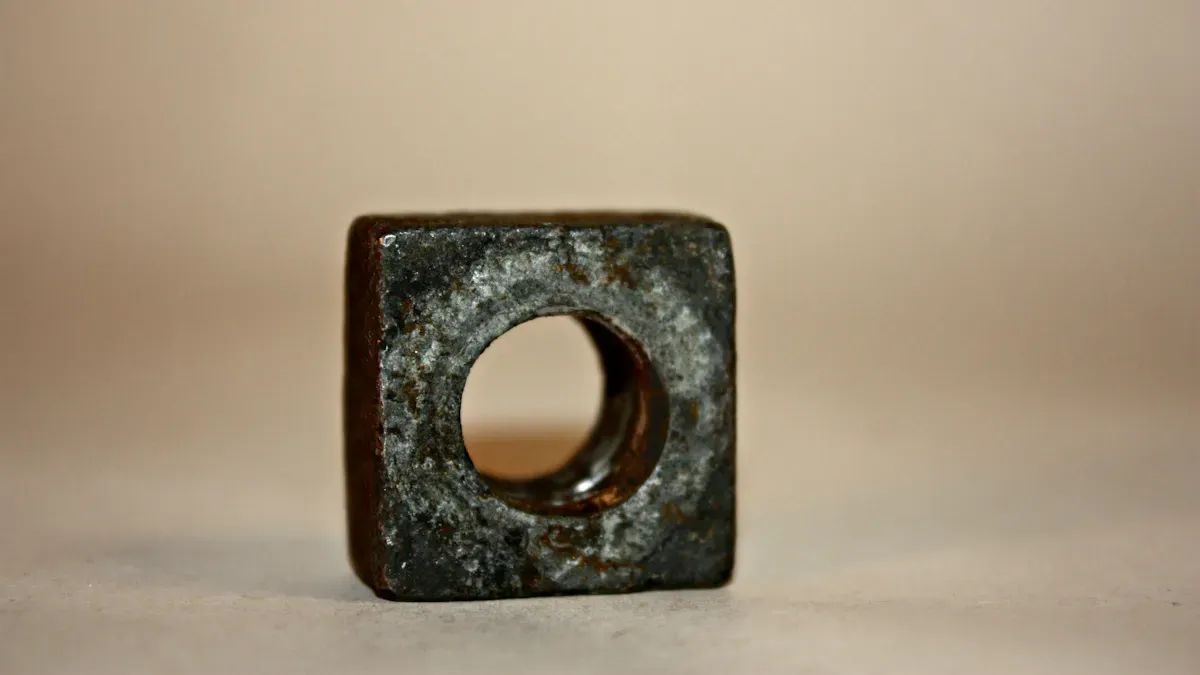
Installing flange nuts correctly is essential for the secure assembly of mechanical components. The strength of flange connections depends on the reliability of гаек и болтов, making proper installation crucial to prevent failures. Many engineers choose нестандартные крепежные элементы from a trusted производитель крепежных изделий на заказ to guarantee high quality and performance. The unique locking features found in a фланцевая гайка design help extend service life and minimize maintenance expenses.
- Reliable installing flange nuts supports both safety and cost control.
- Proper preparation and use of custom fasteners reduce the risk of joint failure.
Importance of Secure Flange Installation
Предотвращение ослабления и отказов
Secure installation of flange nuts plays a critical role in preventing loosening and failure in mechanical systems. When technicians do not follow proper procedures, the consequences can be severe. The table below highlights the most common issues that arise from insecure flange connections in industrial applications:
| Последствие | Описание |
|---|---|
| Leaks | Result from improper sealing due to misalignment or inadequate tightening of bolts. |
| Safety hazards | Can arise from failures leading to spills or equipment malfunctions, posing risks to personnel. |
| Operational inefficiencies | Caused by leaks or failures that disrupt normal operations, leading to downtime and increased costs. |
| Non-compliance with standards | Increases the risk of failure due to not adhering to established installation and maintenance protocols. |
| Inadequate inspection and maintenance | Allows minor issues to escalate into critical failures, compromising system integrity. |
| Improper material selection | Can lead to corrosion and failure if materials are not compatible with the operating conditions. |
| Damage to flange finish | Loss of finish can compromise the seal, leading to leaks. |
| Elongation of fasteners | Caused by poor fit and inadequate materials, leading to joint failure. |
| Assembly errors | Incorrect alignment or uneven tightening can create stress and lead to leaks. |
| Коррозия | Deterioration of components due to exposure to corrosive environments. |
| Thermal expansion and contraction | Fluctuating temperatures can cause warping or cracking of flanges. |
| Mechanical vibration | Can loosen bolts and misalign flanges, leading to structural failures. |
| Improper gasket installation | Misalignment can result in poor sealing and leaks. |
| Excessive piping loads | High forces can distort flanges, compromising their integrity. |
| Wear and fatigue | Continuous cycling of pressures and temperatures can lead to material fatigue and leaks. |
Flange nuts offer several design advantages that help prevent these problems. Their built-in washer distributes pressure evenly, which reduces the risk of loosening. The locking mechanism enhances resistance to vibration, and the uniform material construction improves corrosion resistance. Testing shows that flange nuts create less surface deformation under clamping forces compared to regular nuts, which helps maintain a reliable seal.
Ensuring Structural Integrity with Flange Bolts
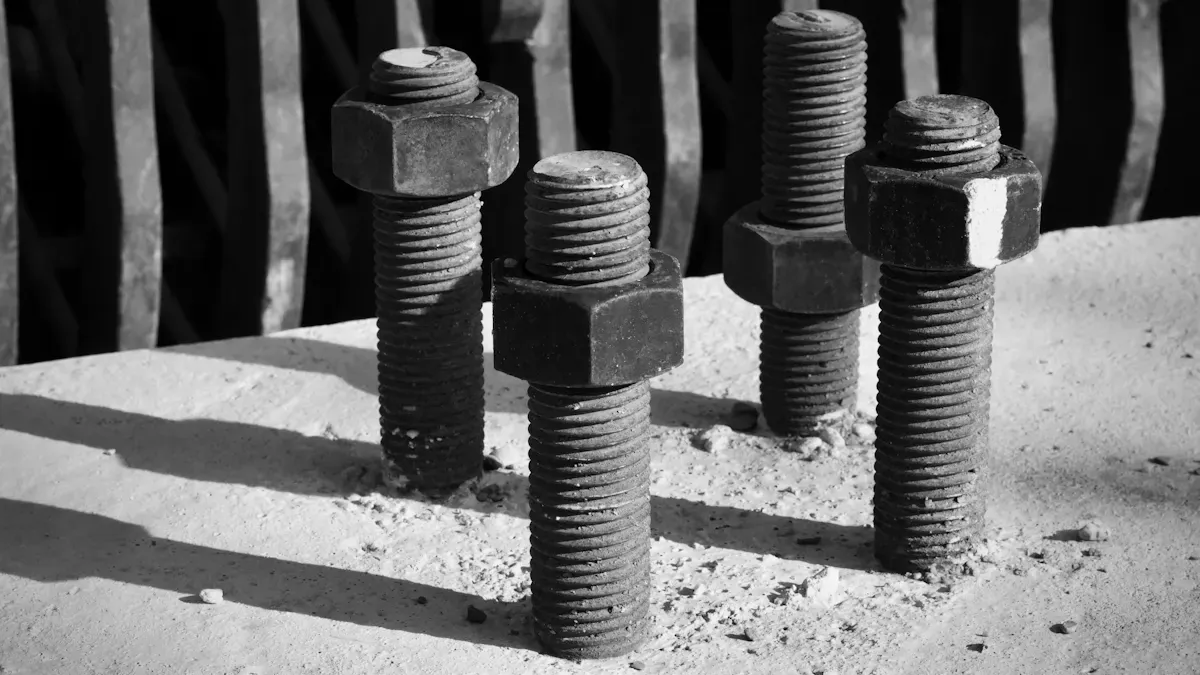
Flange bolts contribute significantly to the structural integrity of flange connections, especially in high-stress environments. They ensure proper sealing and load distribution, which prevents leaks and joint failures. Consistent bolt loading is essential to avoid gasket blowouts and extend the lifespan of both the gasket and the flange. Proper installation techniques and bolt tightening sequences maintain uniform pressure across the sealing surface. This uniformity is vital in high-pressure or chemically aggressive environments, where even minor deviations can lead to system failure.
Enhancing Safety During Installation
Safety remains a top priority during flange installation. Improper preparation, such as failing to clean flange surfaces or using incorrect torque values, can lead to catastrophic joint failures. These failures often result in leaks, which pose risks to both personnel and equipment. The table below outlines common causes of flange failure and their potential impact:
| Cause of Flange Failure | Описание |
|---|---|
| Improper Joint Assembly | The most common cause of flange failures, leading to leaks and safety hazards. |
| Incorrect Gasket Selection | Using inappropriate gasket materials can lead to failure under operational conditions. |
| Improper Bolt Tightening | Insufficient or excessive torque can cause leaks or damage to components. |
| Uneven Tightening | Creates high-stress areas, increasing the risk of leaks. |
| Lack of Lubrication | Can lead to inaccurate torque readings and uneven load distribution. |
| Damaged Flange Faces/Gaskets | Scratches or debris can prevent proper sealing, leading to leaks. |
| Safety Hazards | Leaks can result in fires, explosions, and exposure to hazardous materials. |
| Environmental Damage | Flange failures can lead to the release of pollutants, causing regulatory issues. |
| Increased Maintenance Costs | Frequent repairs and replacements due to flange failures can escalate operational costs. |
| Equipment Damage | Leaks can damage surrounding equipment, leading to further operational disruptions. |
Tip: Always follow manufacturer guidelines and industry standards during installation to minimize risks and ensure long-term reliability.
A secure flange installation not only protects equipment but also safeguards personnel and the environment. Proper attention to detail during each step of the process helps prevent costly incidents and supports the overall performance of the system.
Pre-Installation Checklist for Flange Nuts
Inspecting Flange Nuts and Flange Bolts
Checking for Damage or Defects
Technicians must inspect every flange nut and bolt before beginning installation. They look for cracks, corrosion, and signs of wear. Even minor defects can compromise the integrity of the flange connection. If a nut or bolt shows any damage, they replace it immediately. This step prevents unexpected failures and ensures the reliability of the assembly.
Verifying Correct Size and Thread Type
Selecting the correct size and thread type is essential for a secure flange connection. Technicians compare each nut and bolt against the specifications provided by the manufacturer. They check the diameter, thread pitch, and length. Using mismatched fasteners can cause leaks or structural issues. Proper verification guarantees that the flange assembly will withstand operational stresses.
Cleaning and Preparing for Installation
Removing Dirt, Oil, and Debris
Clean surfaces improve the performance of flange nuts and bolts. Technicians use several methods to remove contaminants:
- Solvent cleaning dissolves oils and grease.
- Abrasive cleaning with wire brushes removes rust and scale.
- Steam cleaning eliminates dirt from hard-to-reach areas.
- Ultrasonic cleaning works well for complex geometries.
- Acid cleaning removes stubborn scale and rust.
They also use solvent degreasers, stiff brushes, and low-pressure water jets to scrub surfaces. After cleaning, they avoid aggressive grinding to maintain the flatness of sealing surfaces. Applying rust inhibitors helps prevent future corrosion.
Ensuring Surfaces Are Dry and Clean
Dry and clean surfaces are critical for proper flange installation. Moisture can lead to corrosion and reduce the effectiveness of the seal. Technicians wipe down all components and inspect them for residual contaminants. They confirm that every flange nut and bolt is ready for assembly.
Tip: Cleanliness directly affects the longevity and safety of flange connections. Always prioritize thorough cleaning before installation.
Organizing Tools and Work Area for Safety
Gathering Necessary Tools and Materials
Preparation includes gathering all tools and materials required for flange installation. Technicians collect wrenches, torque tools, lubricants, and safety equipment. They ensure that every item is within reach to minimize delays and reduce the risk of accidents.
Ensuring Adequate Lighting and Space
A well-organized work area supports safe and efficient flange installation. Technicians follow these steps:
- Clear off a horizontal surface large enough to hold every portable tool needed for multiple sessions.
- Store all portable tools in this designated area.
- Place the most frequently used tools within arm’s reach and store others away.
Adequate lighting allows technicians to spot defects and align components accurately. Sufficient space prevents crowding and reduces the risk of injury.
Note: A tidy workspace and proper tool organization enhance safety and streamline the installation process.
Selecting Tools and Materials for Installing Flange Nuts
Essential Tools for Flange Installation
Wrenches, Sockets, and Torque Wrenches
Technicians rely on a core set of tools to achieve secure flange nut installation. Wrenches, both adjustable and socket types, allow for precise engagement with nuts and bolts. Torque wrenches play a critical role in applying the correct force, which prevents leaks and avoids distortion of the flange. Flange alignment tools help maintain proper positioning, ensuring even stress distribution and a reliable seal. Gasket installation tools assist in placing gaskets accurately, which supports the integrity of the connection.
- Adjustable wrenches
- Socket wrenches
- Torque wrenches
- Flange alignment tools
- Gasket installation tools
Each tool contributes to installation quality. For example, torque wrenches ensure that technicians apply the correct tightening force, which helps prevent issues such as leaks or flange distortion. Flange alignment tools support proper alignment, which is vital for maintaining connection integrity.
Thread Locking Compounds and Anti-Seize Lubricants
Thread locking compounds secure flange nuts in place, reducing the risk of loosening due to vibration. Anti-seize lubricants protect threads from galling and corrosion, making future disassembly easier. Technicians apply these products to both flange bolts and nuts to enhance performance and extend service life.
Choosing the Right Flange Nut and Flange Bolt
Material Compatibility and Corrosion Resistance
Selecting the correct materials for flange nuts and flange bolts is essential. Material compatibility ensures that all components withstand the operating environment. For example, corrosion-resistant materials are necessary in chemical plants or outdoor installations. The table below outlines key factors to consider:
| Фактор | Описание |
|---|---|
| Material Specifications | Choose materials based on the operating environment, such as corrosion-resistant for chemical plants. |
| Механические свойства | Ensure bolts meet tensile strength, yield strength, and hardness requirements to handle operational loads. |
| Sizing | Proper sizing is crucial for a secure seal; incorrect sizes can lead to leaks or damage. |
| Приложение крутящего момента | Correct torque is essential to avoid over-tightening or under-tightening, which can compromise integrity. |
| Gasket Selection | Gasket material must be compatible with the environment to prevent failure under pressure or temperature. |
| Факторы окружающей среды | Consider temperature changes and vibration that can affect the performance and stability of the joint. |
Flange Type, Size, and Application
Technicians must match the flange nut and flange bolt to the specific flange type and application. They verify the size and thread type to ensure a proper fit. This step prevents leaks and supports the structural integrity of the connection.
Safety Equipment for Installation
Gloves, Eye Protection, and Proper Clothing
Safety remains a top priority during flange installation. Technicians use proper safety gloves to protect their hands from sharp edges and pinch points. Eye protection shields against debris and accidental splashes. Proper clothing, such as long sleeves and sturdy footwear, reduces the risk of injury. Specialized tools, including ergonomic hydraulic torque wrenches and backup spanners, further enhance safety by minimizing hand strain and preventing accidents.
| 👷 | Описание |
|---|---|
| Proper Safety Gloves | Essential for protecting hands during flange nut installation. |
| Ergonomic Hydraulic Torque Wrenches | Designed with safety handles to minimize hand injuries and strains. |
| Backup Spanners | Hands-free tools that enhance safety, lightweight and equipped with safety cables. |
| Flange Spreading Wedges | Engineered to prevent finger pinch points, with ergonomic handles for better control. |
Tip: Always use the recommended safety equipment and tools to reduce the risk of injury and ensure a successful flange installation.
Step-by-Step Procedure for Installing Flange Nuts

Positioning Flange Bolts and Nuts
Inserting Bolts Evenly into Flange Holes
Technicians begin assembling the flange by selecting the correct flange bolts for the application. They check each bolt for size, grade, and cleanliness. Next, they insert the bolts evenly into the flange holes. This even distribution prevents stress concentrations and supports a balanced connection. Each bolt must fit snugly without forcing, which helps maintain alignment and reduces the risk of damaging the flange surface.
Aligning and Hand-Tightening Flange Nuts
After inserting the bolts, technicians align the flange faces carefully. They place the flange nuts onto the bolts and start hand-tightening them. Using a crisscross pattern, they tighten each nut a little at a time. This approach ensures the gasket seats evenly and prevents misalignment. Hand-tightening in a staggered sequence helps avoid uneven pressure, which can lead to leaks or damage during later stages of installation.
Tip: Always use a crisscross or star pattern when hand-tightening to achieve even seating of the gasket and prevent flange distortion.
Applying Lubricants and Anti-Seize Compounds
Lubricating Threads and Nut Surfaces
Proper lubrication is essential for installing flange nuts securely. Technicians select lubricants that resist contamination and oxidation. They avoid applying lubricants to the gasket contact area to prevent seal failure. Before applying lubricant, they clean all surfaces to remove dirt and debris. They then apply a thin, even coat of lubricant to the bolt threads, nut bearing face, and under-head bearing surface. A small bead of lubricant should appear at the nut-to-surface interface when tightened. For reused fasteners, technicians always reapply fresh lubricant and avoid mixing different lubricant types.
- Lubricate only after inserting bolts to prevent contamination.
- Apply lubricant liberally to stud threads and the interface between the nut and washer.
- Use manufacturer-recommended nut factors to determine effective torque.
Preventing Galling and Seizing
Galling can occur when metal surfaces bond and tear apart under pressure, which damages threads and seizes fasteners. Lubrication creates a protective barrier that reduces direct metal-to-metal contact. This barrier is critical during tightening, as it prevents galling and ensures smooth assembly. By following these best practices, technicians extend the life of flange connections and simplify future maintenance.
Tightening Sequence and Torque Application
Using Cross-Tightening Patterns for Even Pressure
A uniform tightening procedure is vital for proper installation. Technicians use a cross-tightening or star pattern to distribute pressure evenly across the flange. This method reduces the risk of leaks and maintains the integrity of the gasket. The recommended tightening sequence involves tightening the bolts in a staggered pattern, measuring the distance between flanges at four key positions to confirm even compression.
- Hand-tighten all nuts in a crisscross pattern.
- Use a torque wrench to tighten the bolts in stages, following a star pattern.
- Apply torque in increments—typically 30%, 60%, and 100% of the final value—to ensure a uniform seal.
- Recheck and retighten as needed to maintain even pressure.
Применение правильных спецификаций момента затяжки
Applying the correct torque is essential for secure flange installation. Technicians use a calibrated torque wrench and follow manufacturer guidelines for each bolt size and material. The table below shows standard torque specifications for common flange nut sizes:
| Диаметр болта | Target Torque (Lubricated) | Target Torque (Unlubricated) |
|---|---|---|
| 5/8" | 60 ft-lbs | 90 ft-lbs |
| 3/4" | 110 ft-lbs | 150 ft-lbs |
| 7/8″ | 170 ft-lbs | 250 ft-lbs |
| 1" | 250 ft-lbs | 370 ft-lbs |
| 1-1/4″ | 500 ft-lbs | 730 ft-lbs |
| 1-1/2″ | 700 ft-lbs | 1,025 ft-lbs |

Technicians must always use the correct torque values for the specific flange bolts and nuts. Over-tightening or under-tightening can compromise the seal and lead to premature failure. By following the recommended tightening procedure and torque specifications, they ensure the reliability and safety of flange connections.
Note: Consistent use of correct techniques and adherence to torque guidelines are key factors in achieving a secure and long-lasting flange installation.
Verifying Secure Flange Installation
After completing the process of installing flange nuts, technicians must verify that the connection meets safety and reliability standards. This verification step ensures that the flange assembly will withstand operational stresses and maintain a secure seal. Careful inspection and measurement help prevent future failures and reduce maintenance costs.
Double-Checking Torque Values
Technicians always double-check torque values to confirm that each flange nut has been tightened correctly. They use calibrated torque wrenches and reference torque charts for each bolt size and material. Accurate torque application prevents leaks and protects the integrity of the flange. The following methods help technicians verify secure fastening:
- Measure bolt tension and aim for 70% of the yield strength to achieve optimal clamping force.
- Reference specified applied torque from manufacturer charts to estimate bolt tension.
- Use the “turn of the nut” method, which involves tightening until snug and then rotating the nut an additional 90 degrees.
- Install load-indicating washers, which provide a visual confirmation of bolting loads but are single-use.
- Employ smart bolts with built-in tension indicators for the most precise measurement of bolt clamping load.
| Verification Method | Описание | Точность |
|---|---|---|
| Динамический ключ | Measures applied torque; relies on proper calibration and technique. | Высокая |
| Turn of the nut | Adds a specific rotation after snug tightening; simple but less precise. | Умеренная |
| Load-indicating washers | Show if correct load is achieved; single-use and easy to interpret. | Высокая |
| Smart bolts | Built-in tension indicators; provide real-time feedback on bolt load. | Очень высокий |
Tip: Technicians should always check torque values immediately after tightening. This practice helps catch errors before the flange assembly enters service.
Inspecting for Proper Seating and Alignment
Proper seating and alignment are critical for the performance of flange connections. Technicians inspect the flange faces, nuts, and bolts to ensure that all components sit flush and align correctly. They look for signs of uneven pressure, gaps, or misalignment that could compromise the seal. The inspection process includes the following steps:
- Examine the gasket to confirm even compression across its surface.
- Check that all flange nuts sit flush against the flange face without tilting.
- Inspect the spacing between flanges at multiple points to verify uniform gap.
- Confirm that bolts remain perpendicular to the flange and do not show signs of bending.
- Review the entire assembly for signs of over-tightening or under-tightening, such as distorted flanges or loose nuts.
Technicians document their findings and address any issues before completing the installation. This attention to detail ensures that the flange assembly will perform reliably under pressure and vibration.
Note: Thorough inspection after installing flange nuts helps prevent leaks, equipment damage, and safety hazards. Technicians who follow these steps support long-term system reliability.
Common Mistakes in Flange Installation and How to Avoid Them
Over-Tightening or Under-Tightening Flange Nuts
Risks of Incorrect Torque Application
Many technicians make the mistake of applying either too much or too little torque during flange installation. Over-tightening flange nuts can crush the gasket, which reduces its ability to form a proper seal and often leads to leaks. Under-tightening, on the other hand, fails to provide enough clamping force. This lack of pressure allows leaks to develop and can cause system failures. Both errors compromise the integrity of the flange and increase the risk of costly repairs.
Proper Use of Torque Wrenches
Technicians should always use a calibrated torque wrench when working with flange bolts. This tool ensures that each nut receives the correct amount of tightening force. Following the manufacturer’s recommended torque values prevents both over-tightening and under-tightening. Regular calibration of torque wrenches is essential for accurate results. Technicians should also tighten nuts in a cross-pattern sequence to distribute pressure evenly across the flange.
Using Incorrect Tools or Flange Nuts
Mismatched Sizes or Types
Selecting the wrong size or type of flange nut or bolt can cause serious installation problems. Mismatched components may not fit properly, which leads to misalignment and weakens the connection. Using incompatible materials can also result in corrosion or mechanical failure, especially if the flange operates in harsh environments. Technicians must verify that all parts match the specifications for the flange installation.
Tool Slippage and Potential Damage
Improper tool selection or use can damage both the flange and the fasteners. The table below highlights распространенных ошибок and their consequences:
| Распространенные ошибки | Consequences |
|---|---|
| Reusing gaskets that should be replaced | Increased risk of leakage and failure |
| Skipping bolt inspection or retightening | Potential for misalignment and assembly errors |
| Using uncalibrated tools | Improper bolting practices leading to damage |
| Ignoring standard guidance | Higher likelihood of flange failures |
Technicians should always use the correct tools for the job and inspect all equipment before starting flange installation. This practice helps prevent tool slippage, which can round off nuts or bolts and damage the flange surface.
Neglecting Cleaning and Preparation Steps
Impact on Flange Nut Performance
Dirty or damaged surfaces create leak paths and reduce the effectiveness of the flange connection. Neglecting to clean the flange, bolts, and nuts before assembly can result in immediate leaks. Surface contamination also increases the risk of corrosion and weakens the joint over time.
Best Cleaning and Preparation Practices
Technicians should follow a strict cleaning routine before installing flange bolts and nuts. This process includes removing dirt, oil, and debris from all surfaces. They should inspect each component for damage and replace any that show signs of wear. Proper preparation ensures that the flange seats correctly and maintains a reliable seal.
Совет: The most frequent mistakes during flange installation include incorrect torque on bolts, misplacement or wrong choice of gasket, ignoring pipe or flange alignment, using incompatible materials, and neglecting surface preparation. Addressing these issues helps prevent leaks and extends the life of the flange connection.
Ignoring Safety Precautions During Installation
Risks of Personal Injury
Many technicians overlook critical safety precautions during flange nut installation. These oversights can lead to serious injuries and equipment damage. The following table outlines common safety precautions that workers often ignore and the resulting risks:
| Safety Precaution | Описание |
|---|---|
| Overtightening Joints | Belief that overtightening prevents leaks can lead to pipe rupture and breakage. |
| Using a Cracked Flange | Cracked flanges can cause leaks, posing risks to crew safety. |
| Not Wearing Gloves | Failing to wear protective gloves can expose workers to hazardous materials like acids and alkalis. |
| Not Following Proper Guidelines | Ignoring installation guidelines can lead to improper connections and increased risk of accidents. |
| Injury Risks During Maintenance | Struggling with stuck bolts can result in injuries like sprained wrists or falls from heights. |
Technicians who overtighten joints may believe they are preventing leaks. In reality, this practice can cause pipes to rupture or break, which creates dangerous conditions. Using a cracked flange increases the chance of leaks and puts the entire crew at risk. Workers who do not wear gloves expose their hands to hazardous chemicals, sharp edges, and extreme temperatures. These exposures can result in burns, cuts, or chemical injuries. Ignoring proper installation guidelines often leads to improper connections, which can cause accidents during operation or maintenance. Maintenance tasks, such as removing stuck bolts, also present risks. Workers may sprain their wrists or lose balance, especially when working at heights.
Note: Personal injuries during flange nut installation often result from preventable mistakes. Technicians should remain vigilant and follow established procedures to protect themselves and their coworkers.
Importance of PPE and Safe Handling
Personal protective equipment (PPE) plays a vital role in preventing injuries during flange nut installation. Technicians should always wear gloves to shield their hands from sharp edges, hot surfaces, and hazardous chemicals. Eye protection guards against flying debris and accidental splashes. Proper clothing, such as long sleeves and sturdy footwear, reduces the risk of cuts and burns.
Safe handling techniques also contribute to a safer work environment. Workers should use the correct tools for each task and inspect them before use. They should lift heavy components with proper posture to avoid strains and use mechanical aids when necessary. Following manufacturer guidelines ensures that each step of the installation process meets industry standards.
A strong safety culture encourages technicians to report hazards and share best practices. Supervisors should provide regular training and reinforce the importance of PPE and safe handling. These measures help prevent injuries and maintain a productive workplace.
Tip: Consistent use of PPE and adherence to safe handling procedures protect workers and support long-term system reliability.
Safety Best Practices for Flange Installation
Personal Protective Equipment for Installing Flange Nuts
Gloves, Safety Glasses, and Protective Clothing
Technicians must prioritize personal protective equipment when working with flange nuts. Gloves protect hands from sharp edges and reduce the risk of cuts during installation. Safety glasses shield eyes from debris and accidental splashes, especially when cleaning or handling chemicals. Protective clothing, such as long sleeves and chemical-resistant garments, guards against burns and exposure to hazardous materials. Each worker should select PPE based on the process materials and the specific conditions of the work area. This approach ensures that every technician maintains a high level of safety throughout the flange installation process.
Safe Handling of Tools and Flange Bolts
Preventing Hand and Finger Injuries
Proper handling of tools and flange bolts reduces the risk of hand and finger injuries. Workers should always wear cut-resistant gloves and inspect tools before use. Calibrated wrenches and torque tools help prevent slippage, which can cause pinched fingers or bruises. Technicians should keep hands clear of pinch points and use backup spanners or holding devices when tightening nuts. Clear communication among team members further minimizes the chance of accidental injuries during flange assembly.
Proper Lifting and Handling Techniques
Heavy flange components require careful lifting and handling. Workers should use proper rigging equipment and maintain safe distances during lifting operations. Mechanical aids, such as hoists or cranes, reduce strain and prevent musculoskeletal injuries. Team members must communicate clearly and coordinate movements to avoid accidents. Before lifting, technicians should inspect the area for trip hazards and ensure that all paths are clear. These practices support both safety and efficiency during flange installation.
Maintaining a Safe Work Environment
Keeping the Area Clear of Hazards
A clean and organized work area plays a key role in preventing accidents. Technicians should remove debris, old gasket material, and unnecessary tools from the workspace. Regular cleaning of flange surfaces ensures reliable sealing and reduces the risk of leaks. Workers must maintain clear walkways and use appropriate fall protection when working at elevated locations. Flange protectors and spray shields act as barriers, shielding personnel from hazardous materials in case of leaks.
Following Manufacturer Safety Guidelines
Strict adherence to manufacturer safety guidelines ensures the integrity of every flange connection. Technicians should use new gaskets specified for the service and inspect all sealing surfaces for damage before assembly. Calibrated tools and correct torque sequences guarantee even compression and prevent over-stressing bolts. Pressure testing new connections before service confirms that the flange assembly meets operational standards. Regular maintenance and inspection of flanges help identify potential issues early, supporting long-term system reliability.
Tip: Consistent use of PPE, proper tool handling, and a clean work environment form the foundation of safe and effective flange installation.
Post-Installation Checks and Maintenance for Flange Nuts

Inspecting for Loosening or Wear After Installation
Regular Visual Inspections
Technicians must perform regular visual inspections to maintain the integrity of flange connections. They look for signs of loosening, corrosion, or wear on flange nuts and bolts. These checks help prevent leaks and ensure that the installation remains secure over time. Visual inspections alone may not detect all issues, so many teams use hydrogen detectors to monitor for leaks in critical environments. Inspection intervals depend on the severity of cycling and exposure risks. High-pressure systems require more frequent checks to avoid unexpected failures.
Tip: Define inspection schedules based on operational demands and environmental exposure. Early detection of wear or loosening supports reliable flange performance.
Re-Torquing Flange Nuts as Needed
After initial installation, technicians must re-torque flange nuts to maintain proper clamping force. They use calibrated torque wrenches to ensure accuracy. Regular torque checks help prevent thread stripping and gasket failure. Technicians follow industry standards, such as ASME B18.2.2, to maintain full thread engagement. Proper pairing of bolts and nuts is essential to prevent thread failure and maintain the strength of flange connections.
- Maintain correct torque using calibrated tools.
- Ensure full thread engagement for each nut and bolt.
- Pair bolts and nuts according to recommended standards.
| Bolt Standard & Grade | Recommended Nut Standard & Grade | Key Failure Prevented |
|---|---|---|
| ASTM A193 B7 | ASTM A194 2H | Thread stripping: Nut withstands bolt’s high preload |
| ASTM A193 B7M | ASTM A194 2HM | Stripping + corrosion: Matched for harsh acidic environments |
| ASTM A193 B16 | ASTM A194 7H | Extreme load stripping: Nut matches bolt’s 170ksi tensile strength |
Note: Proper torque and nut-bolt pairing prevent common failures and extend the life of flange connections.
Documenting Flange Installation Details
Recording Torque Values and Dates
Accurate documentation of torque values and installation dates supports long-term reliability. Technicians record each torque measurement after tightening and re-torquing flange nuts. This practice allows teams to track maintenance history and identify patterns of wear or loosening. Documentation also helps verify compliance with manufacturer guidelines and industry standards.
Keeping Maintenance and Inspection Logs
Maintenance and inspection logs provide a clear record of all post-installation activities. Technicians update logs after each inspection, noting any issues found and corrective actions taken. These records improve safety during maintenance and support future troubleshooting. Logs also help supervisors schedule routine checks and ensure that all flange connections receive proper attention.
- Record torque values after every tightening.
- Log inspection dates and findings.
- Track corrective actions for each flange installation.
Callout: Consistent documentation and regular inspections protect equipment and personnel, ensuring safe and reliable operation of flange systems.
Technicians achieve secure and safe flange nut installation by focusing on proper alignment, lubrication, bolting procedures, and regular checks. The table below summarizes essential practices:
| Ключевой вывод | Описание |
|---|---|
| Proper Alignment | Bolt holes and flanges must line up perfectly to prevent leaks. |
| Смазка | Apply the right lubricant to reduce friction and ensure correct tightening. |
| Bolting Procedures | Use a star pattern for tightening to distribute pressure evenly. |
| Regular Checks | Re-tighten bolts after installation and inspect for wear or rust. |
Следование ASME PCC 1 guidelines and using a torque wrench help prevent leaks and structural failures. Strict adherence to safety practices reduces emissions and supports reliable operation.
Частые вопросы
What is a flange nut and why is it used?
A flange nut features a built-in washer that distributes pressure evenly. Engineers use flange nuts to prevent loosening caused by vibration and to improve sealing in mechanical assemblies.
How does a technician determine the correct torque for flange nuts?
Technicians reference manufacturer torque charts and use calibrated torque wrenches. They select torque values based on bolt diameter, material, and lubrication status.
Can a technician reuse flange nuts and bolts?
Most technicians avoid reusing flange nuts and bolts. Reuse increases the risk of thread damage and reduces joint reliability. Always inspect and replace fasteners when necessary.
What safety equipment should a worker wear during flange nut installation?
Workers wear gloves, safety glasses, and protective clothing. These items protect against sharp edges, chemical exposure, and accidental injuries during installation.
How often should a technician inspect flange nut connections after installation?
Technicians perform visual inspections regularly. Inspection frequency depends on system pressure, vibration, and environmental exposure. High-risk systems require more frequent checks.
What are common signs of flange nut failure?
Technicians look for leaks, corrosion, loose nuts, and uneven flange gaps. These signs indicate possible failure and require immediate attention.
Why is proper cleaning important before installing flange nuts?
Proper cleaning removes dirt, oil, and debris. Clean surfaces ensure a reliable seal and prevent corrosion, which extends the life of the flange connection.
What should a technician do if a flange nut or bolt shows signs of damage?
Technicians replace damaged nuts or bolts immediately. Using defective fasteners compromises safety and increases the risk of leaks or joint failure.