Expansion bolts provide a secure fixture point in concrete. This fastener operates through a mechanical wedging action, creating a reliable anchor by expanding to grip the hole’s interior walls. A производитель крепежных изделий на заказ can supply various анкерные болты, including специальные анкерные болты for specialized projects. The global market for these anchor bolts reflects their critical role in modern construction.
| Метрическая | Стоимость |
|---|---|
| Estimated Market Size (2023) | $1.17 billion |
| Projected Market Size (2032) | $1.76 billion |
| Compound Annual Growth Rate (CAGR) | 4.6% |
| Key Growth Driver | Increasing demand for robust infrastructure |
What Are Expansion Bolts? A Closer Look at the Components

Understanding how expansion bolts work begins with knowing their individual parts. Each component has a specific job. Together, they create a powerful and secure anchor.
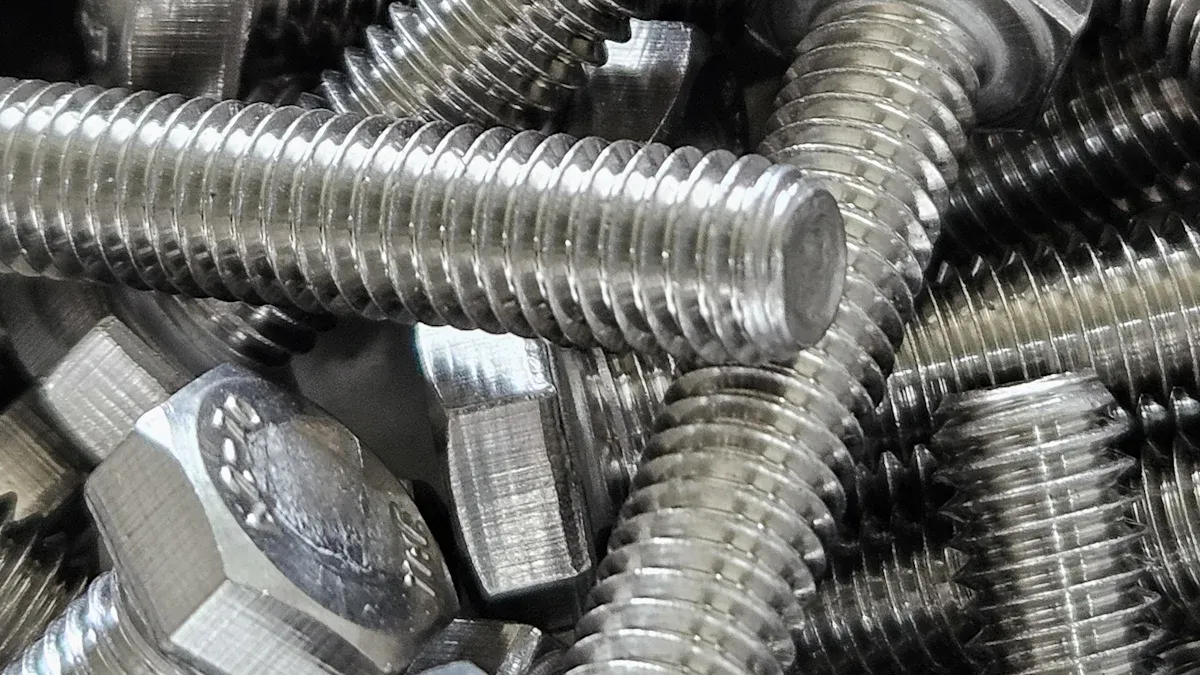
The Threaded Bolt or Stud
The Core of the Fastener
The threaded bolt or stud forms the backbone of the assembly. It provides the primary tensile strength, resisting pull-out forces. Its threads engage with the nut, allowing an installer to apply the necessary torque to activate the anchor.
Material and Finish Types
Manufacturers produce these anchor bolts from high-strength steel to meet strict industry standards. Key specifications ensure reliability and performance.
- ASTM F3125: This is a unified standard for high-strength structural bolts. It replaces older specifications like A325 and A490.
- ASTM A354: This covers quenched and tempered alloy steel bolts and studs.
- ASTM A449: This specification applies to heat-treated steel bolts for general use.
Примечание: For corrosive environments, stainless steel bolting often follows specifications like ASTM A1082, which covers high-strength precipitation hardening and duplex stainless steels.
The finish on anchor bolts is critical for longevity. A coating protects the steel from corrosion. The type of finish determines its durability, often measured in salt spray tests.
| Material or Coating Type | Common Exposure Duration |
|---|---|
| Zinc plated steel | 48 to 96 hours |
| Powder coated metals | 250 to 500 hours |
| Anodized aluminum | 336 to 720 hours |
| Stainless steel | 500 to 1000 hours |
| Marine grade alloys | 1000+ hours |

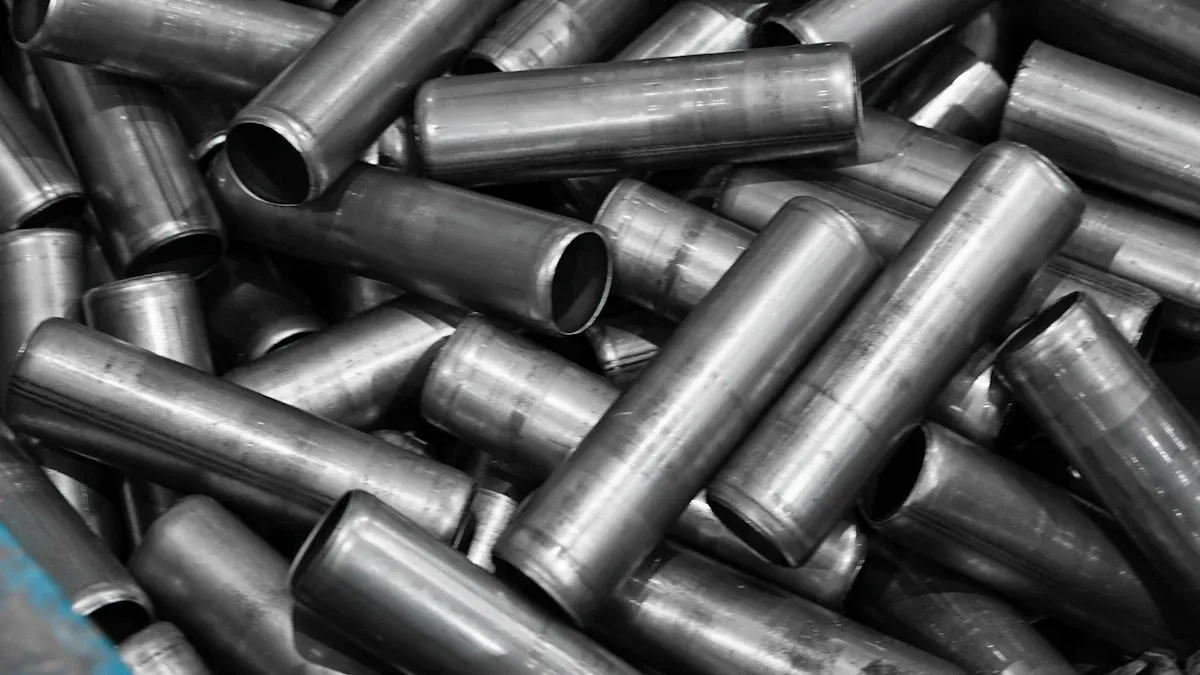
The Expansion Sleeve or Shield
The Part That Grips the Concrete
Стандарт DIN 933: объяснение expansion sleeve is a metal cylinder that sits around the bolt. This is the component that makes direct contact with the interior wall of the drilled hole in the concrete. Its primary function is to expand and generate immense friction. Materials for sleeves, such as ductile iron or steel, are chosen for their strength and ductility.
How It Expands
The sleeve itself does not expand on its own. It has splits or segments that allow it to be forced outward. As the bolt is tightened, the wedge at the bottom is pulled up into the sleeve. This action forces the sleeve’s segments to press firmly against the surrounding material, locking the fastener in place.
The Expansion Wedge or Cone
The Activating Mechanism
Стандарт DIN 933: объяснение expansion wedge, or cone, is the small but essential mechanism that initiates the anchoring process. It is a tapered piece of metal located at the bottom end of the bolt, inside the sleeve. Its shape is the key to the entire wedging action of expansion bolts.
Its Role in Forcing Expansion
When an installer tightens the nut, it pulls the threaded bolt upward. This movement draws the cone up into the expansion sleeve. The cone’s angled shape acts like a ramp, forcing the sleeve to expand outward. Studies often analyze specific angles, such as a 15° cone, to understand the relationship between the tightening force and the resulting expansion. This mechanical principle converts rotational torque into a powerful radial force, creating the secure grip that makes expansion bolts so effective.
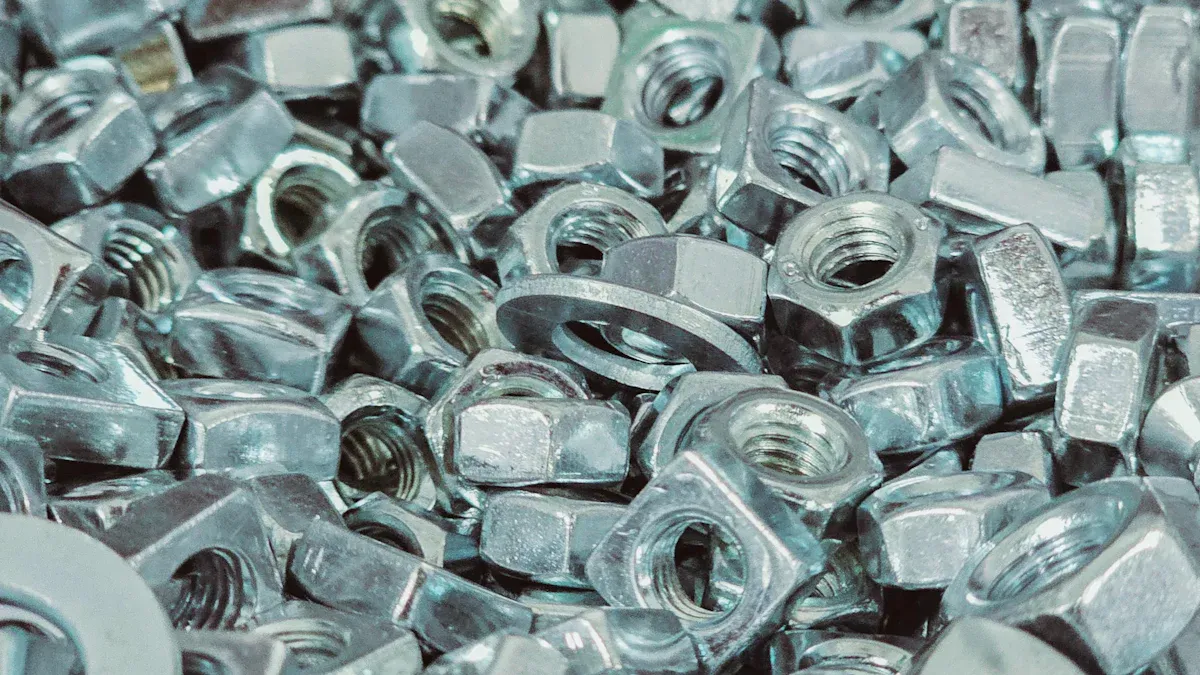
The Nut and Washer
The nut and washer are the final components an installer handles, but their roles are fundamental to the anchor’s success. They work together to properly set the expansion bolt and secure the fixture. The nut applies the critical setting force, while the washer protects the fixture and distributes the resulting load, ensuring a stable and durable connection. Without these two parts, the entire assembly would fail to perform its function correctly.
Applying the Tightening Force
The nut is the component that translates an installer’s effort into anchoring power. An installer uses a wrench to turn the nut, creating torque. This rotational force travels down the threads of the bolt, generating a powerful linear pulling force, or tension. This tension is what draws the bolt and its attached cone upward into the expansion sleeve. The result is the wedging action that locks the anchor into the concrete.
Manufacturers produce a wide variety of nuts, each designed for specific conditions and holding requirements. The choice of nut can impact the anchor’s long-term reliability, especially in applications involving vibration. Common industry standards, such as the German DIN specifications, outline numerous types:
- Гайки: DIN 934 Hex Nuts, DIN 985 Nylock Nuts, DIN 6923 Flange Nuts, and DIN 7967 Self Locking Nuts.
Using a self-locking nut, for example, helps prevent the connection from loosening over time due to machine vibration or thermal cycles.
Distributing the Load
The washer may seem like a simple, flat disc, but it performs a critical function: load distribution. When an installer tightens the nut, it exerts immense pressure on a very small area. The washer sits between the nut and the surface of the object being fastened (the fixture). It dramatically increases the contact area, spreading the clamping force evenly.
Professional Tip: Always use a washer with an expansion bolt. Skipping this step can cause the nut to dig into and damage the fixture, especially with softer materials like wood or aluminum. This damage can compromise the integrity of the connection.
This distribution prevents damage to the fixture and ensures a secure, stable hold. Like nuts, washers come in many forms to meet different engineering needs. A flat washer is standard, but other types offer unique benefits. Spring washers, for instance, provide tension to resist vibrational loosening. Taper washers are essential for creating a parallel bearing surface when fastening to structural steel shapes like I-beams.
A range of standard washers is available for various applications:
- Шайбы: DIN 125 Flat Washers, DIN 127 Spring Washers, DIN 434 Square Taper Washers, and DIN 25201 Double Fold Self-locking Washers.
Selecting the correct washer is just as important as choosing the right bolt for ensuring a safe and lasting installation.
The Core Mechanism: How Expansion Bolts Create a Powerful Grip
The holding power of expansion bolts comes from a simple yet powerful engineering principle: mechanical wedging. This process converts the rotational energy from tightening a nut into an immense outward force. This force locks the fastener into the concrete, creating a connection strong enough to support significant loads. Understanding this mechanism is key to appreciating why correct installation is so critical.
The Principle of Mechanical Wedging
Mechanical wedging relies on using an inclined plane (the cone) to redirect force. An installer applies an upward pulling force on the bolt. The cone at the bottom redirects this linear force into a radial, or outward, force. This outward pressure is what engages the anchor with the base material.
Drilling the Hole
The process begins with a precisely drilled hole. The hole’s diameter must match the anchor’s specifications perfectly. A hole that is too large will prevent the sleeve from making firm contact. A hole that is too small will not allow the anchor to be inserted. The integrity of the entire connection starts with this initial step.
Inserting the Anchor
An installer places the anchor assembly into the clean, properly sized hole. At this stage, the fastener is loose. The magic happens when the tightening process begins. The mechanical wedging action of expansion bolts applies significant radial force to the walls of the hole. This outward pressure can create stress in the base material.
This operating principle makes these anchor bolts ideal for solid, high-quality substrates. However, it also means they are less suitable for applications near an edge or in weaker materials where this stress could cause cracking.
Other types of anchor bolts, like chemical or adhesive anchors, operate differently. They use a bonding agent and do not generate expansion stress, making them a better choice for weaker or cracked materials.
| Характеристика | Expansion Anchor Bolts | Chemical Anchor Bolts |
|---|---|---|
| Load Transfer Mechanism | Mechanical interlock and friction | Chemical bonding between resin and substrate |
| Stress on Base Material | High radial force, can cause cracks near edges | No radial force, suitable for use near edges |
| Base Material Suitability | High-quality, solid concrete or brick | Cracked, weak, or porous materials |
The Step-by-Step Action of Tightening
Tightening the nut initiates a chain reaction. Each step builds on the last to create the final, secure hold. The entire sequence transforms a loose-fitting pin into a powerfully locked anchor.
Pulling the Cone into the Sleeve
First, an installer turns the nut with a wrench. This rotation creates tension along the bolt’s threads. This tension pulls the entire bolt stud upward. Since the cone is attached to the bottom of the stud, it is also drawn up into the surrounding expansion sleeve.
Forcing the Sleeve Against the Concrete
Next, the cone’s tapered shape acts as a wedge. As it moves further into the cylindrical sleeve, it forces the sleeve’s segmented walls to expand outward. The sleeve presses against the interior surface of the drilled hole with tremendous force. This action fills every microscopic imperfection in the hole, creating a tight, custom fit.
Creating a Friction-Based Hold
Finally, this outward push generates the anchor’s holding power. The physics behind this grip is based on two key factors:
- Normal Force (N): This is the immense outward force the expanded sleeve exerts on the walls of the hole. The torque applied to the nut directly creates this force.
- Friction Coefficient (μ): This value represents the roughness between the metal sleeve and the concrete.
The anchor’s ultimate friction capacity is the product of these two factors (μN). A higher normal force or a rougher surface results in a stronger grip. The relationship between the installer’s torque and the resulting force is complex, but it confirms that proper tightening is essential for generating the required holding power.
Common Types of Expansion Bolts and Their Uses
Not all expansion bolts are created equal. Different projects require different anchoring solutions. Understanding the common types of expansion bolts helps professionals select the right fastener for the job, ensuring both safety and performance. Each design offers unique benefits for specific load requirements and base materials.
Клиновые анкеры
For Heavy-Duty Loads in Solid Concrete
Клиновые анкеры are the workhorses of heavy-duty fastening. They are designed exclusively for use in solid concrete and provide exceptional tensile (pull-out) and shear (side) load capacities. The anchor’s strength is directly related to its diameter and embedment depth. Deeper embedment generally provides a stronger hold. The table below shows typical allowable load capacities for wedge anchors installed in 4000 PSI concrete.
| Nominal Anchor Diameter (in.) | Минимальная глубина заделки (дюймы) | Allowable Tension Load Capacity (lbs.) | Allowable Shear Load Capacity (lbs.) |
|---|---|---|---|
| 1/4″ | 1-1/8″ | 342 | 344 |
| 3/8″ | 1-5/8″ | 686 | 911 |
| 1/2″ | 2-1/4″ | 1,103 | 1,614 |
| 5/8″ | 2-3/4″ | 1,985 | 2,761 |
| 3/4″ | 3-3/8″ | 2,571 | 3,716 |
| 1″ | 4-1/2″ | 4,153 | 7,107 |

Области применения
The high strength of these anchor bolts makes them ideal for securing structural components and heavy equipment. Common uses include:
- Anchoring structural steel columns and beams
- Securing heavy machinery и car hoists to floors
- Fastening heavy pipe supports and cantilevers
- Installing handrails and safety barriers
Распорные анкеры
For Medium-Duty Loads in Concrete and Masonry
Гильзовые анкеры are versatile fasteners suitable for a wider range of base materials, including solid concrete, brick, and concrete block. Their design features a full-length sleeve that expands along its entire body, providing a reliable grip in both solid and hollow materials. While not as strong as wedge anchors, they offer substantial holding power for medium-duty tasks. These anchor bolts are a popular choice for general-purpose fastening.

Области применения
Sleeve anchors are go-to expansion bolts for many residential and commercial projects. Their adaptability makes them useful for:
- Attaching window frames and door frames
- Securing shelving and cabinets to walls
- Fastening electrical junction boxes and conduit straps
- Mounting lightweight machinery or fixtures
Drop-In Anchors
For Creating Female Threads in Concrete
Drop-in anchors are unique among expansion bolts. They are designed to sit flush with the concrete surface and provide a female threaded opening. An installer uses a special setting tool to drive an internal plug downward, which expands the anchor body. This creates a permanent, threaded socket in the base material.
Стандарт DIN 933: объяснение flush-mount installation is a key advantage. It eliminates trip hazards and allows equipment to be placed directly over the anchor point without any obstruction.
Области применения
These anchors are the preferred choice when a removable bolt or threaded rod is needed. They are frequently used for overhead applications.
- Suspending threaded rods for HVAC ductwork or cable trays
- Hanging fire sprinkler pipes from ceilings
- Creating anchor points where a fixture may need to be removed later
Strike Anchors (Hit Anchors)
Strike anchors, often called hit anchors, are a type of expansion bolt designed for speed and simplicity. Their unique design allows for rapid installation with just the strike of a hammer, making them a favorite for repetitive, light-duty fastening tasks. Unlike other expansion bolts that require a nut to be torqued, a strike anchor sets through impact. This makes it a permanent, tamper-resistant fastener once installed. The anchor consists of a cylindrical body and a pre-inserted nail-like pin that acts as the expansion wedge.
For Quick, Light-Duty Fastening
The primary advantage of a strike anchor is its installation speed. An installer simply drills a hole, inserts the anchor, and drives the internal pin flush with the anchor head using a hammer. This action forces the anchor body to expand, locking it securely into the concrete. The entire process takes only a few seconds per anchor. This efficiency makes them highly cost-effective for large-scale projects with many fastening points.
However, this speed comes with a trade-off in holding power. Strike anchors are intended for light-duty static loads only. They do not offer the high tensile and shear strength of wedge or sleeve anchors. Their simple, impact-based setting mechanism provides a secure hold for lightweight fixtures but is not suitable for supporting heavy machinery or structural elements.
Примечание: Once an installer sets a strike anchor, it is considered a permanent fixture. The head of the pin sits flush, leaving no nut to unscrew. This makes the anchor tamper-resistant but also difficult to remove without damaging the surrounding concrete.
The table below compares strike anchors to other common expansion bolts.
| Характеристика | Strike Anchor | Клин-анкер | Рукавный анкер |
|---|---|---|---|
| Installation Speed | ⚡️ Very Fast | Умеренная | Умеренная |
| Грузоподъемность | Легкая категория | Повышенная прочность | Средняя категория |
| Setting Method | Hammer Strike | Динамометрический ключ | Динамометрический ключ |
| Removability | No (Permanent) | Да | Да |
| Наилучший случай применения | Repetitive Fastening | Structural Loads | General Purpose |
Области применения
The quick and easy installation of strike anchors makes them ideal for projects where efficiency is paramount. They are most effective in solid concrete or stone. Installers commonly use them for the following tasks:
- Securing electrical conduit straps and junction boxes.
- Fastening wood furring strips or hat channels to concrete walls.
- Attaching lightweight signage to masonry surfaces.
- Anchoring brick ties and masonry flashing.
- Mounting brackets for light-duty shelving.
How to Choose the Right Expansion Bolt for Your Project
Selecting the correct fastener is critical for the safety and longevity of construction projects. An installer must evaluate three key factors: the load requirements, the base material, and the environmental conditions. A careful assessment of these elements ensures the chosen anchor performs reliably.
Assessing Load Requirements
The forces acting on a fastener determine the type and size of the anchor needed. Loads are categorized by their direction and nature.
Tensile Load (Pull-Out Force)
Tensile load refers to the force that tries to pull an anchor straight out of its hole. This is a primary consideration for overhead applications, such as hanging pipes or fixtures from a ceiling. Manufacturers provide specific tensile load ratings for their anchor bolts.
Shear Load (Side Force)
Shear load is a force applied perpendicular to the anchor, trying to slice it sideways. An example is a bracket mounted to a wall supporting a heavy shelf. Many connections experience both tensile and shear forces simultaneously. Engineers calculate this combined loading using an interaction equation, which integrates stresses from different directions into a single value to ensure the bolt’s integrity.
Technical Insight: Professionals can use specialized software to check combined loads against design standards like AISC 360-16 or EN 1993-1-8. These tools resolve all forces acting on a bolt group to verify its capacity for complex applications.
Статические и динамические нагрузки
It is crucial to distinguish between static and dynamic forces.
- Static loads are constant and unchanging, like the weight of a permanently mounted cabinet. Most expansion bolts excel in these situations.
- Динамические нагрузки involve vibration or fluctuating forces, such as those from heavy machinery or seismic activity. While some heavy-duty expansion bolts can handle dynamic loads, chemical anchors often provide superior performance and resistance to vibration.
Evaluating the Base Material
The material an anchor is installed into directly affects its performance. Expansion-style anchor bolts are not a one-size-fits-all solution.
Solid Concrete vs. Block or Brick
Expansion bolts work by exerting immense outward pressure. This makes them ideal for solid, dense concrete. In softer or hollow base materials like brick or cinder block, this pressure can cause cracking and failure. For these substrates, a Анкер-гильза, which distributes force over a larger area, is often a more suitable choice.
The Importance of Concrete Strength (PSI)
The compressive strength of concrete, measured in pounds per square inch (PSI), is a critical factor. An anchor’s holding power is directly related to the PSI of the base material. Manufacturers’ load charts are based on specific concrete strengths, such as 2,000 PSI or 4,000 PSI. Installing an anchor in weaker concrete will significantly reduce its load capacity.
Учет условий окружающей среды
The installation environment dictates the necessary material and coating for an anchor to resist corrosion.
Использование внутри и снаружи помещений
Indoor, dry environments are far less corrosive than outdoor settings. Outdoor installations expose fasteners to moisture, rain, and temperature fluctuations, which accelerate rust and degradation.
Zinc-Plated, Galvanized, and Stainless Steel
The anchor’s finish provides a barrier against corrosion.
- Оцинкованные (гальваническое покрытие): Best for dry, indoor applications with no exposure to moisture.
- Hot-Dip Galvanized: Features a thick, protective zinc coating suitable for outdoor use in most climates.
- Нержавеющая сталь: Offers the highest level of corrosion resistance, making it essential for marine environments, coastal areas, or applications involving corrosive chemicals.
How to Install Expansion Bolts in Concrete: A Step-by-Step Guide

A successful connection depends entirely on the correct installation process. The holding power specified by a manufacturer is only achievable when an installer follows the precise instructions for the fastener. This step-by-step installation guide outlines the critical actions required to create a safe and reliable anchor point.
Step 1: Select the Correct Tools and Anchor
The foundation of a proper installation begins with having the right equipment. An installer must match the tools and the fastener to the project’s specific requirements. Using incorrect tools can compromise the integrity of the entire connection.
Using a Hammer Drill and Masonry Bit
Drilling into concrete requires a specialized tool. An installer must use a rotary hammer or hammer drill equipped with a carbide-tipped masonry bit. A standard drill lacks the impact action needed to efficiently penetrate hard materials. The hammering motion pulverizes the concrete while the rotation clears the debris, creating a clean and uniform hole.
Matching the Bit to the Anchor Diameter
The drill bit diameter must exactly match the specified diameter for the anchor. Manufacturers stamp the required bit size on the anchor itself or include it in the product documentation. Using a bit that is too small prevents the anchor from being inserted. A bit that is too large creates a gap between the sleeve and the hole wall, severely reducing the anchor’s holding power.
Step 2: Drill the Hole to the Proper Depth and Diameter
Precision is paramount when drilling the hole for expansion bolts. The hole’s dimensions directly influence the anchor’s ability to expand correctly and achieve its rated load capacity. An improperly sized hole is one of the most common causes of anchor failure.
Why Hole Dimensions Are Critical
The mechanical wedging action of these anchor bolts requires a snug fit. The expansion sleeve must press firmly against the walls of the hole to generate friction.
- The industry standard tolerance for hole diameter when drilling for these anchor bolts is typically very tight, often within ±0.5mm.
A hole that is even slightly oversized can prevent the anchor from setting correctly. This results in a loose connection that cannot support the intended load. The anchor may spin in the hole during tightening or pull out under a much lower force than expected.
Using a Depth Gauge for Accuracy
An installer must drill the hole to the correct depth to ensure proper embedment. Most hammer drills come with an adjustable depth gauge or stop. An installer should set this gauge to match the required hole depth for the anchor. This prevents drilling a hole that is too shallow, which would leave the anchor protruding, or too deep, which could cause the anchor to be set incorrectly.
Step 3: Clean the Hole Thoroughly
Drilling creates a significant amount of dust and debris. Removing this material from the hole is a non-negotiable step in the installation. A clean hole is essential for achieving maximum holding power.
The “Blow-Brush-Blow” Method
The most effective installation method for cleaning a hole is the “Blow-Brush-Blow” technique. This simple but critical procedure ensures all loose particles are removed.
- Blow: Use a can of compressed air or a hand pump to blow all initial dust out of the hole.
- Brush: Insert a stiff wire brush, sized to the hole’s diameter, and scrub the interior walls to dislodge any remaining fine particles.
- Blow: Blow the hole out a second time to remove the dust loosened by the brush.
Why Debris Reduces Holding Power
Concrete dust acts like a layer of tiny ball bearings between the expansion sleeve and the wall of the hole. This debris prevents the sleeve from making direct, solid contact with the base material. The presence of dust dramatically reduces the coefficient of friction, which is the very principle that gives the anchor its grip. An unclean hole can reduce an anchor’s load capacity by over 50%, creating a significant safety hazard.
Step 4: Insert and Set the Anchor
With a clean, properly dimensioned hole, the installer can proceed with the physical placement of the anchor. This part of the installation process requires a careful touch to position the anchor correctly before applying the final tightening force.
Tapping the Anchor into Place
An installer inserts the complete anchor assembly—bolt, sleeve, washer, and nut—into the hole. The nut should be threaded onto the bolt just enough to be flush with the top of the bolt. This protects the threads from damage during insertion. The installer then gently taps the head of the nut with a hammer until the washer rests firmly against the surface of the fixture.
Внимание: The installer should only use light taps. Driving the anchor with excessive force can damage the threads or the expansion mechanism at the bottom, compromising the entire connection. The anchor should slide into the hole with minimal resistance.
Ensuring Correct Embedment Depth
Correct embedment depth is the distance the anchor is embedded into the concrete. This dimension is critical because it determines the anchor’s pull-out strength. Deeper embedment engages a larger cone of concrete, providing greater resistance to tensile loads. The manufacturer’s instructions specify the minimum required embedment for achieving the published load values.
For certain anchor bolts, particularly those approved for multiple embedment depths, visual verification is possible after installation. ICC-ES acceptance criteria require manufacturers to stamp a length identification letter code on the end of these anchors. A qualified inspector can use this code to confirm the embedment depth, ensuring the installation meets engineering specifications.
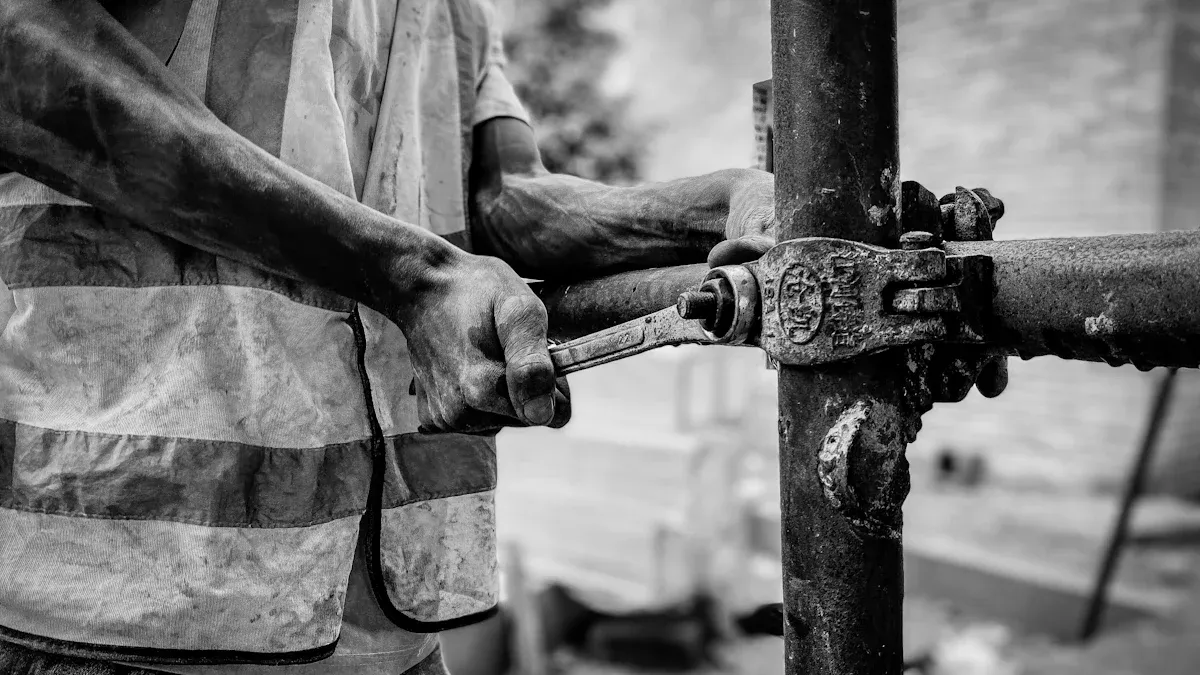
Step 5: Tighten the Nut to the Specified Torque
The final step is the most critical for activating the anchor’s holding power. Tightening the nut creates the mechanical wedging action that locks the anchor into the concrete. This step must be performed with precision to ensure a secure and reliable connection.
The Importance of a Torque Wrench
An installer must use a calibrated torque wrench to tighten the nut. A torque wrench is a specialized tool that allows the user to apply a precise amount of rotational force, or torque. Manufacturers specify the exact torque value required for each size and type of their anchor bolts. Applying this specific torque ensures the anchor is set correctly, generating the optimal expansion force without damaging the bolt or the concrete. Using a standard wrench relies on guesswork and is not an acceptable installation method for structural applications.
The Risks of Over-Tightening or Under-Tightening
Deviating from the specified torque value can lead to catastrophic failure. Both under-tightening and over-tightening create unsafe conditions and undermine the integrity of the fastener.
Under-tightening fails to generate enough expansion force. This results in low preload, leaving the connection vulnerable.
- The anchor will have a significantly reduced load capacity and may pull out under a load far below its rating.
- Joints become highly susceptible to loosening from vibrations or external forces, leading to an unstable connection.
- In piping or hydraulic systems, insufficient torque can cause gasket failure, resulting in dangerous leaks.
Over-tightening applies excessive stress to every part of the assembly and the surrounding concrete. This can cause immediate or long-term damage.
- The bolt can be stretched beyond its elastic limit, causing permanent deformation and a drastic reduction in its load-bearing capacity.
- Excessive expansion force can crack or fracture the concrete base material, especially near edges.
- Threads on the bolt or nut can be stripped, or the bolt itself can shear off during the installation.
- The extreme stress makes the metal more susceptible to fatigue failure and stress corrosion cracking over time.
Comparing Expansion Bolts to Other Anchor Bolts
While expansion bolts are a powerful solution, they are not the only option for fastening to concrete. Professionals choose between different types of anchor bolts based on the specific demands of the job. Understanding the key differences between expansion anchors, concrete screws, and adhesive anchors is essential for successful construction projects.
Expansion Bolts vs. Concrete Screws (e.g., Tapcon)
Concrete screws offer a distinct set of advantages and disadvantages when compared to traditional expansion-style fasteners.
Installation Speed and Reusability
Concrete screws typically provide a faster installation process. An installer simply drills a pilot hole and drives the screw directly into the base material. This one-step fastening saves time. A key benefit is their removability. Unlike most expansion bolts, an installer can remove a concrete screw, making them ideal for temporary applications like bracing.
Holding Power Differences
Concrete screws create their grip by cutting threads into the concrete, while expansion anchors use friction. In certain conditions, screw-style anchor bolts can provide superior strength. For instance, a 1/2-inch diameter screw anchor can show a 20% increase in tensile capacity in uncracked concrete compared to a similar expansion anchor. The chart below illustrates the typical tension and shear capacities for various fastener sizes and grades.

Expansion Bolts vs. Adhesive (Epoxy) Anchors
Adhesive anchors, also known as chemical anchors, operate on a completely different principle, offering unique performance characteristics.
Load Capacity and Cure Time
High-strength epoxy anchors generally provide the highest possible load capacities among all post-installed anchors. They create a powerful bond between the fastener and the base material.
Trade-Off: The primary drawback is cure time. ⏱️ An installer must wait for the epoxy to harden before applying any load, a delay that can range from hours to a day depending on the product and temperature. Expansion anchors, in contrast, can be loaded immediately after installation.
Performance in Cracked Concrete
Adhesive anchors excel in both cracked and uncracked concrete. The epoxy fills voids and bonds with the substrate without generating any outward pressure. This makes them the superior choice for applications near an edge or in questionable base materials. Conversely, heavy-duty expansion bolts generate high stress and are generally not specified for use in cracked concrete. For critical applications involving dynamic or blast loads, engineers almost always specify adhesive anchors due to their superior performance under stress.
Common Installation Mistakes and Safety Precautions
The reliability of expansion bolts in construction projects depends heavily on correct installation. Most anchor failures do not stem from faulty products but from installer error. Adhering to best practices and understanding safety principles are essential for a secure connection.
Avoiding Common Errors
Many installation errors are preventable with proper training and attention to detail. Incident reports frequently cite a handful of recurring mistakes that compromise the integrity of anchor bolts.
- Failing to follow the manufacturer’s specific installation instructions.
- Using fasteners that are not substantial enough for the load, leading to over-tightening.
- Not pre-drilling holes correctly, which can elongate the opening and weaken the connection.
- Lacking sufficient quality control or competent supervision on the job site.
Incorrect Hole Size
The diameter of the drilled hole must exactly match the anchor’s requirement. A hole that is too large prevents the expansion sleeve from making firm contact with the concrete. This results in a loose fit and drastically reduced holding power. A hole that is too small will prevent the anchor from being inserted without damaging it.
Inadequate Hole Cleaning
Concrete dust left inside a drilled hole acts as a lubricant. It prevents the anchor’s sleeve from generating the necessary friction against the concrete walls. An installer must clean the hole thoroughly, typically with a “blow-brush-blow” method, to ensure a solid grip. An unclean hole can cut an anchor’s capacity by more than half.
Over-Torquing the Nut
An installer must use a calibrated torque wrench to tighten the nut to the manufacturer’s specification. Applying too much force can over-stress the fastener, potentially shearing the bolt head or stripping the threads. Excessive torque also creates extreme outward pressure, which can crack the concrete base material.
Critical Safety Considerations
Beyond avoiding simple mistakes, installers must understand the physics behind how these fasteners interact with concrete. Following established safety protocols protects both the installer and the integrity of the structure.
Respecting Edge and Spacing Distances
Anchor bolts require a minimum distance from any concrete edge and from each other. Placing an anchor too close to an edge can cause the concrete to break out. Industry standards like ACI 355.2 outline test procedures to determine the minimum edge distance (cmin) and minimum spacing (smin) to prevent this type of splitting failure during installation.
Wearing Personal Protective Equipment (PPE)
Installers must always wear appropriate Personal Protective Equipment (PPE).
Safety First: This includes safety glasses to protect from flying debris, gloves to protect hands, and hearing protection when using a loud hammer drill. A dust mask is also recommended to avoid inhaling harmful silica dust.
Understanding the Concrete “Cone of Failure”
When a fastener is pulled out under extreme tensile load, it does not simply slide out. It pulls a cone-shaped chunk of concrete with it. The size of this “cone of failure” is related to the anchor’s embedment depth. This concept visually explains why edge and spacing distances are critical. If the cones of two adjacent anchors overlap, their combined holding power is significantly reduced.
Expansion bolts are vital fasteners that create a powerful, friction-based grip inside concrete through mechanical wedging. An installer’s success with these anchor bolts depends on choosing the right type for the load and base material. Correct installation is absolutely critical for ensuring a safe and reliable connection.
Key Takeaway: A secure outcome requires precise drilling, thorough hole cleaning, and proper torquing. Neglecting any step compromises the fastener’s integrity and creates a significant safety risk.
Частые вопросы
Can you reuse expansion bolts?
Most expansion bolts are designed for single-use installation. Removing an anchor damages its expansion mechanism and the surrounding concrete. An installer should always use a new fastener for a new application to ensure safety and full holding power.
What happens if the hole is too big?
A hole that is too large prevents the anchor’s sleeve from making firm contact with the concrete. The fastener will not expand correctly, resulting in a loose fit. This dramatically reduces its load capacity and can lead to failure.
Почему так важно очищать отверстие?
Concrete dust inside the hole acts as a lubricant. It prevents the expansion sleeve from generating the necessary friction. An unclean hole can reduce an anchor’s holding power by more than 50%, creating a significant safety hazard.
Can you use expansion bolts in brick?
Wedge anchors are not suitable for brick. However, sleeve-style anchor bolts are designed for this purpose. Their full-length sleeve distributes the expansion force over a larger area, reducing the risk of cracking the softer base material.
How close to an edge can you install an anchor?
Installers must respect minimum edge distances specified by the manufacturer. Placing an anchor too close to an edge can cause the concrete to break out during tightening. This is known as a “cone of failure” and compromises the connection.
Professional Tip: As a general rule, the minimum edge distance should be at least 1.5 times the anchor’s embedment depth, but always follow the manufacturer’s specific guidelines.
Do you need a torque wrench for installation?
Yes, an installer must use a calibrated torque wrench. It ensures the correct amount of tightening force is applied. This action properly sets the anchor and achieves the specified load capacity without over-stressing the bolt or the concrete.